Status
Not open for further replies.
Mr.LaneP, You're welcome. Ive actually made really consistent loads in both speed and accuracy by weighing my powder before making them into paper cartridges. I used to use the standard volume measuring spouts but i got inconsistent volumes and i noticed even the slightest bit makes a difference. And manufacturers vary too ... For example, two different manufacturers may have 20 grain spouts but they usually threw different amounts. Once i went to weighing my loads and finding the best weight of powder for each bullet i used...i stopped having wide power/speed deviations and my accuracy improved. Then i started making my paper carts straight walled and that helped make sure i always applied the same amount of seating pressure, depth, etc.
 
Thanks again mr.beczl! Im sure plenty of folks here are grateful for these.
You are welcome. Still, other labels and inscriptions creation are in progress, I hope they will be useful to someone.

Some example.
A cap usage instruction/comparison (original size 176x112mm / 6,93x4,4")
And a Colt Navy Direction for loading and cleaning (original size 190x162mm / 7,48x6,37")

Direction for caps.jpg Direction for cleaning.jpg

I attached higher resolution images as the forum downsized the original attached pictures.
 

Attachments

  • Direction for caps.zip
    506.4 KB · Views: 21
  • Direction for cleaning.zip
    1.2 MB · Views: 30
Last edited:
You are welcome. Still, other labels and inscriptions creation are in progress, I hope they will be useful to someone.

Some example.
A cap usage instruction/comparison (original size 176x112mm / 6,93x4,4")
And a Colt Navy Direction for loading and cleaning (original size 190x162mm / 7,48x6,37")

View attachment 872891 View attachment 872892

I would also like to extend sincere appreciation for the historical info you posted, particularly the directions for loading and cleaning. That is gold all by itself. I've never seen original published loading and cleaning directions before and it is fascinating to read. Thanks again.
 
I would also like to extend sincere appreciation for the historical info you posted, particularly the directions for loading and cleaning. That is gold all by itself. I've never seen original published loading and cleaning directions before and it is fascinating to read. Thanks again.
I'm glad you like it. This information is coming from the old "Dixie Gunworks" catalog, and the "Guns" magazine, whiches unfortunately not available online. Also in Hungary, even these weapons are not so popular than in the USA, several local auctions held. (for example http://fegyvervadaszok.com/aukcio.php ) And on these, you can catch a lot of interesting and not widely available information.
 
A Trade label from 1856. (original size 190x124mm 7,5x5")

Trade label.jpg
 

Attachments

  • Trade label.zip
    1.4 MB · Views: 14
Last edited:
I make my carts with no taper. Theres no tearing of the paper ...if find that with a highly tapered cartridge that you dont ger an even burn of the paper in most cases due to the paper getting crumbled up inside the chamberm. I use one layer of thin cigarette paper (RAW brand since they are very thin but strong and are brownish tan colored, but other brands work fine) or curling paper, or brown coffee filter paper. For glue i use only nitrocellulose glue (DUCO cement glue brand) as it burns up completely where other glues will cause the glued area not to burn sometimes especially at the nipple end of the cartridge. I also use a single layer of thin rice paper (used for stuffing gift bags etc) at the nipple end of the cartridge so that i know which end to put in the cylinder first due to i also put a lupe disc in my paper carts. There usually is no bullet on them and i choose the bullet or ball. Heres a pic.. View attachment 872059 View attachment 872060
Outlaw Kid, would you mind explaining how you attach the rice paper at the bottom of the cartridge? I like your idea of a straight walled cartridge but could not tell from the picture how you attached the rice paper. It was very cleanly done. Since I'm experimenting right now, your help would be appreciated.
 
Definately. Ill post a complete write up tomorrow with pics on how i make them if that works for you?
 
Definately. Ill post a complete write up tomorrow with pics on how i make them if that works for you?
Thank You, of course at your convenience. I was surprised at how clean and sharp your straight walled cartridges were. Were those in the picture 44's or 36's?
 
Last edited:
I'm glad you like it. This information is coming from the old "Dixie Gunworks" catalog, and the "Guns" magazine, whiches unfortunately not available online. Also in Hungary, even these weapons are not so popular than in the USA, several local auctions held. (for example http://fegyvervadaszok.com/aukcio.php ) And on these, you can catch a lot of interesting and not widely available information.
Also many thanks,beczl for everything you posted. By the way, where in Hungary are you? I've been able to track down my ancestors to the county of Bihar. Don't know yet what mischief they may have been up to there!:)
 
Also many thanks,beczl for everything you posted. By the way, where in Hungary are you? I've been able to track down my ancestors to the county of Bihar. Don't know yet what mischief they may have been up to there!:)
I'm from the opposite part of Hungary, Veszprem city and county. :)
 
Part 2. Higher resolution files are attached as well.

Cap_R Walker_Colored.jpg Cap_UMC_Green_Colored.jpg Cap_W E_White_Colored.jpg Wads_Colt_Colored.jpg
 

Attachments

  • Cap tin - Colored 1.zip
    1.4 MB · Views: 11
  • Cap tin - Colored 2.zip
    1.7 MB · Views: 9
  • Cap tin - Colored 3.zip
    1.8 MB · Views: 8
  • Cap tin - Colored 4.zip
    1.6 MB · Views: 13
  • Cap tin - Colored 5.zip
    686.3 KB · Views: 9
Last edited:
Mr. Beczl...thank you! The colored cap labels are amazing! Were very appreciative...this should help a lot of us with our projects. Im working on my paper cartridge pics/write up...should be done later today. I promissed it a couple days back...but got busy with work.
 
Mr. Beczl...thank you! The colored cap labels are amazing! Were very appreciative...this should help a lot of us with our projects. Im working on my paper cartridge pics/write up...should be done later today. I promissed it a couple days back...but got busy with work.
Thanks, hope it helps a lot of folks to create their own prop.

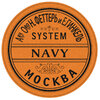
A few new cap tin label. :)

Cap_Hicks_Green_2.jpg Cap_Hicks_Green_3.jpg Cap_Kynoch_Vanilla.jpg Cap_S&B.jpg
Cap_Hicks_Green_2_Colored.jpg Cap_Hicks_Green_3_Colored.jpg Cap_Kynoch_Vanilla_Colored.jpg Cap_S&B_Colored.jpg
 

Attachments

  • Cap tin - Colored 6.zip
    1.4 MB · Views: 10
  • Cap tin - Colored 7.zip
    805.4 KB · Views: 5
Mr.navy six 2 and anyone else interested...as promised heres how i do it.
Materials you will need are:

1) paper to make cartridge (your choice of rolling paper, hair curling paper, coffee filter)

2) wax paper (to place on top and bottom of lube disc so as not to contaminate powder or cardboard disc that seals the cartridge)

3) rice paper used for placing in gift baskets (i use red)

4) mandrel or gauge pin (these have to be a specific size depending on caliber of gun. I use a .360 and .362 gauge pin for my .36 navies)

5) Deco cement (nitrocellulose glue) because it is flamable and leaves no residue or paper behind) but you can use a glue stick if you like i just prefer Deco cement

6) thin lube discs of your choice

7) cardboard or thick paper card stock to make cardboard discs (i use cereal or fruit roll up cardboard boxes)

8) 3/8ths inch paper hole puncher (to make rice paper, wax paper, and cardboard/card stock discs) but you will need to use a larger punch to make .44 cartridges

9) 3/8ths punch to punch out lube discs, but again you will need a larger punch if shooting .44, the 3/8ths is for .36 navy cal

First you need to choose your paper for your cartridge body. I use RAW brand rolling papers primarily, but have used hair curling papers, Zig Zag rolling papers, and thicker rolling papers such as Bugler and Tops. Heres the difference in color and thickness with a finished cartridge from each type of paper..
20191126_132312.jpg
Next you have to size them by cutting them in half and trimming on side so that it wraps around the mandrel tool without too much overlap. The goal here is to not have layers of paper if possible, layers of paper wont always burn entirely

20191126_133111.jpg
20191126_133245.jpg
I use pin gauges since they are perfectly straight and can be had in any size needed down to a thousandths of an inch. I use .360 and .362 and they make cartridges that slide in perfectly and snugly into my chambers yey do it with ease.
20191126_132739.jpg

Next you make the paper cartridge by wrapping the paper around the mandrel. Remember, Less overlapped paper is the goal as it ensures even complete burn
20191126_133318.jpg
Then once its wrapped then scoot the paper cartridge up so u can fold over some paper over the edge of the mandrel.
20191126_133447.jpg
Fold the paper evenly over the edge of the mandrel
20191126_133531.jpg
Next, place glue on the paper you folded over and place a rice paper disc on it. This is the end that your percussion cap bursts through
20191126_134311.jpg
20191126_134346.jpg
Heres what it looks like on the inside
20191126_134419.jpg
 
These are what your tubes will look like
20191126_134525.jpg
20191126_140258.jpg
After you place your powder in the tubes you will top it off with a wax paper disc, then a lube disc, then another wax paper disc, then a carsboard disc. This exact order
20191126_140106.jpg
Then press it all down with a dowel using a bit of compression. It will make tight and sturdy cartridges. Here are some completed cartridges in 17 grain, thse are used with round ball. Showing bottom, side, and top view
20191126_134913.jpg
These are some other finished examples. 20 grain by weight..see how well they fit in the chambers and how easily they load?
20191126_135426.jpg
20191126_135227.jpg 3 carts made from RAW papers and 3 carts made from hair rolling paper
20191126_135338.jpg
20191126_135407.jpg
Heres the card board discs, wax paper discs, rice paper discs and the paper punch i use to make them
20191126_134121.jpg
Heres the rice paper i use to make my rice paper discs that i use to seal the powder end of the cartridge
20191126_133555.jpg
 
Outlaw Kid. that was an outstanding visual/narrative explanation! I have never seen the paper cartridges made in that manner and I have been researching this for awhile now. Everyone else had made them with a tapered mandrel and that is the method I've used up to this point. I was intrigued by your explanation of how the straight walled cartridges leave little to no residue and will be eager to reproduce them using your procedure. Only thing I lack is a set of pin gauges which I have been meaning to acquire and I see how they make a big difference.
Thank you sincerely for the time and effort required to put this together!
 
Mr. LaneP and Mr. Navy Six 2 i thank you for the kind words. I forgot to mention that instead of gluing the cartidge shut at the cardboard card you can instead top it off with a conical of your choosing. Also remember that the glue used makes a huge difference on the performance of the cartridge. I use Deco cement glue , i especially use it to glue the rice paper disc to the cartidge as it helps the paper be completely consumed. Its also an important ingredient i use to make my homemade percussion caps.
 
And the higher resolution images which I can not able attach to the previous post due to the max file limit.
 

Attachments

  • Cap tin - Colored 10.zip
    1.4 MB · Views: 8
Mr.Beczl, may i ask how you came across this vast collection of labels? These are a gold mine...did it take long to acquire all of these? Im actually thinking about making some cap tins with some of your labels. Thanks again!
 
Status
Not open for further replies.
Back
Top