Lee Pro 1000 Solutions < No Bashing >

Status
Not open for further replies.

LiveLife

Member
Joined
Jan 10, 2010
Messages
32,876
Location
Northwest Coast
This informational exchange thread is for those that already reload or DECIDED TO RELOAD on the Lee Pro 1000 progressive press. It is similar to the sticky "What clever little things have you 'invented or discovered' that you can share?" thread but specific to the Pro 1000 (http://www.thehighroad.org/showthread.php?t=218188).

Keeping the posts in the following format will help those looking for solutions to their Pro 1000 problems. Of course, feel free to post any "clever little things" you have done to better your reloading experience on your Pro 1000.
Problem:
XXXXXXXXXXXX

Solution:
XXXXXXXXXXXX

If you are new to reloading, I recommend you first learn the basic reloading safety practices and principles. Many THR members will suggest you start on a single stage press - please check out the numerous THR single stage/reloading basics threads by using the search feature under the Handloading and Reloading category.

If you are looking to bash, rip or attack the Pro 1000 press or make comparisons to other progressive presses, please respect the THR intent/spirit and withhold your negative comments (perhaps you may want to start a similar thread for your make/model of reloading press.


Now, let's network and help out fellow Pro 1000 users! :D
 
Here are some reference pictures and links (I will update as I find better links):

Factory parts page: http://www.leeprecision.com/html/catalog/lp1000.html

Factory Pro 1000 Instructions: http://www.leeprecision.com/cgi-data/instruct/TR2441.pdf''

Tutorial for setting up Pro 1000: http://www.xdtalk.com/forums/ammo-can/56881-lee-pro-1000-set-up-tutorial-sticky.html

Other links:
http://newsgroups.derkeiler.com/Archive/Rec/rec.guns/2006-05/msg02199.html

attachment.php
 
Last edited:
Problem:
Primer feed arm (slider) runs dry of primers even though primer tray has primers causing primer jam/misfeed.

Solution:
Make sure the inserted wire on the side of the primer feed arm makes contact with the grooves on the frame tube to keep the primer tray shaking as the shell plate carrier goes up and down - this will keep the primer feed arm filled with primers.

You can make the adjustment by loosening the hex bolt on the right side of the shell plate carrier and rotating the carrier clockwise until the wire makes contact with the frame tube. Tighten the hex bolt back and actuate the ram lever up and down to check for proper "clicking of the wire and shaking of the primer tray".
attachment.php
 
Last edited:
where the primer tray opens up for the primers to flow onto the chute I cut it so that it's not a 90 and more like a 45 if that makes sence? kinda looks lika a V now and that helped alot as far as primers getting stuck in the tray and not droping in the chute. I also bent that rod that is attached to the primer system in to make it vibrate more and ever since then as long as I dont let the primer tray run dry I have had no problems with primers, I'm loading 45ACP with my 1000 and I love it
 
Problem:
Dropped primers when installing tray to chute.
Solution:
Drill a 1/16" hole in the cover to the primer tray right at the exit point and use a bent paperclip to hold back the primers when installing the full tray to the chute.
 
Problem: supplied spring for autodisk powder measure is too stiff, hence increasing the likelihood of breaking the brass chain.

Solution: instead, use the spring from any retractable pen; these springs are much lighter but still get the job done. make sure the new spring is at near-full compression when the shellplate is in its bottommost position.
 
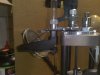
Problem: Spent primers build up underneath the press base

Solution: Find a small plastic bottle, such as vitamins or pharmacy medicines are sold in. Find a hole saw that is about the same size as the inside of the bottle. Drill a hole in the lid of the bottle so that you have a ring that threads onto the neck of the bottle. Unbolt your press from your work surface. Use the same hole saw to drill a hole down through the work top. Use super glue, screw, small nails, or whatever method you choose to secure the lid/ring to the underside of the table. Now you can screw the bottle on and off of the lid/ring under the table. Spent primers will collect in the bottle for disposal, so you don't have to unbolt the press to clean under there.


Problem: Finished rounds do not eject properly from the shellplate

Solution: Bend the tip of the ejector wire outwards and then inwards to make a sort of "hook" in the wire. The bottom of the hook should face out. This will start the rounds ejecting sooner and not let them get bound up in the shellplate. Very useful for larger diameter shells.


Problem: Finished rounds pile up on the finished round chute instead of sliding down

Solution: Use ultrafine steel wool or sandpaper to polish the chute. Apply some case sizing lube, Pam cooking spray, silicon oil (best!) or wax to the chute. Now rounds will slip down easily.


Problem: Tall cases such as .357 Magnum and .223 tend to tilt coming out of the case feeder or fall over.

Solution: Adjust the gap between the bottom of the case feeder and the top of a case sitting on the feed horn so that a nickle will fit between there. Sometimes the case feeder flexes while the press runs and this can cause cases to get hung up there if the gap is too tight. Also, do not lubricate the feeder horn the cases sit on while being slid into the carrier- too slippery here and the case will slip out of position.


Problem: OAL of finished rounds varies, usually deeper.

Solution: Crud in seater die. Disassemble and clean the die.


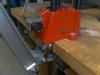
Problem: Cases do not enter the resize die squarely, and sometimes they get hung up on the rim of the resize die.

Solution: Carefully shim the top of the ram with a piece of paper on the side closest to the operator. Sometimes the shellplate carrier has a slight tilt towards the operator, this will help it.


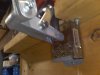
Problem: Primers going sideways, flipping upside down, or getting squished on insertion

Soution1: Primers need to be kept in the priemr chute to a level above the curve in teh chute. You may have a jam in the primer tray (the little jiggler pin needs to keep the primers jiggled apart so they feed into the chute). You may be low on primers. A piece of debris may have fallen in the primer chute. Excess powder may have fallen into the primer punch recess.
I keep a tiny makeup brush next to the tray. It was leftover from one of my wife's makeup kits. It's a tiny brush about as big as a kitchen match. It's the perfect size to clean out the primer tray and under the shellplate. A can of compressed air like used to clean computer keyboards works well, too.

Solution2: Shellplate timing! The rotation of the shellplate in relation to the movement of the ram is critical to ensure the primer arrives at the right place at the same time as the case. If the case is delayed, the rotation of the case will wipe the primer sideways off of the primer punch and make it sideways or upside down.

A properly timed shellplate will have the case arrive in the primer slot before the primer punch starts pushing on the primer.

To adjust, follow the Lee procedure. Adjust the shellplate with the phillips screw so that it is about to the spring-loaded ball detent. Then turn it slowly so that the ball detent pulls the shellplate ahead for you when it locks in place. Then turn the screw another half turn. That's it. Should be right on the money now.


Problem: High primers

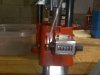
Solution: First, look at the top of the red mounting base next to the bump which is where the primer punch hits. Is there a spent primer that has fallen in there and prevents the carrier from going all the way down and pushing the primer punch up?

Next ensure the brass is not crimped primer brass. Next make sure the brass is not Seller & Bellot- they have tight pockets.
Next, ensure you are fully pushing the ram to the top of its stroke and not short-stroking the ram. I have my press handle set so that at the top of the stroke, my right ring and pinky fingers will grab the upright bar on the press and help me pull my hand on the handle further towards the top of stroke. I don't use the wooden ball knob on my Pro-1000.
Next check to make sure the primer punch is not worn down, the right punch is installed for the primer size you are using.
 
Problem: shellplate timing adjustment does not affect carrier timing.

Solution: Install new adjustment parts in the carrier. The nylon 'nut' tends to strip out if the adjustments are done extensively.

Jim H.
 
This is a great thread and will be useful to many Pro1000 users.

Problem: Cases not fitting tight in the shellholder from repeated removal of cases for inspection, etc.

Solution: Remove the case retainer spring and bend it so it fits tight against the edge of the shellplate, then reinstall.

It's also a good idea to have a selection of replacement parts on hand. Lee parts are very inexpensive and for $20.00 you can have enough parts on hand to last for years.

From Lee's website -
TA2368 - Hex Ratchet - 3 for 0.50
TR2432 - Ratchet Gear - $3.00 ea
TR2242 - Ejector Pin - 2 for $1.00
TR2243 - Tension Fingers - 4 for $1.00
TR2549 - Sensor Clip - $1.00 ea
 
So.... did we cover all the problems and solutions in only 7 posts?

I guess we are all busy fixing our Pro 1000 with the above posted solutions :D

I am planning to post more fixes and tips, but didn't want to steal everyone's wind. :rolleyes: Trying to be polite to fellow Pro 1000 reloaders, you know. ;)
 
Here is an easier fix to the collator for 9mm I just figured out and posted over at Loadmaster zone. I got tired of trying to find the screw and plastic piece and making them was a pain.

This came at the end of a loading session and I was in the man cave enjoying a man drink and it hit me.

the 1 cent fix


.22 casing and a penny

DSC_0429.jpg


Drill a hole in the penny and fit the case through the hole. On a grinder cut the casing down to about half its length.

DSC_0427.jpg

DSC_0430.jpg

DSC_0431.jpg


This mod works great and every case falls in the right direction. Its easy to make and easy to hold onto.
 
I have to admit that case collator solution for smaller cases is better than the square piece of cardboard/plastic taped/screwed to the center. And it is easily removed too.

Thanks for all the helpful posts everyone and I am sure new/old Pro 1000 users feel the same!

Also, the posts don't necessarily have to be a fix to a problem. If you have ideas/mods to better the Pro 1000, there will be many (me included) who will benefit from them.
 
I too am a proud Pro 1000 owner. She is finicky to set up but, once there good to go. Fast loading machine, with bullet feeder.


Problem: bullet feeder starts its upward motion before it has extended all the way under the seating die (40 caliber, 180 grain bullet).

Solution: I clipped a 2.6 ounce folding knife to the side of the feeder, adding just the right amount of weight to make the feeder fully extend before traveling up to the seating die.
 

Attachments

  • img235.jpg
    img235.jpg
    117.2 KB · Views: 315
  • img236.jpg
    img236.jpg
    66.4 KB · Views: 220
  • img237.jpg
    img237.jpg
    135 KB · Views: 313
Last edited:
Problem: catching spent primers (another way)

Solution: I notched my bench and recessed the press into the notch Then I mounted a small plastic container under the bench, held in place with a metal clip.


Problem How many rounds have I loaded?

Solution I mounted a small mechanical counter to the front of the Pro 1000, drilled a small hole in the case feeder frame and attached a spring to the counter arm and frame.
 

Attachments

  • img238.jpg
    img238.jpg
    142.5 KB · Views: 365
  • img239.jpg
    img239.jpg
    122.3 KB · Views: 318
  • img240.jpg
    img240.jpg
    104.1 KB · Views: 352
Problem: I don't like my Pro 1000.
Solution: PM me and we'll talk a deal.

Sounds like a win-win proposal. Are you throwing in any dies, etc.?

With the tips mentioned on this thread, the buyer should have that Pro 1000 humming in no time. :D


This problem is not specific to Pro 1000 and works for other progressive presses too.

Problem: As powder charged case "clicks" into station, some of the powder shakes out of the case.

Solution:
I tried carefully "clicking" the shell plate into station/riding the case with my finger but didn't work and took too much time. I usually feed the bullets with my left hand and I simply cover the opening of the case with the bullet (it's going in there anyways) or my finger tip as the case is "clicking" into station. No more spilled powder and no more inconsistently charged loads.
 
Last edited:
problem: I only have a pro 1000 and want to load for my rifle.

Solution: The 45 acp shell plate accommodates any case with the same head dimensions as the 308 win. ( which is a good portion of common rifle calibers). Remove the spinner rod from the center of the shell plate carrier and presto, now you have a turret press for loading rifle calibers. I am not sure if full length rounds (such as 30 06) will have enough clearance for bullet seating, but short action rounds will work fine. I am loading for my 7x57 with my pro 1000.
 
Remove the spinner rod from the center of the shell plate carrier and presto, now you have a turret press

You know, in all my reloading years, I have never thought to do that. Great tip! I can think of all kinds of applications with this now.

For one, if someone wanted to do a small batch of load development, removing the center rod will essentially turn the progressive into a single stage press. Instead of screwing the dies in/out, you simply rotate the 3 hole turret.
 
It probably took me at least a week of tweaking before I could hum though 100 rounds at a time without any problems, but now that I'm there my only problem with the press is running out of components.

Problem: Ram becomes decoupled from shell plate carrier on the down stroke after resizing.

Solution: Pin ram to shell plate carrier.

With ram in upmost postion reengaged with shell carrier, drill 1/8th hole through base of shell carrier, through the ram and out the back side of the carrier. Blow out all filings and other metal bits with compressed air, then oil 2 shortened 1/8th pins and insert one in the front and one in the back. This will provide sufficient linkage to be able to pull the stuck brass out of the die. Don't put the pin all the way through because you'll block the flow of spent primers out of the ram, resulting in jams on the downstroke, which is a real pain.

I'm using carbide 9mm dies which don't require lube, but the ram would always strip out of the carrier when I tried to pull the brass out of the resizer.
 
Last edited:
Problem: catching spent primers (another way)

Solution: I notched my bench and recessed the press into the notch Then I mounted a small plastic container under the bench, held in place with a metal clip.


Problem How many rounds have I loaded?

Solution I mounted a small mechanical counter to the front of the Pro 1000, drilled a small hole in the case feeder frame and attached a spring to the counter arm and frame.
That counter is such a cool idea! Where'd you get the parts?
 
I can not really tell you where to find a like counter. Sorry! This one was removed from one of our OBI press, during an upgrade to digital controls and counter.

I suggest a search at McMaster Carr or MSC Industrial Supply.

Hope this helps!
 
By the way,
...the ram would always strip out of the carrier when I tried to pull the brass out of the resizer.
It is very often the expanding die that gets stuck, not the sizing die. Make sure the plug in your expanding die is very smooth and clean; polish it if it has a rough surface.

If you find that it is the sizing die, it might help to clean the die and tumble the brass (I know you always do this, but double check to make sure).
 
Status
Not open for further replies.
Back
Top