I first began checkering around 35 years ago. There were no DVD's or you-tube videos involved with someone trying to learn what was involved with getting started. My first set of checkering tools now "sleeps with the fishes in Lake Michigan". Those were purchased from Herter's who swore they sold the BEST of everything. Then, I tried the tools made by DemBart. Another frustrating learning process. These cutters clog up with sawdust before you get to complete a whole line. Teeth are too fine and when they clog up the cutter will wander off track. Then I tried a set of Gunline tools. These cut much better and cutters are very easy to change into a single handle. For those starting out, I would recommend the Gunline brand, as the cutters have teeth that will cut forward and can cut when pulled backward.
Once I found the
W.E.Brownell brand of checkering cutters and bifurcated handles, I stocked up on those:
View attachment 866308
View attachment 866309
I found out very early that no one could, or would, teach a person how to checker. It's definitely a "learn by doing" endeavor.
The cutters and handles I finally settled on and learned to use, and still use today are those made by
W.E. Brownell of San Diego, CA:
View attachment 866310
View attachment 866311
Unfortunately, this gentleman passed away and his daughter sold all of his equipment to make these cutters and handles and the purchaser has as yet to make a cutter that works properly. These tools do come up for sale on ebay now and then, and I would recommend you get at least one of these handles and at least a 90° single line cutter.
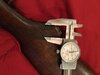
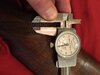
If your plan is only to "re-cut" existing checkering, where the top of the diamonds have been flattened, you really don't need a whole kit. The diamonds can be pointed up once again with a single line 90° cutter. For one thing, you probably don't know what the checkering line spacing on the stock measures, so there's no need to rely on a line-spacing cutter. It's a bit tedious to cut lines to partial depth in both directions, but with a modicum of patience, you will get there. The reason why I would recommend a 90° single line cutter, is because if you're dealing with American Walnut or stock wood with a more open grain, the line spacing is most likely 20 Lines-Per-Inch, done so the diamond tops won't pop off due to the courser grain wood. It's only when dealing with tight grained walnut like the California English, French and Bastogne gunstock wood where those species will take finer checkering to 24 LPI at 75° diamonds. The stock pictured is 24 LPI at 75°.
So, after all of my above wind, you will be safe to purchase a Gunline handle and a 90° single line cutter to carefully point up the worn checkering you want to do rather than a whole kit. Take your time and don't try to cut the lines to full depth on the first several passes. Cut a little bit to depth and then do the cross-over lines, at least three times, and then when you have the diamonds all pointed up, evenly, then brush at least three coats of finish into the checkering with an old toothbrush until it soaks into the wood. Wipe the excess of the first finish added off with an absorbent cloth ( old T-shirt ) next day brush another coat into the checkering and remove excess, and then the next day the same thing and wait a couple of days to let the finish harden up those diamonds.
Good luck and post a picture of your finished job.