Bartholomew Roberts
Member
Finally received my own Wicked Edge sharpener and have sharpened six knives with it. First, let me give some background - i am not a knife guy, chef, or anyone who has more than a very basic competence with knives. In preparation for this, I've done some online research on sharpening and different theories. One of the basic things you've got to understand is raising a burr. Until you understand that, you might as well stick to pull through sharpeners.
Ok, I've sharpened about six knives now and these are my first impressions and are subject to change as I learn more.
If you are looking for something to keep your knives sharp in the kitchen with minimal effort, the Wicked Edge is probably not it. It can certainly do that; but there are other products that can do it more easily or cheaply - and even midrange solutions like the Sharpmaker can get knives sharp enough to shave the hair off your arm.
The big places the Wicked Edge excels is in reprofiling a bevel very precisely and in doing a scary sharp, mirror-edged polish on the blade. It does both of these well enough that it makes you wonder "How much faster/prettier could I make it with the extea-coarse stones and ultra-fine stones not included in the Pro Pack?
A couple of random thoughts:
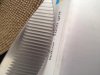
I really likehow you can work on the knife while looking at the edge at the same time. The Spyderco doesn't have that and watching the stones work was like an education on the different kinds of steel. I tried putting an edge on a letter opener and you could literally watch the edge fold over and crumble if you tried an angle of less than 30 degrees. Likewise, I got a quick education on why my $5 kitchen knives are different from the $220 set I got as a gift.
Once I recognized the difference I really wanted to grab my knives that had better steel and see what I could do - hold off on that temptation for as long as you can because the stones get a lot better with a little break in (and so do you). I ended up doing a Kershaw Black Horse and was disappointed not to get the mirror edge I was looking for (scary sharp; just not pretty). Later on I did much better on polish on a kitchen knife. I think both the stones and I just needed a little more work.
As rjrivero noted, the system takes some time and patience to set up; but even a complete novice like me can produce professional results with a very short learning curve.
Ok, back to making all the knives in the house ridiculously sharp... More later
Ok, I've sharpened about six knives now and these are my first impressions and are subject to change as I learn more.
If you are looking for something to keep your knives sharp in the kitchen with minimal effort, the Wicked Edge is probably not it. It can certainly do that; but there are other products that can do it more easily or cheaply - and even midrange solutions like the Sharpmaker can get knives sharp enough to shave the hair off your arm.
The big places the Wicked Edge excels is in reprofiling a bevel very precisely and in doing a scary sharp, mirror-edged polish on the blade. It does both of these well enough that it makes you wonder "How much faster/prettier could I make it with the extea-coarse stones and ultra-fine stones not included in the Pro Pack?
A couple of random thoughts:
I really likehow you can work on the knife while looking at the edge at the same time. The Spyderco doesn't have that and watching the stones work was like an education on the different kinds of steel. I tried putting an edge on a letter opener and you could literally watch the edge fold over and crumble if you tried an angle of less than 30 degrees. Likewise, I got a quick education on why my $5 kitchen knives are different from the $220 set I got as a gift.
Once I recognized the difference I really wanted to grab my knives that had better steel and see what I could do - hold off on that temptation for as long as you can because the stones get a lot better with a little break in (and so do you). I ended up doing a Kershaw Black Horse and was disappointed not to get the mirror edge I was looking for (scary sharp; just not pretty). Later on I did much better on polish on a kitchen knife. I think both the stones and I just needed a little more work.
As rjrivero noted, the system takes some time and patience to set up; but even a complete novice like me can produce professional results with a very short learning curve.
Ok, back to making all the knives in the house ridiculously sharp... More later