What gunsmithing or repairs have you done today

Not necessarily gunsmithing, more of an experiment when it's cold & windy outside and I have too much time to think about things.

I attempted to tape off my front sight on a revolver after degreasing it and applied some of the powder coat that I use to create shiny gold speckled fishing jig heads... I'll see how long it takes to wear off :rofl:

Powder-Coat-Front-Sight.jpg
 
Euro Stock 1.jpg

I think I finished my Target Rifle. Yeah, I know, there's always something new I can try. This has a Euro Stock by Stocky's of Florida. It's free floated but I haven't glass bedded it yet. Simmons 8 X 34 sight and I like it. I don't need a spotting scope out to 50 yards.

Changed out the trigger internals for a Powers Custom unit. The Kidd that I ordered does not work in the aluminum housing. The PC unit fits correctly and gave me a 2.5 pound trigger. Nice but not enough for what I plan on using the rifle for (informal target shooting and ammo testing).

I changed out the rebound spring and plunger, reversed the order by putting the plunger in first and then placing the spring on the outside. Now the trigger is set at 1 pound 14 ounces averaged on my Lyman Digital Scale.

Groups at 50 with a variety of ammo:
 

Attachments

  • 50 yard 10 22 Feb 12 24.jpg
    50 yard 10 22 Feb 12 24.jpg
    419.4 KB · Views: 9
Tinkering in the shop yesterday. I have installed a JP Enterprises Silent Captured Spring System in my Knights 14.5" SR-25 Advanced Combat Carbine, which replaces a conventional carbine length H2 buffer and spring. Wanted to do the same buffer system replacement with my 11.3" Wilson Combat 6.8 SPC II. JP's standard large frame H2 system allows too long a bolt stroke cycle rearward for use with the 6.8 bolt; this bolt is ~ 1.5" shorter than the SR-25 bolt which would allow the rear-end of the 6.8 carrier key to strike the receiver extension on rearward carrier movement. Usually desire ~1/8" of clearance to prevent damaging the carrier or fracturing / loosening the retaining screws themselves, let alone beating up the top of the receiver extension.

So, I fabricated a delrin spacer to be fitted on the JP captured buffer weight-spring guide rod system to shorten the stroke length of the system to prevent said carrier key from striking the receiver. An additional spacer is required at the back of the buffer tube to adjust the OAL of the "system" to proper cycling dimensions.

Disassembly, fabrication of spacer, re-assembly of modified system. Forgot how handy those lead sheets can be in the vise.

IMG_0026 1Wilson Combat 6.8 SPC 2 JP SCSS  LawH2 Delrin Spacer Fabrication 02.18.24.jpg IMG_9960Wilson Combat 6.8 SPC 2 JP SCSS  LawH2 Delrin Spacer Fabrication 02.17.24.jpg IMG_9962Wilson Combat 6.8 SPC 2 JP SCSS  LawH2 Delrin Spacer Fabrication 02.17.24.jpg IMG_9963Wilson Combat 6.8 SPC 2 JP SCSS  LawH2 Delrin Spacer Fabrication 02.17.24 2.jpg IMG_9971Wilson Combat 6.8 SPC 2 JP SCSS  LawH2 Delrin Spacer Fabrication 02.17.24.jpg IMG_9973Wilson Combat 6.8 SPC 2 JP SCSS  LawH2 Delrin Spacer Fabrication 02.17.24.jpg IMG_9975Wilson Combat 6.8 SPC 2 JP SCSS  LawH2 Delrin Spacer Fabrication 02.17.24.jpg IMG_9976Wilson Combat 6.8 SPC 2 JP SCSS  LawH2 Delrin Spacer Fabrication 02.17.24.jpg
 
Last edited:
Just some maintenance:

Cleaned up the head of the trigger pin on my BHP and blued it with oxpho. Hope it’s a long time before I need to remove that one again!

Also, the measured trigger pull on the BHP is just barely over 4lbs.

Reset has an audible “click” if you listen for it. You can feel it if you are careful, but would be unlikely to notice if focused on the target. All of this to say I think the Apex trigger is a little smoother than the stock trigger. You just can’t feel any grit or drag at all. No creep, just take up, wall, break, reset, repeat.

The wider trigger face makes it feel like less than 4lbs!

I’ll be shooting the BHP with various loads on upcoming range trips. It will probably edge out my 1911s for a while
 
Had a busy day, Installed a new sight mount on my latest 10/22 build, replaced the trigger with a Powers Custom Trigger Kit and replaced the return springs to get a reliable and very crisp 1 3/4 pound trigger. This will be used as a bench gun once the barrel comes in.

I also redid the bolt lock so that it will automatically return the bold.

Redid the trigger on my friend's 10/22. He doesn't know it yet but I redid the trigger from the OEM 7.5 pound trigger down to 3 1/2 pounds using the OEM parts. I'll go lower if he askes me to but I don't think he can handle a lighter trigger at his age. He shakes too much. I'll let him try my 1 3/4 pounder and see what happens.

He sure wasn't satisfied with the OEM trigger and asked what I could do to fix it.

Took apart my S&W 617 and did some trigger work. Had to replace the strain screw and set the hammer fall to 54 ounces. It was set at 48 from the factory but wouldn't fire all the ammo I wanted to test. Even with Remington Bucket Of Bullets I was getting misfires. They are the lightest firing .22 ammo of all that I tried.
 
I’ll print these to keep handy. They’re even better than Stephen Camp’s disassembly guide!
Thank you!

My BHP is a 70s era pistol I got from my father in law. The trigger pin was already buggered up when I got it and the frame had a bent/burr like someone had tried to pry the slide stop out. I had a gunsmith clean up the burr and touch up the blueing but I had never cleaned up the trigger pin till today. Needless to say, the trigger pin is just a very tight fit, even with relieving the trigger spring pressure from the groove in the pin. At least it looks presentable/correct now after reinstalling the trigger.
(I got rid of the mag safety several years ago)
 
Completed my 1-1/2" die holder for manual threading on the lathe. Added a close tolerance 1/2" drill rod center shaft after reaming it 0.500". Added a 1-1/2" I.D. piano wire spring sourced from McMaster Carr to allow the lathe tail stock to apply pressure to the die for threading. Then a road test with 5/8"-24 die on Delrin-acetal stock. Works nicely.


IMG_0028Gunsmith Round Die Holder Lathe Tail Stock  MJD 02.18.24.jpg IMG_0030Gunsmith Round Die Holder Lathe Tail Stock  MJD 02.18.24.jpg IMG_0031Gunsmith Round Die Holder Lathe Tail Stock  MJD 02.18.24.jpg IMG_0032Gunsmith Round Die Holder Lathe Tail Stock  MJD 02.18.24.jpg IMG_0033Gunsmith Round Die Holder Lathe Tail Stock  MJD 02.18.24.jpg IMG_0035Gunsmith Round Die Holder Lathe Tail Stock  MJD 02.18.24.jpg
 
Last edited:
Next up. I follow Joe Piezynski (Joe Pie) youtube machinist out of Austin Texas. He has a sophisticated commercial machinist enterprise, apparently with a side interest in very small modeling projects requiring lathe / milling expertise. A lot of techniques and tips applicable to gunsmithing, with particularity small parts. He offers a 6" & 8" small part holding fixture beautifully mfg. from A2 steel for use on the mill. I just got one and looking forward to putting it to good use. It comes with 4 holding clamps and 10-32 cap screws. He recommends using waste stock to protect the fixture plate from gouging when the clamps are torqued down. Also recommends using some type of bushings to enhance modularity of holding options so I got some aluminum and steel spacers to be held by the 10-32 screws. In his video of the product he shows some round brass bushings accepting countersunk 10-32 cap screws; got some 360 brass round stock from McMaster Carr and plan on fabricating some next week just for fun.

A link to the site and fixture plate video. https://www.youtube.com/watch?v=zdXJGWUe7b0

Excluding lathe 5C colettes, I have acquired a variety of clamps, vises etc for holding small firearm-related parts to worked upon. Inventory just increased.

IMG_0048Gunsmith Advanced Innovations Small Fixture Plate Joe Pie 2024.jpg IMG_0066Gunsmith Advanced Innovations Small Fixture Plate Joe Pie 2024.jpg IMG_0067Gunsmith Advanced Innovations Small Fixture Plate Joe Pie 2024.jpg


IMG_0051Gunsmith Advanced Innovations Small Fixture Plate Joe Pie 2024.jpg
 
Last edited:
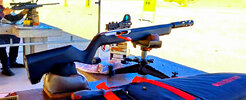
It has been a while since I have posted any progress reports with my 6.5x55 Swede build and that due in large part to being daddy day care. Anyway I have done quite a bit of work to the old girl and it is time to blue the barrel and marry it to the receiver.

I forged the bolt handle, took the receiver down to the white, drilled and tapped it for the scope, jeweled the bolt, blued the receiver using Mark Lee's express brown 2, Installed a Dayton Traister Mark II low profile safety, made the action screws from screw blanks using the 1/4x22 Whitworth die, milled the action screw holes to accept the larger screw heads, cleaned the trigger guard down to the white and re-blued it using the same Mark Lee's express brown, chased the receiver threads with the appropriate taps. When I started this project the receiver had broken action screws which I easily removed. This build started as nothing more than an orphaned receiver and bolt. There was nothing collectable at all. I just brought it back to a useful bang stick.

The list of aftermarket parts besides the Dayton Traister Mark II safety includes the short chambered Douglas barrel, leupold scope bases and medium high rings, a Wolf firing pin spring kit.

I'll post pictures later on.
 
New acquisition (French Railway Police issued SP101 in .38special):
  • Installed an XS Big Dot front sight
  • Cleaned/polished the internals
  • Rounded the trigger as it had sharper edges, now it feels like my S&W
Next up is installing new hammer/trigger shims as well as updating the springs.

SP101-05776-XSBig-Dot-A.jpg


SP101-05776-XSBig-Dot-B.jpg


SP101-05776-B.jpg
 
Last edited:
My Rossi 92 .357 has a habit of chewing up the rims of cases, plus the action is a tad rough, so I took it down.

I lightly polished the bolt raceways, locking lugs, worked on the trigger spring and extractor by removing some metal, etc.

Reassembly? PITA! The lever pin holes aren’t perfect, so installing the pin locked everything up solid. I fiddled with it for over an hour with no luck.

I have the Steves Gunz DVD, but my new computer won’t play the older formats. So, I picked up the phone and spoke to Steve at Stevesgunz.com. He walked me through the process to get the bolt and lever free with the pin in place. (Thanks Steve! I will be ordering the peep sights soon!)

The action is much smoother, as is the better trigger pull. The extractor still nicks case rims a bit, so I will be working on lightening that until cases come out damage-free.

Stay safe.
 
Put a Springer Precision 1911 style full length guide rod kit and a 16lb Wilson 1911 recoil spring in to replace the stock Springfield captured recoil spring system on my Springfield XDM Elite Precision. I know there is always a lot of discussion on full length but I used to be a dairy farmer most heavy tillage equipment has guide rods for the heavy spring systems on it, that is why I like full length rods from my experience being a farmer.
 
Last edited:
Shot my 7x57ACKLEY the other day and was maxed out on elevation at 25 yard sighting in, these old talley bases must have been fit to a different action. So for now I just put some leupold bases and old Redfield jr dovetail rings on and see how that goes.

Trying to bed that winchester these week, I've asked someone that has a old tub of Johnsons paste wax I can get some for release agent.
 
Back
Top