What gunsmithing or repairs have you done today

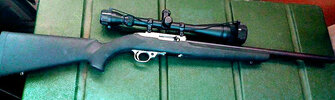
While cleaning my carbine and something never do is letting it stand up against the bench. Well, I nudged it with my chair making it slide and thud against the ammo cans. I picked up ad no scratches or any other damage until I looked the front sight. The front bead on the sight was gone *** and I found it on the floor sheered clean from the sight. My Henry front beads are made of brass not plastic. I called the manufacturer and asked if I could get a replacement under warranty? I sent them a picture and was told a new one will be shipped in 4 weeks. That just cuts into deer season then the light went on.

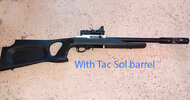
So, I drilled out the rest of the plastic in the site. Then I cut a thin piece of brass stock and marked the center with a punch. I drilled it out using a drill bit the same size as the sight hole. Using the drill bit, I clamped it in vise grips. Broke out my Map gas/Oxy torch and brazed the brass to the drill bit. Then I chucked up the drill bit in my drill press using files to machine and refine the bead also polished it with 800 grit paper. Then I cut the drill bit to fit properly in the sight. After dry fitting then I used JB weld metal Pro-epoxy to make a permanent fix. Better than new.


s1.jpg s2.jpg s3.jpg s4.jpg s5.jpg s6.jpg
 
4 inch sstock facing  right.jpg
Worked on this for a couple of hours today with no luck. Cylinder won't turn when I pull the trigger. Everything works fine without the cylinder in the gun but as soon as I close it the gun locks up. I checked the extractor rod and it's tight as can be, cleaned under the star, cleaned around the forcing cone. Action is stock other than a 12 pound rebound spring and it works perfectly until I close the cylinder.

I am using snap caps when I dry fire the gun.

I'll take any hints you all can give me.

Steven
 
Not exactly a repair, but I tricked out my 1894 today: Recoil pad, leather comb, scope, rings & mounts.--
Marlin-1894-1-12-3-2023.jpg


Marlin-1894-2-12-3-2023.jpg
 
Cylinder won't turn when I pull the trigger. Everything works fine without the cylinder in the gun b
With the cylinder out won't the trigger be locked up because the cylinder center pin is not depressing the bolt to unblock the hammer ? I was going to ask IF the bolt was being depressed when the cylinder is closed.
 
I ended up with a Universal M1 Carbine, first year production, as my late uncle's estate was divided up this spring. Today, I gave the gun a thorough cleaning (which it needed) and oiling. This one is in great shape--there isn't a mar on it, except for some scratches on the barrel band spring.

Edited to add: unfortunately, I put some dings in the stock whey trying to fit the thing into my overstuffed gun safe, after posting the above. :(
 
Last edited:
Reworked my Glock 42 trigger from 9lbs. down to 4lbs. with a reduced power spring kit from Ghost including firing pin safety plunger, 4.0lb striker spring, and minus connector. Return on the trigger was sluggish so I went back in and installed a 25% higher power trigger return spring. Much better.

This Glock was a police trade-in (looked brand new), so it must have had a heavy trigger from a department requirement, it was terribly heavy and on a small compromise gun it was not what I was looking for. Now it is a great trigger that is still smoothing out and will make a great compromise gun/BUG to my standard carry and will spend most of it's life in an ankle holster.

One of the many reasons I like Glock for a SD platform its utilitarian nature and reliability are great attributes. The ease of parts being sourced, and can be stocked at my gun bench for future needs and commonality between many different calibers on small parts are great assets.
 
Last edited:
I don't know if this qualifies as 'smithin'.
Mounted my first scope this evening.
An Athlon Gen2 10 x 42 on my newly purchased Springfield Armory Saint Edge in 223 Wylde.
Pretty straight forward. Easy.

1701825524315.png
Yeah, I have a busy workbench! (please disregard!)
Jags said "welcome to the Dark Side".
I think he is right.

Time to hit the range!
 
I replaced the firing pin, hammer, sear springs with a M*CARBO reduced power kit in my Kimber Micro 9. When I reassembled the gun I swapped the OEM recoil spring with an extra power spring.

It is a bit tight inside the Micro 9 frame to fit the sear under the sear spring, but it all went together and function-checked fine.

IMG_3750.jpeg
Brought the trigger pull from 8 lbs down to a much more manageable 4 lb 12 oz. :D

IMG_3751.jpeg

Stay safe.
 
Your post motivated me to go measure my Kimber Micro trigger weight.......avg. 6 lbs 6oz. Got one pull just under 6 lbs. Factory lists 7 lbs.
It's a very smooth pull, no creep whatsoever and a crisp break. Nice little pocket heater.
Ditched the too-slippery Rosewood grips and like to use the Tru-Glo fiber optic / tritium front sights on the small profile arms. Had to use 2-56 set screws for the front sight installation.
Elite Survival makes a nice front pocket holster.


e Screen Shot 2018-08-20 at 4.28.43 PM.png IMG_9486.jpg IMG_9485.jpg IMG_9977.JPG IMG_0561.JPG IMG_0567.JPG IMG_0568.JPG IMG_1230.JPG IMG_5110.jpg
 
Nice! I did Vickers Tactical flat triggers on all my Glocks but the Gen 5 ones ( 19X and 45), and the Apex kit I put in a Gen 3 17 I built. The shape and grooves of the regular Glock Gen 1-4 triggers drove me nuts.

IMG_0055.jpeg


The LC9, LCP and LCP II are all stock, save for orange painted front sights.

IMG_0506.jpeg

Stay safe.
 
I replaced the firing pin, hammer, sear springs with a M*CARBO reduced power kit in my Kimber Micro 9. When I reassembled the gun I swapped the OEM recoil spring with an extra power spring.

It is a bit tight inside the Micro 9 frame to fit the sear under the sear spring, but it all went together and function-checked fine.

View attachment 1183829
Brought the trigger pull from 8 lbs down to a much more manageable 4 lb 12 oz. :D

View attachment 1183830

Stay safe.
Nice that's probably a sweet little shooter now, how is it racking it I remember women would have a hard time with these but they were pretty popular.
 
Nice that's probably a sweet little shooter now, how is it racking it I remember women would have a hard time with these but they were pretty popular.
Not bad for me. I use a bit if a push-pull method when I rack semi autos, so it would take quite a stiff spring to be tough to rack.

For someone with less hand strength I could see this being a bit more difficult than stock to rack.

After I drop the kids Yamaha off to the mechanic for 2024 season race prep, I hope to shoot for a bit tomorrow. If I am able to go to the range, I will report back how it shot for me. :D

Stay safe.
 
Mamba with C-More.jpg Mounted the C-More with a 6 minute dot today. This is the 6 months I shoot Open, rimfire with a dot, for Steel Challenge Matches so I converted the gun back. I also changed grips to Herrett's. The gun is working great. I had two misfires using CCI Clean ammo. It was cold and the ammo needed to warm up. Bullets made it to the target and that's all that matters.

My Black Mamba has a 1 1/2 pound trigger. I use the Volquartsen LLV 6 inch upper with their bolt for reliability.

Steven
 
I decided to check the end shake on a 1950 Pre Model 10 snub I bought in the fall. Cylinder pushed back it measured .009, forward .005. The .009 was tight so I put a .002 in figuring I could always add another if needed. Shot 100 rounds yesterday and it functioned as it should. I know it's only gunsmithing 101 but maybe I gave the 73 yr old (like me) revolver a few more years.
 
Top pic is as the gun was given to me. Ruger 10/22 with Clark 20 inch barrel and Simmons 8 X 34 scope. Trigger was stock and toughed off at 6.5 pounds as measured with my Lyman Digital Scale. Accuracy is fantastic.
It's very heavy and I wanted to lighten it up.

Picture 2, I think it's complete: Tactical Solutions 16 inch barre. ( 5 inches of rifling ) false silencer. C-More Railway red dot sight, BX trigger ( 2.5 - 3.3 pounds) still too knew to get an exact reading.

Build was pretty simple except taking off and reinstalling the barrels. Very tight so I used the method Volquartsen show by using a heat gun to heat up the receiver and then putting the new barrel on. Took a lot longer than I thought and a little encouragement with a rubber mallet to get the barrel in all the way.
 

Attachments

  • Ruger 10 22 from Glenn.jpeg
    Ruger 10 22 from Glenn.jpeg
    272.2 KB · Views: 3
  • Complet with short barrel.jpeg
    Complet with short barrel.jpeg
    296.6 KB · Views: 3
Last edited:
I decided to check the end shake on a 1950 Pre Model 10 snub I bought in the fall. Cylinder pushed back it measured .009, forward .005. The .009 was tight so I put a .002 in figuring I could always add another if needed. Shot 100 rounds yesterday and it functioned as it should. I know it's only gunsmithing 101 but maybe I gave the 73 yr old (like me) revolver a few more years.
I am thinking you probably could have put an .003 or even an .004 in there. I am a rank amateur but put shims equeal to the endshake in my Model 28. My effort is described here.
 
Back
Top