How I prep brass and load for PRS matches.
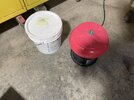
Step 1: Tumble
I tumble the fired cases for 30 minutes give or take. Corncob with light polish (Midway/Dillon/etc). No, I don't care if the cases are shiny,
just clean, prior to annealing and sizing.
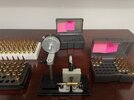
Step 2: Anneal.
Some folks like to decap first. If so, decap, then just clean primer pockets with a brush etc, or clean/uniform primer pockets with a PP
uniformer. Use a good one and don't scrape the side walls.
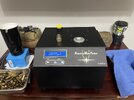
I don't think it really matters about annealing with primers in or out, I have tried it both ways, anneal with the primers in, and anneal
with them out. Using the Aztec Mode to analyze cases the AMP gives nearly an identical number for both, with or without. Meh. YMMV
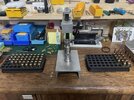
Step 3: Size (And Decap if you didn't between tumbling and annealing).
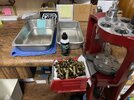
I use a full length bushing style die. I choose a bushing to get the necks sized down enough my chosen mandrel type expander does just
a little bit of work on each and every case. So I choose a bushing to size the necks down enough for that, and an expander for neck tension.
Case neck thickness/bushing brand will determine what bushing you choose. Remember, we are talking about loading for standard necked
chambers, not tight necked ones!
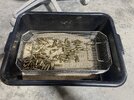
Step 4: Tumble with dry corn cob (no polish) to remove lube.
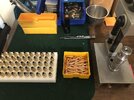
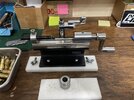
Step 5: Trimming Cases
I use a Wilson right now, but am looking hard at a Henderson which would chamfer and deburr at the same time, as well as save reps
on my old hands with a manual trimmer like the Wilson. Great trimmer though.
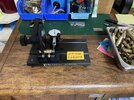
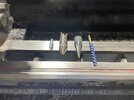
Step 6: Chamfer & Deburr if your trimmer didn't do it. Clean primer pockets if you didn't do it after decapping prior to annealing.
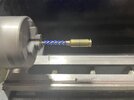
I do it under power with a little hobby lathe, but any way one chooses is fine. Brush last to smooth the surface the bullet seats in.
If the cases are already deburred and chamfered, as well as primer pockets cleaned, then brushing is still done for the same reason.
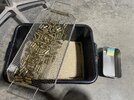
Step 7: Tumble again in corn cob with a little bit of polish added.
I use corncob with polish here because I want residual polish on the cases. I also want the tumbler to work on the chamfered surface
where the bullet seats, hopefully smoothing that surface further. That's part of the reason for brushing after chamferring and deburring.
Step 1: Tumble
I tumble the fired cases for 30 minutes give or take. Corncob with light polish (Midway/Dillon/etc). No, I don't care if the cases are shiny,
just clean, prior to annealing and sizing.

Step 2: Anneal.
Some folks like to decap first. If so, decap, then just clean primer pockets with a brush etc, or clean/uniform primer pockets with a PP
uniformer. Use a good one and don't scrape the side walls.
I don't think it really matters about annealing with primers in or out, I have tried it both ways, anneal with the primers in, and anneal
with them out. Using the Aztec Mode to analyze cases the AMP gives nearly an identical number for both, with or without. Meh. YMMV

Step 3: Size (And Decap if you didn't between tumbling and annealing).
I use a full length bushing style die. I choose a bushing to get the necks sized down enough my chosen mandrel type expander does just
a little bit of work on each and every case. So I choose a bushing to size the necks down enough for that, and an expander for neck tension.
Case neck thickness/bushing brand will determine what bushing you choose. Remember, we are talking about loading for standard necked
chambers, not tight necked ones!

Step 4: Tumble with dry corn cob (no polish) to remove lube.

Step 5: Trimming Cases
I use a Wilson right now, but am looking hard at a Henderson which would chamfer and deburr at the same time, as well as save reps
on my old hands with a manual trimmer like the Wilson. Great trimmer though.

Step 6: Chamfer & Deburr if your trimmer didn't do it. Clean primer pockets if you didn't do it after decapping prior to annealing.
I do it under power with a little hobby lathe, but any way one chooses is fine. Brush last to smooth the surface the bullet seats in.
If the cases are already deburred and chamfered, as well as primer pockets cleaned, then brushing is still done for the same reason.

Step 7: Tumble again in corn cob with a little bit of polish added.
I use corncob with polish here because I want residual polish on the cases. I also want the tumbler to work on the chamfered surface
where the bullet seats, hopefully smoothing that surface further. That's part of the reason for brushing after chamferring and deburring.


