Powder Horn

I got two more horns from a friend on another forum. They're big too but to be honest I didn't ask for measurements. I just went by pics he had of these and a couple of smaller ones. I should have gotten the smaller ones. One is just as big as the other one I bought but it's not as long. The smaller one is closer to what I wanted but still a little big. It will do just fine tho. These are the two I just got with my biggest horn.

12MaE85l.jpg


This is my big horn inside the biggest one I just got. it has a brass valve on it or it would have all fit inside.

WacSkftl.png


It swallowed my small horn whole.

BhXKku8l.png


Even if I cut the length down on the two big horns they will still be really fat. I'll use them to practice on and if I don't screw them up too bad I'll figure out what to do with them later.
 
Far out colors. !! Hey, you can always make a big horn smaller, but ya can't make a small horn bigger. :)
 
I don’t know this for fact but I think you can steam it HOT and then flatten the horn… 🤷‍♂️
This is true, I have heard that immersing it in hot oil works better. Don't know exactly what kind of oil they are talking about.
 
Never seen deocrative tacks in the plug before.

I used a bunch of small tacks years ago on the day horn I made.

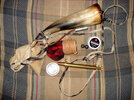
The horn is from a display Grandparents Smith brought from Texas one year, and the leather is from a whip they brought me from the same place. Both were damaged, and I didn't want to throw them away, so I repurposed them.

The ball bag is made from a piece of flannel from Grandpa Burkhardt and a wooden thread spool from Grandma Burkhardt, tied together with more of the aforementioned leather.
 

Attachments

  • kit.jpg
    kit.jpg
    157.3 KB · Views: 9
  • rear.jpg
    rear.jpg
    140.9 KB · Views: 9
I don’t know this for fact but I think you can steam it HOT and then flatten the horn… 🤷‍♂️
I've got a horn on the Coleman Camp Stove right now. I plan on flattening it.

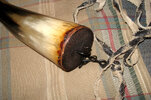
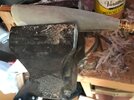
Originally the horn was super heavy and about 3/8" thick. You can see the gaps between some layers in the first two images. I chiseled most of the layers off in huge flakes. After scraping and filing to get it smooth, it was heated in boiling water (yay old Coleman Camp Stove), had a piece of triangular plywood jammed into it and flattened and allowed to cool in the vise. The third image (rear view) of the cooling horn shows how more layers must be removed. A pencil line drawn on the top and bottom helped me to keep it aligned for flattening.
 

Attachments

  • IMG_4358.jpeg
    IMG_4358.jpeg
    81.4 KB · Views: 10
  • IMG_4357.jpeg
    IMG_4357.jpeg
    65.3 KB · Views: 9
  • IMG_4360.jpeg
    IMG_4360.jpeg
    69.8 KB · Views: 9
  • IMG_4361.jpeg
    IMG_4361.jpeg
    64.9 KB · Views: 10
  • IMG_4362.jpeg
    IMG_4362.jpeg
    57 KB · Views: 10
Last edited:
Update on horn. Fitting a wood plug on and need to glue the bushing in place.

Just noticed that the (unfinished) Good Dog horn appears in Gary Horne's Schools Open! column in the Oct. 2023 Muzzle Blasts magazine. Funny but I got the Nov. 2023 issue long before the Oct. issue. The horn appears before the archaic latin, latin and english were scrimshawed on its side. Unfortunately the other side with the dog leaping at the pheasant was not depicted.
 

Attachments

  • IMG_4367.jpeg
    IMG_4367.jpeg
    79.3 KB · Views: 10
  • IMG_4366.jpeg
    IMG_4366.jpeg
    84.5 KB · Views: 10
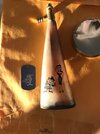
Thank you Frulk. When held to the light it is somewhat translucent so the user can see how much powder is left. It's flattened to fit into the shooting bag.

The bullet board for the gun was made from oak salvaged off a sofa that was being tossed. I learned from another member to use the forstner bit so the board is centered over the muzzle for easy of loading. The bits are Irwin but made in Austria (superior steel to Workers' Paradise steel). Second image shows it drying after stain was applied. Afterward Johnson Paste Wax was rubbed in to protect it from moisture.
 

Attachments

  • bullet board (backside).jpeg
    bullet board (backside).jpeg
    98.8 KB · Views: 6
  • IMG_4353.jpeg
    IMG_4353.jpeg
    72.8 KB · Views: 6
It's flattened to fit into the shooting bag.
Yes, I've found lately that a small horn that fits in the bag is more "handy" then having it over-the-shoulder on a strap. I suppose over the shoulder is a bit faster in the field, perhaps, but I have so much stuff dangling off me already...!!! And, if I really need a fast reload I just grab a paper cartridge. (been there done that!)
 
Yes, I've found lately that a small horn that fits in the bag is more "handy" then having it over-the-shoulder on a strap. I suppose over the shoulder is a bit faster in the field, perhaps, but I have so much stuff dangling off me already...!!! And, if I really need a fast reload I just grab a paper cartridge. (been there done that!)

My bag is too small or my horns are too big. 🤔 Nice work Gary. How did you shape the plug?
 
Old fashioned way. Trace the outline of the horn exterior over the pine (scrap wood) and then cut it with a handsaw. Then it was a matter of filing to match the contour. Afterward the inner portion was roughly sketched out and then filed down so the plug would fit it.
 
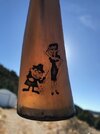
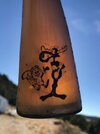
Update on squirrel horn. Naturally it has Moose and Squirrel, "Moose must die" in cyrillic and Boris and Natasha. Some of the image was done with glowforge. I should have sharpened up the images before doing the trace.

Use a sidevise like what the woodworkers use to flatten the horn. This horn was not flat enough and wouldn't fit into the Glowforge without bottom being removed. I should have sanded the horn better prior to scrimshawing it too.
 

Attachments

  • IMG_4391.jpeg
    IMG_4391.jpeg
    93.5 KB · Views: 18
  • IMG_4388.jpeg
    IMG_4388.jpeg
    98 KB · Views: 18
  • IMG_4394.jpeg
    IMG_4394.jpeg
    76.5 KB · Views: 18
LOL Jackrabbit. It certainly would. Unlike the Good Dog horn I made earlier this year (It had archaic latin, latin and english which all carried the same message, "Feed Me and Walk Me") this is not the Rosetta Stone.

Some blackpowder guys use magnifying glasses to determine what tool was used to do something. Sandpaper or scraper? Let me check.
 
I've got a horn on the Coleman Camp Stove right now. I plan on flattening it.

Originally the horn was super heavy and about 3/8" thick. You can see the gaps between some layers in the first two images. I chiseled most of the layers off in huge flakes. After scraping and filing to get it smooth, it was heated in boiling water (yay old Coleman Camp Stove), had a piece of triangular plywood jammed into it and flattened and allowed to cool in the vise. The third image (rear view) of the cooling horn shows how more layers must be removed. A pencil line drawn on the top and bottom helped me to keep it aligned for flattening.
The Coleman was my original casting furnace.
 
Back
Top