Revolver Display box (case)

Status
Not open for further replies.

scrat

Member
Joined
Jan 27, 2007
Messages
6,877
Location
Monrovia, CA
Ya i have one i bought a few years ago its pretty worn out and messed up so i was thinking on building a new one. Seems like it turned out pretty good. In the next week or so i am going to be building on for my Walker. This is stained in Honey Oak.

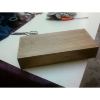
This is the completed box. The box is all one piece i stained it first this is just after i stained it. After this i took it to my table saw and cut it in half so the pieces match 100% and the Stain matches 100%. The one i bought a few years ago you could tell the top and bottom were made seperately the stain does not match the two halves and the fit is not exact.
k2-1.jpg 2-4.jpg

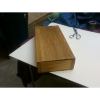
this picture is after i stained the inside and lined with red felt. Also spent a while cutting the inside pieces to make the revolver fit ok. This works on all my colt full size revolvers. tad to small for an 1858. That will be down the line.
2-9.jpg
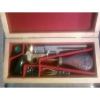
this is after it has been cut and hinged you cant even tell where the cut is and the stain matches perfectly top and bottom.

2k.jpg

Any how it came out very good. camera on my phone stinks need to take some better pics later on. So has anyone else made any.......
 
Measurements if anyone interested.
Top and bottom cut from select grade pine 3/8 thick
Cut on table saw to 16"x7 3/8 "
Sides front and back cut from select pine grade 2 1/2 wide by 3/4 thick

cut on table saw 16"
left right sides cut from same piece 5 3/4"

Use a good wood glue apply a small amount then use finishing nails (1 1/4 Nails) to nail the sides front and back to sides left and right. use a square to make sure the piece is true. Apply a thin amount of glue to the top then use 5/8 finishing nails. Do the same on the bottom. Then let sit for 24 hours.

Now sand the bjesus out of it from 80 grit up to 200 grit. Drive in the finishing nails and use stainable filling putty to fill in nail holes and any imperfections on the box. sand again.

Apply some pre stain conditioner then let dry again. then stain with your favorite color. After that let dry again 8 - 24 hours. For finish i wanted a smooth very low gloss finish. So i used miniwax paste finishing wax. Two coats. After that i let it dry and air out then measure up the table saw to 1 1/2 inches then cut the box into two pieces. Did some minor sanding in the inside then stained and finished. The attached the hinges.

FELT and insert. The inserts i cut from 3/8 hardboard i had lying around. 1 inch strips then cut to fit. glued them together then drilled 1/16 holes and lightly put in some 1/4 inch finishing nails. i then felted everything then glued the bottom of the inserts and set them in place then tapped in some 1/4 inch nails on some holes i pre drilled to toe them in. then glued some very small pieces of felt to cover the holes and presto done.
 
scrat,

You do beautiful wood work, but I do have one question for you. Are you left handed? I'm not asking to be funny or anything, but most of the cases I've seen and have are mirror images of the one you made. Here is what I mean....

022_22.jpg
 
Right handed.

You know i was looking at a whole bunch of pictures and designs and i couldnt figure out what side to put it on. I went with the gun being on the left side as you would be able see the cut away part for the caps. Never knew it was a left hand right hand thing.
 
The 2nd Gen. Colt presentation boxes point the muzzle to the left but then Colt guns are also known to have the less common left hand rifling.
By comparison the S&W Schofield presentation box has the muzzle pointing to the right.
Each manufacturer also makes the rifling twist going in a different direction, and sometimes the direction may even be different for each model.

Colt Left Hand Barrel Twist?

http://www.thehighroad.org/showthread.php?t=569374
 

Attachments

  • S&WSchofield.jpg
    S&WSchofield.jpg
    35.6 KB · Views: 23
Last edited:
Scrat,

Salute! Nicely done....You have a true craftsman's eye for detail...

Wade
 
Last edited:
Scrat,

Nice work, it takes patience that most don't have to fit those dividers in and make them look nice.

Didn't this take away a lot of time from shooting??
 
Status
Not open for further replies.
Back
Top