S&W Lemonsqueezer project pistol

Joined
Mar 19, 2020
Messages
23
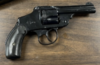
I really love top breaks and it looks like I'm gonna be receiving an older somewhat broken .38 safety hammerless. From the sounds of it, it's got a smashed firing pin return spring and maybe some other firing pin issues. Likely dry fired without empty cases. Found a replacement firing pin bushing/spring/firing pin, my understanding is that the firing pin requires fitment?

The grips are broke and I was wondering if anyone knew what size grips they were, I've seen one with J-frames grips and was wondering if they were compatible, looking to make put MD elk grips on it. I'll be sure to update the thread with some photos when I receive it in a couple weeks. Thanks for any information you can send my way!

I'm interested in having it cut down to a 2" or 1.875" barrel and would like the people's opinions on that, I understand the bicycle guns are subject to alot of fakery and I'm not looking to do that, just to have a bicycle gun for my own enjoyment without paying the premium of the authentic ones. Are there any smiths that work on these old double action Smiths? I've seen a thread on the colt forum where a member used a hacksaw to make his Iver Johnson model but would rather not do that.
 
Last edited:
-I failed in reading comprehension on this. I missed that you are talking about a S&W and not an Iver Johnson. I still believe a simple hacksaw and some filling is the way to go for a barrel shortening. You will only need a pin punch and hollow ground drivers to remove the firing pin on a new departure/lemonsqueezer. If i remember correctly you do need to remove the side plate but it’s an easy job otherwise.-
 
Last edited:
A few photos might be helpful. Is it the same model shown in this video?


That video is what made me want one with stag grips! That one is a 1st model and the one I'm buying is a 4th or 5th model with the T latch, don't have the serial to tell for sure. Screenshot_20230210-181046.png
The pictures I have are pretty horrible, but from them I'm guessing it's a re-blue, doesn't have the case hardened trigger which to my understanding they had. Seller says the firing pin won't retract and stops the cylinder from revolving hoping I can just do the spring and bushing. Shouldn't be too hard I've got all the tools and I'm a reasonably competent with this sort of thing.
Screenshot_20230210-181643.png
 

Attachments

  • Screenshot_20230210-181046.png
    Screenshot_20230210-181046.png
    1.7 MB · Views: 2
I forgot to mention, the New Departure does in fact use the same grip frame as a modern Jframe. There’s a lot of different grips that will work, however if you want replacements for the original style midway has them here:

https://www.midwayusa.com/product/1003996082?pid=172570

These are new made plastic whereas the originals are hard rubber but I have a set of them on my S&W Perfected model and they work great.

index.php


You may have to sand the inside flat of the grips to get the best fit but they are made slightly over-thick to accommodate this.
 
-I failed in reading comprehension on this. I missed that you are talking about a S&W and not an Iver Johnson. I still believe a simple hacksaw and some filling is the way to go for a barrel shortening. You will only need a pin punch and hollow ground drivers to remove the firing pin on a new departure/lemonsqueezer. If i remember correctly you do need to remove the side plate but it’s an easy job otherwise.-

Hack sawing a barrel on a revolver just seems wrong to me! A shotgun barrel sure but it seems odd to do it on a revolver. If I had access to a four jaw chuck probably wouldn't be too bad, at least it'd know it was straight and could put a nice crown on it.

I forgot to mention, the New Departure does in fact use the same grip frame as a modern Jframe. There’s a lot of different grips that will work, however if you want replacements for the original style midway has them here:

https://www.midwayusa.com/product/1003996082?pid=172570

These are new made plastic whereas the originals are hard rubber but I have a set of them on my S&W Perfected model and they work great.-

I'd seen the midway replacement ones, might go that route or get j frame stags trimmed to Lemon sizes depending on what condition it is in when I receive it and fix firing pin issues.
 
Hack sawing a barrel on a revolver just seems wrong to me! A shotgun barrel sure but it seems odd to do it on a revolver. If I had access to a four jaw chuck probably wouldn't be too bad, at least it'd know it was straight and could put a nice crown on it.


I'd seen the midway replacement ones, might go that route or get j frame stags trimmed to Lemon sizes depending on what condition it is in when I receive it and fix firing pin issues.

You would chuck it up and use a lathe? I suppose that would work, but it’s an awful big production and you would be subjecting the old girl to a pretty violent process.

It’s pretty easy to set up a top breaks barrel in a simple vise. Leather jaw covers would be best but plastic might work alright. Cardboard is not good enough as the little teeth marks on my Iver Johnson’s barrel can attest.

07445BF0-5E31-46E9-96AC-EF70B58C92D6.jpeg

I specifically went for a Ruger SP101ish contour. I simply cut it off as squarely as I could eyeball using a hacksaw. I then used files and went slow taking off a little at a time until I was satisfied with its contour and straightness. I finished up by using my trusty Lee case mouth chamfering tool to give it just the most basic crown.

I don’t know what you have in mind for a front sight but consider me a fan of drilling (and if you want to be fancy, tapping) for a brass bead. A simple 1/8” deep hole is much more simple than trying to cut a slot for a blade, potentially more durable, and very good for quick acquisition.

Here’s that Iver Johnson compared to my S&W. I figured the visual comparison might help your planning.

DD7BAB3F-059B-453F-9489-AD63FD5A43F1.jpeg
 
Last edited:
Found a replacement firing pin bushing/spring/firing pin, my understanding is that the firing pin requires fitment?

Are these new parts (Jack First) or used parts ( Numrich)? If new they will all need fitting as they pretty much come oversize in all dimensions. If used you will just have to wait and see.

It is unlikely that the bushing in your revolver will need replacing and i wouldn't unless you have to. Fitting a new or even a used bushing will be tedious due to its circular shape and small size. A new pin will likely take some fitting around the 'barrel' section (for lack of a better term) and the taper from the barrel section to the pin section. At least the firing pin has a section to grag/hold.


You will only need a pin punch and hollow ground drivers to remove the firing pin on a new departure/lemonsqueezer

The thinner the pin punch the better. It has to enter at an angle to punch out the bushing and one to thick can get bound in between the bushing channel and the frame.

hoping I can just do the spring and bushing.

It is possible that the spring broke and has the pin in a bind. You might get lucky and just have to replace the spring.

Be sure to check if the pin is bent. It doesn't take much of a bend there to bind it up against the hole in the bushing. Trying to close the latch on a protruding firing pin could bend an already bound firing pin.

Here is a recent thread on this very subject.

https://www.thehighroad.org/index.php?threads/s-w-new-departure-firing-pin-sticking.914787/
 
Thanks for all the information, the firing pin appears to lack a spring entirely or is broke. I'm hoping the bushing is fine and same with the pin. Think when I have it apart I'll chuck up the pin in a drill and see if it has any cant to it like Johnm did, hoping it's not bent. The FFL I transferred through had some old .38 s&w which I snagged so that was nice. It's been PAINTED with some thick enamel paint. Rifling looks pretty rough and dirty, I'm not sure what a good example with strong rifling would look like. Here's some pictures for you all. I think I will end up doing the hacksaw and file route. PXL_20230223_194848981~2.jpg PXL_20230223_184147806~2.jpg PXL_20230223_193352360.jpg PXL_20230223_193344415.jpg PXL_20230223_193055421.jpg PXL_20230223_184250418.jpg PXL_20230223_184228586.jpg PXL_20230223_184215185.jpg PXL_20230223_184133368.jpg
 
Are these new parts (Jack First) or used parts ( Numrich)? If new they will all need fitting as they pretty much come oversize in all dimensions. If used you will just have to wait and see.

It is unlikely that the bushing in your revolver will need replacing and i wouldn't unless you have to. Fitting a new or even a used bushing will be tedious due to its circular shape and small size. A new pin will likely take some fitting around the 'barrel' section (for lack of a better term) and the taper from the barrel section to the pin section. At least the firing pin has a section to grag/hold.


The thinner the pin punch the better. It has to enter at an angle to punch out the bushing and one to thick can get bound in between the bushing channel and the frame.


It is possible that the spring broke and has the pin in a bind. You might get lucky and just have to replace the spring.

Be sure to check if the pin is bent. It doesn't take much of a bend there to bind it up against the hole in the bushing. Trying to close the latch on a protruding firing pin could bend an already bound firing pin.

Here is a recent thread on this very subject.

https://www.thehighroad.org/index.php?threads/s-w-new-departure-firing-pin-sticking.914787/

Thanks! That's tons of great information, I'll be ordering a Jack First pin and spring today, the fitting for the pin sounds very minimal! Looks like you got a nice little .32.
 
What a fun project! Keep us posted on your progress, with more pics! Incidentally I have no idea how important cosmetics are to you, but I agree it looks like bubba got in there with a paint brush at some time, and there's pitting under the paint. I bet it'd look more gun-like if you got rid of that.

UPDATE I meant get rid of the paint, not the pitting. Pitting is character.
 
Last edited:
Quick update, got the jack first pin and spring in now, firing pin was broken. I just dropped them in and did zero fitting, seemed to be enough protrusion when I checked it outside of the gun, but was unable to compare it to the original. Next step is going to be paint remover, or lacquer thinner. Possibly try paint stripper before I move on to any kind of abrasive i e blasting
PXL_20230305_000255186.jpg Very easy to do everything otherwise. The side plate was somewhat stuck, took a lot of tapping, thinking that's from the enamel paint.
PXL_20230305_000542782~2.jpg


Not sure if my firing is getting enough protrusion, I put a bit of paper in-between my snap-cap and it seems to be fine? Would appreciate Johnm1 thoughts on that. Might just need to get some brass and try it with primers only. PXL_20230305_001615070.jpg
 
Would appreciate Johnm1 thoughts on that. Might just need to get some brass and try it with primers only.

I apologize. I didn't see your request. If you put the @ symbol in front of someone's handle it will send a notification to that person.

The impression on paper looks good enough. There is a measurement but I don't know what it is. I always function test with primer only cases. If it fires it's long enough. Yours has a rebounding hammer so unless it peirces the primer or leaves a reall deep impression it isn't too long. Make sure the rebounding function works. The firing pin should not protude when at rest. As best I can tell, the rebound is a function of the mainspring geometry/tension. Make sure the mainspring tension screw is completely tight.

If you have a bullet puller it only takes a moment to make 5 primer only rounds.

We'd all like to hear an update.
 
Back
Top