I learned an important lesson this last week. The specifics are related to the series of posts titled "Tale Of..." but I think the concept is worth repeating here for any work on antique or older firearms that need repair.
In all three of the threads titled "Tale of..." I have had issues with the rear sear of the Smith & Wesson double actions not holding on the single action notch. I was able to correct this on the 32 double action and one of the 38 double actions. But I didn't know how I did it. The problem was intermittent and showed up sometimes when reassembling that particular firearm. One of the 38 double actions and my 44 double action can both be pushed off with varying degrees of force. The Assumption was that either the rear sear or the single action notch had been worn to a point. But I no longer think so. And here's why:
Initially the first 38 double action would hold on the single cock notch but could be pushed off. The second 38 double action would not hold at all on the single cock notch. I was able to find a replacement hammer and initially it too would not hold. When I went back to the original hammer I noticed that the hammer stud was loose. I tightened the hammer stud and installed the first Hammer that would not hold at all. And low and behold, not only did it hold it could not be pushed off.
Both of the 38 double actions have been cycled hundreds of times and last week the first 38 double action would no longer hold at all. I disassembled and retightened the hammer stud which was only marginally loose. But the act of tightening the hammer stud returned the first 38 double action to the point where it would hold on its own. It can still be pushed off though. So I have just returned it to its previous position and level of function. My thoughts are that the looseness in the hammer stud allows the hammer to rotate in the plane that should be parallel to the rear Sear. Thus reducing the area in which the rear Sear contacts the single cock notch.
Whenever work slows down I will be testing new and or different Hammer studs to see if I can improve the function. I suspect once I find a hammer stud or a hammer stud position I will be using Loctite to hold it in that location. Lots of testing yet, but I think I can get all of these to full function without push off. I figure there a couple of ways the hammer stud/hammer could cause this issue:
- the hammer stud is bent - unlikely. 2 of the 4 have new aftermarket hammer studs including the 44 that can be pushed off
- the threads on the stud that engage the frame are worn and allow the stud to wobble or even lock in place out of square - unlikely
- the threads on the frame that engage the hammer stud are worn and allow the stud to wobble or even lock in place out of square - unlikely
- the part of the hammer stud that the hammer rotates on is worn - very possible as this is a surface that is worked every time the firearm is cycled
- the hole in the hammer that rotates around the hammer stud is worn - again possible as this is a surface that is worked every time the firearm is cycled
- a combination of any/all of the above
EDIT TO ADD: the rear sear could be out of alignment with the single cock notch due to a bent pin or the pin holes being misaligned or wollowed out.
There are other things that can cause the hammer/sear to not engage well including a poorly machined or worn sear or worn single cock notch. The one thing that leads me to believe that I'm dealing with a wear issue is that each of the 4 firearms I'm working with cannot be pushed off when the sear is engaged but the mainspring is not installed. Apparently everything lays in the right position when the mainspring is not installed. It is only when the mainspring is installed and imparting significant force on the hammer that the misalignment appears. At least for now that is my supposition.
The "Something Moved" concept is probably something that any experienced gunsmith would have suspected when malfunctions are intermittent. But I thought it was worth mentioning here for those that Tinker like I do.
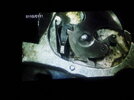
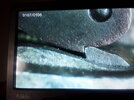
For orientation here are some pictures


Last edited:

