Shanghai McCoy
Member
To put it in the vernacular of my 13 year old daughter...")
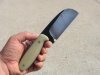
"That Is Awesome."
Thanks Sam.
"That Is Awesome."
Thanks Sam.
A cheap band saw would be "better" and can be had at pawn shops for not that much. Heck, a slightly modified porta band can be had for even less.

Couple craftsmanship with genius and you get Sam C!

Tak-Toku...
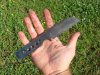
I'll be looking forward to seeing the finished version of that bad boy.
.
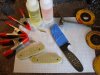
BTW, what's your epoxy preferance there? I usually get by with the standard Devcon 2 ton but I'm always open to suggestions.

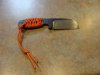
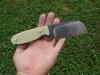
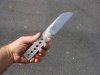
Amazing skill, nice work.
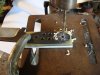
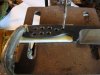
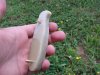
It looks like your furnace is simply refractory brick stacked up with a heat source.
What might that heat source be or am I missing something obvious.
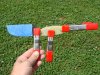
http://www.harborfreight.com/propane-torch-91033.html