Van's gun blue- school me up

Status
Not open for further replies.

FL-NC

Member
Joined
Feb 10, 2016
Messages
8,736
Location
Fl panhandle
I have a Remington model 11 that is badly in need of a face lift. There is almost no bluing left on the metal, and the wood is really bad too. In fact, the forearm looks like the last owner had acetone on his fingers the last time he handled it. The metal is so bad, I need to frequently oil the exterior to prevent it from rusting inside of my house- surrounded by other guns that never rust. Oddly enough, that model 11 is mechanically sound and reliable (after I cleaned out probably decades of crud from inside of it). I know what to do for the wood, but I'm planning on a DIY cold blue- what is the verdict on this Van's stuff? Is it worth a hoot? It looks really easy to do, and I have everything I need except for the actual blue. I'll be doing the barrel and the receiver, along with some small screws and the magazine cap. It looks like this stuff is only available in 4 ounce ($13) or 32 ounce ($40) bottles. My $ says I need the 32 ounce, but at the same time, I don't want to have 26+ ounces of this stuff laying around doing nothing since I'm not planning on making a habit of doing this. Any pearls of wisdom on this matter will be appreciated.
 
I've never used the Van's bluing method but I have used a couple other cold blue solutions. For a single gun a 4 oz bottle should be enough as long you don't saturate a massive cloth with it and use smaller ones instead.

Another option to consider is slow rust bluing if you have something big enough to boil the barrel in. I have successfully used this method in the past. https://www.reddit.com/r/Bladesmith...ody_interested_in_a_quick_dirty_howto_for_at/
 
I would do a lot of prep work and spray paint it with Brownells Aluma Hyde I have done some old Ruger 10/22 s with it. I like it better than bluing which will never look like factory blue and doesn't cover and major flaws in the metal
Even better would be Duraacoat but it's expensive one time use, None left for any later touch ups.

Back to bluing, get whatever is the best price, They have it on Amazon as well.
 
I had an old 870 gifted to me like your problem there was little bluing left and minor pitting I had it parkerized and my sons have used it in the bay many times hunting ducks and it has held up great.
 
41E62753-0056-4B7F-A3A6-1DB04981D3B8.jpeg I have one of those Uberti Cattleman with the cheap "Hombre" finish. I polished it out and used Van's to blue it. I followed their detailed instructions for prep to the letter and think it came out pretty good.

I didn't go for a high polish on the gun, just wanted to knock down the irregular, almost crinkle, finish. I think the Van's has held up pretty well. One 4oz. bottle was sufficient to complete the entire revolver.

Having used it, I’d recommend it.
 
If the whole gun needs blue: send it off somewhere or buy tanks and heaters and chemicals and do it yourself. Parkerizing is also fun if appropriate to the piece.

I use the various cold blue/black All The Time, but for repair/replacement screws, pins, and the usual scratch or wear. Really helps dress stuff up, but hard to do well on large surfaces. Also, it is quite not a rust preventative. Have to keep it oiled still. More oil than for hot blue finishes to stay happy even. (I'd do small parts with the blackeners / blue chemicals still, as it is hard to get all pins and screws to take paint well, easier to touch up from screwdriver usage once in place, etc).

If purely a working gun and you need no authenticity, then rattlecan it. I have used every sprayable finish ever, and quality spray paint (Gillespie/RAPCO and whoever doe the base for RAL coded MyPerfectColor are the best of the good tier) is as good or better than any of the bake on, including Cerakote. You can do fun stuff with colors also. Want to look authentic? Thin layer of bright blue, then overcoat when dry (not cured) with a dark gray. Will look like old worn blueing but be entirely weatherproof now. You can also go to the custom color places and get really subtle coloring, pick from up to 5 sheens.

For anything, including cold blue: prep, prep, prep. Disassemble, and scrupulously clean. Then, make a clean work surface (fresh paper etc) and put on gloves, clean again with denatured alcohol. Let air dry and as soon as possible do the application of the finish.

Cold blues can take a bit of almost scrubbing to get to work. Once they start activating (you can see it) it can be good to apply another coat with the brush, to get more chemistry on there while it's working. Watch closely, as /sometimes/ it can etch the surface. If it seems too energetic, wipe a small area off (q-tip) and make sure it's just coloring, not pitting. Otherwise, bubbles and stuff are generally good, it's working. When done, the energetic reaction has stopped or it seems to not be getting blacker, wait a few more minutes, then wipe with a clean (no grease) cloth. You can now see, and the no-grease is to allow you to re-apply to get an even coat, fill spots, etc. When all done, wipe again but not hard, oil, wipe like normal before-putting-in-safe, and leave it out for a few hours to let it soak in and deactivate, then wipe down for real, reassemble, etc.

For paints: after application hang it up and, do not touch for at least 10 days. Do not TOUCH. Don't even look at it lest you be tempted. Curing is not drying, but takes much longer and is a week or two for all likely paints (often, it's not stated on the can so we have to guess).. I have simple painted gun parts that are not just 10 years old with no scratches but things like the shell deflector on an AR upper with no chips through the paint after 10,000 rounds. Cured quality paint, well-prepped, is impossibly strong stuff.
 
Last edited:
If the whole gun needs blue: send it off somewhere or buy tanks and heaters and chemicals and do it yourself. Parkerizing is also fun if appropriate to the piece.

I use the various cold blue/black All The Time, but for repair/replacement screws, pins, and the usual scratch or wear. Really helps dress stuff up, but hard to do well on large surfaces. Also, it is quite not a rust preventative. Have to keep it oiled still. More oil than for hot blue finishes to stay happy even. (I'd do small parts with the blackeners / blue chemicals still, as it is hard to get all pins and screws to take paint well, easier to touch up from screwdriver usage once in place, etc).

If purely a working gun and you need no authenticity, then rattlecan it. I have used every sprayable finish ever, and quality spray paint (Gillespie/RAPCO and whoever doe the base for RAL coded MyPerfectColor are the best of the good tier) is as good or better than any of the bake on, including Cerakote. You can do fun stuff with colors also. Want to look authentic? Thin layer of bright blue, then overcoat when dry (not cured) with a dark gray. Will look like old worn blueing but be entirely weatherproof now.

For anything, including cold blue: prep, prep, prep. Disassemble, and scrupulously clean. Then, make a clean work surface (fresh paper etc) and put on gloves, clean again with denatured alcohol. Let air dry and as soon as possible do the application of the finish.

Cold blues can take a bit of almost scrubbing to get to work. Once they start activating (you can see it) it can be good to apply another coat with the brush, to get more chemistry on there while it's working. Watch closely, as /sometimes/ it can etch the surface. If it seems too energetic, wipe a small area off (q-tip) and make sure it's just coloring, not pitting. Otherwise, bubbles and stuff are generally good, it's working. When done, the energetic reaction has stopped or it seems to not be getting blacker, wait a few more minutes, then wipe with a clean (no grease) cloth. You can now see, and the no-grease is to allow you to re-apply to get an even coat, fill spots, etc. When all done, wipe again but not hard, oil, wipe like normal before-putting-in-safe, and leave it out for a few hours to let it soak in and deactivate, then wipe down for real, reassemble, etc.

For paints: after application hang it up and, do not touch for at least 10 days. Do not TOUCH. Don't even look at it lest you be tempted. Curing is not drying, but takes much longer and is a week or two for all likely paints (often, it's not stated on the can so we have to guess).. I have simple painted gun parts that are not just 10 years old with no scratches but things like the shell deflector on an AR upper with no chips through the paint after 10,000 rounds. Cured quality paint, well-prepped, is impossibly strong stuff.
I just did a browning A5. used black appliance epoxy spray high gloss. came out great
 
I did my first refinish of a gun (a rusty pile of parts deeply sporterized Lithgow SMLE III*) in the dorm at college, finished in appliance epoxy. VERY shiny. Since then have used it again, and if oversprayed in matte black when dry but not cured you can get a semi-gloss sort of finish that looks a LOT like a normal blue/black smooth gun look that is very rugged, for the cost of two rattlecans and a couple weeks of patiently waiting.
 
Apparently you can use furniture polish to 'cure' rattle can paint more quickly.
https://www.creeklinehouse.com/how-to-get-your-spray-paint-projects-to-dry-almost-instantly/

Was painting my Henry zamac receiver cover with some krylon hammered finish paint and managed to drop it :uhoh: 
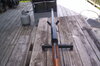
after the second coat. Scuffed up the dings and kept painting (3-4 more coats). I had heard about using furniture polish to speed things up and decided to try it with some Johnsons paste wax. Let it air dry for 2 days then used the wax like a rubbing compound. Lost the last coat or two doing this but the finish was ready to be handled.
IMG_0539.jpg

The dark line occured when I got too close with the nozzle, two more coats of paint and it was gone until the polish...
 
I did my first refinish of a gun (a rusty pile of parts deeply sporterized Lithgow SMLE III*) in the dorm at college, finished in appliance epoxy. VERY shiny. Since then have used it again, and if oversprayed in matte black when dry but not cured you can get a semi-gloss sort of finish that looks a LOT like a normal blue/black smooth gun look that is very rugged, for the cost of two rattlecans and a couple weeks of patiently waiting.
I used rustoleum. wasnt real shiny and looks like deep blue finish almost. if I dont mention people I showed it to think it is blued
 
Never correct anyone who thinks your gun is more expensive than it is :)

Anyway, that is — even with the shadow line — a great example of spray paint as an easy finish. Looks 100% convincingly like bare metal or plating, at least in that photo to me.
 
In that case I would probably send it off somewhere for Sarah coding or professional bluing. I've done plenty myself on old guns and while I think it works for touch ups and things I've never been able to quite get an original look from it.
 
here is an A-5 that I redid that was totally camoed even the stock. used black appliance epoxy on the metal 011.JPG 011.JPG 012.JPG
 

Attachments

  • 010.JPG
    010.JPG
    110.6 KB · Views: 4
Status
Not open for further replies.
Back
Top