1933 commercial Government Model do it yourself repolish/reblue?

Status
Not open for further replies.
Joined
Jan 31, 2004
Messages
4,238
Location
Florida, CSA
Well, maybe not reblue it myself, but what about repolish it myself. Is this something a non-gunsmith can do. Will it save me money over having it done by a 'smith, or should I just have the smith do both the repolish and reblue. Its not a collectors item, by the way. It's already had a bad reblue, looks like a matt black. Want it to look more like it did when it left the factory back in '33. Is this too much for a non-gunsmith to do?
 
I am NRA Mechanically Inept and am not qualified to teach you how to polish over the Internet. But just to get things started... Is the present reblue so bad nothing will hurt? Or are the flats still flat, the rounds still even, the pinholes not dished, and the markings legible?

If the former, you can do a lot with a range of sandpaper grits and a piece of plate glass to polish the flats. No problem on the slide, but the grip screw bushings and plunger tube would have to come off the frame. Polishing the contours would take care and some technique and tools, but that is what Colt did in 1933. See picture of a restored 1932 gun in the Photo Galleries at
http://www.restoration-gunsmith.com/

The current style of polished flats and matte contours would be easier, on a gun that could not be brought back to original appearance. Just have the 'smith bead the contours and you polish the flats. I don't know whether it would be better to have the 'smith bead blast the contours first, so you could polish flat right up to the edges with care not to mar the beaded areas. Or maybe do it the other way 'round; polish and mask off the flats to get the curves beaded.

If the metal is good under the old refinish, or is even somewhere in between, it really deserves a restoration grade refinish, not a buff and dip at the local shop. Turnbull is the best known but Bill Adair (site above) has a tremendous reputation amongst 1911 collectors.

Do you have pictures you could post to let the real experts judge what is reasonable to try?
 
I approached Cylinder and Slide about doing the job, but the 'smith's attitude was that Colts from this time period are basically pieces of junk and I shouldn't even shoot it, or it will fall apart. Instead, I should either buy a new Colt Series 70 or the basic model that they offer at Cylinder and Slide. All I wanted was a repolish and reblue, and the guy makes me feel like I need to just throw my gun away because the steel is no good, being from 1933. :(
 
What a bunch of nitwits.

I'd say it is able to be restored to new appearance if you don't mind throwing some money at it. The slide looks like it was buffed pretty hard but not enough to erase the roll marks. The frame looks better, I can't see that the pinholes are dished out.

A good general shop reblue would look better than it is now... but it would still look like a reblue.
 
Talk to A shop about it.

I have worked in a Blue shop, and I believe you could polish it yourself by hand and have a a dip job.
Find A shop and get a firm price quote.
Practice on some flat and curved steel, such as a old single shot shotgun.
I'd guess you want a 400 grit finish or better.
Lots of older books on the subject.
 
There is some rationale in saying that 1930's Colt autos are not as good as the ones today. The slides were not hardened, and areas like the slide stop notch were not spot-hardened. Still, those are concerns only if the gun is to be used a lot, as in full scale target shooting, where thousands of rounds a year are the norm. For normal use, there should be no concern in that area.

Jim
 
Old Steel

Whenever I hear somebody refer to the older pistols as "junk" I have to take a breath and pause. Yes, they were soft. No...they're not junk, and have probably held up for thousands of rounds before many of us were born. That's where scoring an old pistol gets dicey. No way of knowing what the history is, and how many rounds have been through it.

If there have been too many, you can usually tell by looking at the breechface and the locking lugs in the slide, and ...if it has the original or era-correct barrel...its locking lugs. The breechface may show some deformation
around the firing pin hole that comes from the repeated battering from the case
at the instant of firing, when the case is slammed into the breechface. In some, it may be bad enough to trap the firing pin in the forward position. This problem was addressed sometime in 1936 by a modification to the slide and installation of a hardened steel insert that's known as the "Recoil Face" or "Recoil Plate." This was present in all pistols produced by the five WW2 contractors, and can usually be seen if the breechface is clean. It will appear to be a circular machining mark. This practice was discontinued in late 1946 when Colt began to fully harden all slides.

Locking lugs that have been deformed by overuse will take on a stair-stepped appearance. This is most often noted on barrel lugs on the front face, but often appear on the corresponding rrear faces of the slide's lug walls. Deformed barrel lugs also usually have a little flanging on the top, front corners unless someone has noticed it and dressed the flanging with stone or file. This deformation can be heavy and obvious...or it can be minimal, and require careful inspection after thoroughly cleaning the area, under a good light.

For this reason, I recommend a GO/NO GO headspace test before firing the old warhorses. If the pistol fails...goes to battery on the NO GO gauge...take a close look at the locking lugs. That may be the cause. If only the barrel is
damaged, it can be replaced. if the damage is also in the slide...it's a wall-hanger.

Slide deformation and wear as noted wasn't too much of a concern in military pistols, since the Army Ordnance Department probably procured three or more spare slides for every complete pistol that was delivered, and whenever a slide and barrel set was deemed unserviceable, it/they were replaced. Deformed slide and barrel lugs caused the pistols to fail the maximum headspace check, and thus taken out of general inventory until repairs were made.
 
Thanks, Tuner, I will strip it and look at the lugs in the slide to see if there is any deformation. I will also inspect the breech face. I do know it shoots. I've shot a few hundred rounds of FMJ through it without a problem of any kind. I only paid $250 for the gun so it's not like I have a lot of money in it at this point. Back when the Sistemas were first coming into the country, I quickly ordered one, because the $250 price tag was just irresistible. I opened the box and to my surprise was not a Sistema, but a commercial Colt Government Model dating to 1933. No, I didn't call the importer to complain about being shipped the wrong gun. :)
 
Ok, took a picture of the lugs and the firing pin hole. What's the verdict?
 

Attachments

  • Government Model locking lugs.JPG
    Government Model locking lugs.JPG
    61.7 KB · Views: 56
  • Government Model firing pin hole.JPG
    Government Model firing pin hole.JPG
    37.1 KB · Views: 51
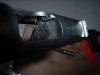
looking at the pic, the pistol appears to have a mat or brush finish. It also appears that the finish may be black parkerized as you can visibly see where the front portion of the slide was heat treated (hardened) at the factory. If you can polish it, you could blue it also. Looking at the only pic of the slide, it was done on a wheel and the sharp edge was lost. The frame edges on the other hand look decently sharp. If you want to pursue this, I would completely disassemble the pistol, go to a lowes or home depot and buy a 1'x1' square polished marble or granite tile to use as a polishing table. Then get yourself some aluminum oxide (auto grade) sandpaper, it's black and is available at walmart start with coarse in the 100s(if there is no pitting, start with 240) working up 240, 360, 500 grit. If you want a Python grade shine, work on up to 1000 grit.

The process:

For the slide, place it in a vise between wood blocks making sure to not over tighten...all you want is snug. Polish the top using shoe shine method with the sand paper. For the sides of the slide, with the sand paper on the tile, place the slide FLAT and run it across the paper front to back going in one direction. This will return the missing sharp edge to the slide. Pay attention after every few strokes to make sure you are not obliterating the lettering/pony nor the serrations (although these can be sharpened using a small needle file if required).

Polish the frame using the same technique.

Bluing Recipe for doing small jobs such as a pistol:

DO NOT ATTEMPT TO PLACE THIS SOLUTION IN an ALUMINUM PAN or PLACE ANY ALUMINUM ITEMS IN THE SOLUTION AS IT WILL BE DESTROYED!

2 parts Sodium Hydroxide (lye) about 2lbs
1 part Ammonia Nitrate about 1lb
distilled water have 2 gallons on hand
XXX Steel wool
small spool of steel wire
glass candy thermometer that will register at least 300*F
2 metal pans that the pistol will easily fit into and are deep enough to completely submerge the pistol. 1 is for the solution, 1 is for water

Make sure you are out doors in well ventilated area when first mixing solution as it will give off very strong ammonia fumes.

Wear eye protection!


using a steel deep pan, place the lye in first then add the ammonia nitrate. Pour in a small amount of distilled water, just enough to moisten the mixture. There will be a chemical reaction with the mixture reaching boiling temps. Once this occurs and the fumes decrease and the solution is no longer volatile, slowly add more distilled water completely covering the salts. You want the mixture to be deep enough so that the pistol/parts can be completely submerged.

Heat the solution to 290* (Make sure solution is at 290* and no more than 300* or the part will come out red/purple rather than blue/black)
using piece of wire tied to the part, submerge the part into the solution so that it is completely covered but suspended so that it doesn't rest on the bottom of the pan to avoid heat spots. Leave the part in for 20 minutes, remove and place immediately into water pan allowing to cool. Clean part gently using XXX steel wool and dishwashing detergent (dawn works best) examine part to make sure it's satisfactory, if not rinse the part with water and repeat the process. Spray each completed part down with WD-40. Once the job is complete, fill water pan with fresh water and add a box of baking soda and boil parts in it to avoid any bluing creep. Rinse with clean water. Following this, dry all parts and oil with a quality gun oil such as BreakFree. Re-assemble weapon.
 
Thanks for all the advice. I think I might attempt the polish on my own, but I think I will send it out to be reblued.

So I am assuming the picture of the lugs and the firing pin hole do not indicate a problem, right?
 
Earplug has a good point, it would help to learn the techniques on something less valuable than a Colt.

I am not Tuner, but the locking lugs and breechface look crisp. Them Argies didn't practice much. Couldn't hold off the Brits, could they?
 
Pix

I think I can see a little light flanging on the first and third barrel lugs. Seating/equalizing setback, and nothing out of the ordinary. A tiny bit
on the third slide lug. (See the thin, shiny line at the front corner?) Normal for an older pistol that's got a few hundred rounds on the clock. If it passes the NO GO headspace test, it's shootable...but I wouldn't run 10k a year through it. For normal use, it'll work. All things in moderation, y'know.

Breechface looks good...another plus. The gun apparently hasn't been overused or abused. Good pistol, Hawk. Enjoy!:cool:
 
Just saw Road To Perdition again. When the mob boss's son kills Tom Hanks' character's wife and son, there is a close up of a Government Model that looks identical to mine. Its finish doesn't have polished flats. In fact, its finish looks very much like that on mine. Is that a commercial Colt Government Model from that era?
 
Status
Not open for further replies.
Back
Top