
Riomouse911
Member
I have a batch of K- frames that I love shooting, but each one has a bit different trigger feel. I decided to buy a bunch of the Wolff spring kits to improve the trigger pull and sort of “standardize” the feel with similar parts. These are range guns and not duty guns, so I bought some K-L-N frame no. 2 reduced power mainspring and rebound slide spring kits from Wolff (and a few other things, too). After waiting about a month, they came in the mail the other day.

At first I thought about paying someone to install the kits, as I hadn’t done this type of work on revolvers before. However, I watched the You Tube videos of Larry Potterfield and Jerry Michulek and got the gist of what it entails. They make it look super easy, but there wasn’t a whole lot to it so I got to work.
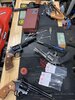
For those who may not have done this stuff before here are a few pics of what I did that sort of deviated from the two videos.

After removing the side plate (keep the screws set in order so they go back in the right holes) and removing the mainspring by undoing tension on the screw on the grip frame, I cleaned out the innards using q-tips. The guns sure did get a bit of crud in them after years of use.
I used a small flathead screwdriver to lift the rebound slide from the frame. I held my thumb over the end as I raised it past the pin that retains the spring so it wouldn’t fire across my garage.
When the rebound slide was removed I cleaned it and very lightly sanded the bottom edge smooth using 2000 grit wet-dry from the auto parts store set flat on my workbench to smooth the surface. The bottom is smooth as glass now.


I didn’t do any other surface smoothing. I am not confident in my ability to smooth only what’s needed, and then reassemble all the small parts.
The kits came with 13-14-15 pound rebound slide springs. I selected the 13 lb rebound slide spring after reviewing a bunch of threads on several forums.
I did not have the rebound slide spring tool that both Larry and Jerry used, so I got a wide flathead screwdriver and used this to compress the new spring into the rebound slide in order to get the spring to rest against the pin. (The spring tool would make this easier, I may just buy one as I perform this task for the rest of my guns.)

A light touch of lube on each pin, a q-tip to clean up any excess, and the guns went together so easily it’s scary.
Now the DA pull is a touch over 8 lbs and SA is at about 3 pounds 7 oz. Best of all it’s smoooooth!

I can’t wait to hit the range and see how my groups improve.
Stay safe.
At first I thought about paying someone to install the kits, as I hadn’t done this type of work on revolvers before. However, I watched the You Tube videos of Larry Potterfield and Jerry Michulek and got the gist of what it entails. They make it look super easy, but there wasn’t a whole lot to it so I got to work.
For those who may not have done this stuff before here are a few pics of what I did that sort of deviated from the two videos.
After removing the side plate (keep the screws set in order so they go back in the right holes) and removing the mainspring by undoing tension on the screw on the grip frame, I cleaned out the innards using q-tips. The guns sure did get a bit of crud in them after years of use.
I used a small flathead screwdriver to lift the rebound slide from the frame. I held my thumb over the end as I raised it past the pin that retains the spring so it wouldn’t fire across my garage.
When the rebound slide was removed I cleaned it and very lightly sanded the bottom edge smooth using 2000 grit wet-dry from the auto parts store set flat on my workbench to smooth the surface. The bottom is smooth as glass now.
I didn’t do any other surface smoothing. I am not confident in my ability to smooth only what’s needed, and then reassemble all the small parts.
The kits came with 13-14-15 pound rebound slide springs. I selected the 13 lb rebound slide spring after reviewing a bunch of threads on several forums.
I did not have the rebound slide spring tool that both Larry and Jerry used, so I got a wide flathead screwdriver and used this to compress the new spring into the rebound slide in order to get the spring to rest against the pin. (The spring tool would make this easier, I may just buy one as I perform this task for the rest of my guns.)
A light touch of lube on each pin, a q-tip to clean up any excess, and the guns went together so easily it’s scary.
Now the DA pull is a touch over 8 lbs and SA is at about 3 pounds 7 oz. Best of all it’s smoooooth!
I can’t wait to hit the range and see how my groups improve.
Stay safe.
Attachments
Last edited:


")


