Lee Six Pack Pro at 4k rounds

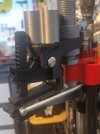
Yeah, a part in the priming system wasn't formed right and was making the primer pusher click or jump when it was almost fully forward. I ended up having to round off a part or two to get it to operate smoothly.
One of the other pieces in there was miss-shaped and I had to reshape it to get it to work. Took me all afternoon to figure that thing out and what was causing the problems.
When I had called about it I was told by the technical support guy to heat it up in boiling water and reshape it to make it work.

There was no, "OH, we'll send you a new part to fix that". That's what I'm used to from working with, well, just about any company I deal with a brand new equipment.
I told him exactly what part it was and what was wrong with it.

I have no brand loyalty, so when someone does'nt support their product. I have no problem sharing what my experience was with the other members. I'm not trying to derail anyone, I'm just stating what my experience was with them from the facts.

I'm big on customer service, from being in machine diagnostics and repair my whole life, and theirs is lacking somewhat, at least with that one technician.
We had no words or arguing. I just told him that I thought the parts should have been replaced and he just didn't say anything from that point forward. So I figured I was wasting my time.

I also got mixed up on which thread this was or I wouldn't have posted my last comments in post 99, so I'll bow out again.
 
a part in the priming system wasn't formed right and was making the primer pusher click or jump when it was almost fully forward. I ended up having to round off a part or two to get it to operate smoothly.

One of the other pieces in there was miss-shaped and I had to reshape it to get it to work. Took me all afternoon to figure that thing out and what was causing the problems. When I had called about it I was told by the technical support guy to heat it up in boiling water and reshape it to make it work.
I will forward this to John Lee via Calvin.

Which press part was it? ABLP or Deluxe APP?
 
Last edited:
a part in the priming system wasn't formed right and was making the primer pusher click or jump when it was almost fully forward. I ended up having to round off a part or two to get it to operate smoothly ... One of the other pieces in there was miss-shaped and I had to reshape it to get it to work ...

When I had called about it I was told by the technical support guy to heat it up in boiling water and reshape it to make it work.
I will forward this to John Lee via Calvin.
Here's reply direct from Andy Lee (You can probably also ask about your gated 5 tube case feeder issue for ABLP):

Andy at Lee Precision - 01/25/2024 10:15 am​
Hi John,​
The only time technical service will recommend what the customer described, is for the bullet feed fingers for the old style Lee Bullet Feeders. The fingers tend to take a set to the open position over time and loose their grip on the bullets. Boiling them restores the initial molded configuration of the part and will provide the necessary tension to retain the bullet.​
In the instance of a primer feed device, this would not be the case. We do not record our phone conversations, so I have no way of auditing what may or may not of been said to the customer.​
If can private message this customer and have him contact me directly, I would appreciate it and promptly get him taken care of.​
Sincerely,​
Andy Lee​
Lee Precision, Inc.​
4275 County Road U​
Hartford, WI 53027​
 
Last edited:
I got the 3D printed case feeder from the Norwegian gent today and installed it on my Six Pack Pro. Setup took about ten minutes.
... The new unit really is all that - it works perfectly and fixes all the foibles of the Lee unit. $35 well spent!
I just received mine to and got it up in no time. There are a lot more subtilties to the design than I thought, so I'll start a new thread to describe them...hopefully with pictures

20240125_164841.jpg
 
Last edited:
Guess what I did? ;)
Ordered the printfiles to see how printing them myself would work......they were cheap....so I thought I'd relieve my curiousity and maybe even be of use to someone. Unlike you guys I didn't have to wait even a day......Will print them tomorrow. I've read the manual and watch the 2 videos. I don't think it would do anything but help sales to show the how to assemble video....wetting appetites here we come:


And if this design is all we hope it could be, I won't mind using it......There are a lot of people smarter than me. He most likely is one of them.:)

Great vid...
Sounds like a professional narrator (AI), as I'm sure that Norwegian inventor doesn't speak English.
Waiting for those who bought the completed/printed version to chime in with a review. :uhoh:
:D
.
 
It's coming, I just have to stop being distracter by...Squirrel :p
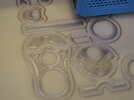
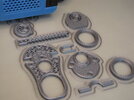
Picture of my printing........another 12 hours to go......decided to try printing all the parts at once. ;) (filament is Zyltec's gunmetal PLA)

IMG_4312.JPG
Bet you can't guess what color filament I printed with last!.....This picture illustrates why I always watch the first layer go down. The red on the two parts just had to be brushed off....somehow I missed inspecting the nozzle area after I changed filament. But you will also notice a red tint in some of the surround (called a skirt). We have skirts to give us the chance to inspect first layer flow and height and catch any problems before it starts the model. Adjust down (called babystepping) until it presses a little flat on top....sort of a hotdog profile, but not so flat that it gets scraped off. Anyway, the idea is to get any tint from the last color out before the nozzle prints actual models.....if the model is small and not much surrounding skirt....then push filament by hand into the printer and out the nozzle until color is pure.
 
Last edited:
Last edited:
It's interesting how the teeth of the Trigger Assembly Lever are printed...just didn't imaging it would be laying on it's side. The base for the single tube feed is really interesting also
Yeah, you have to really pay attention how things lie. I just assumed that his .stl files were based the best way.....sometimes that assumption bites me. Notice in the top right corner.....all those angled shapes are supports to hold up the upper overhangs of that piece that would otherwise be in mid air. 3D printers don't do so well printing in mid air...... the result is a bunch of spaghetti, and eating filament is not the goal.. I try to design parts with the least amount of supports, because so much filament (and time) is wasted, but sometimes it can't be helped. You can print at 45 degrees but that's about it....and that only if it doesn't become top heavy and topple over. (symmetry is important here) Arches usually work if they aren't too large in diameter.

Printing update: 44 percent done....
If you watch it press the arrow alright, but then press the full screen button on the bottom right.
3D printers just keep giving......the print files cost me $5 plus tax.
 
Last edited:
I was surprised at how clean the threads on the bolts were and the texturing on the outside. His parts are printed in PETG

I'll be interested to see if there is much cleanup you'll need to do. I'll likely get the files also. for the minimal cost and to have on hand as parts wear
 
I was surprised at how clean the threads on the bolts were and the texturing on the outside. His parts are printed in PETG

I'll be interested to see if there is much cleanup you'll need to do. I'll likely get the files also. for the minimal cost and to have on hand as parts wear
I only use PLA since I don't have an enclosure, but I don't think there's that much difference....PETG might handle a tad more heat, but I don't have a heat problem in the reloading room.

As for cleanup, there will be some, especially since he has a flat top in the cylinder inside the threads. Did not catch that....he should have domed the top so the stupid slicer wouldn't want to fill it with supports......Here's a video at 67 percent complete......its taking longer than my slicer thought it would....so I may be up late.

The video shows stringing in some of the small holes that can be reamed in a second with a drill bit. You can see minor stringing....hardly any really....look how smooth the surfaces are with this Zyltec Gunmetal filament and the slicer....they like each other. Make the video full screen so you can see the cleanup and smoothness. I'm impressed.

 
Why would a enclosure be required? Air current cooling ?
The enclosure keeps a consistent temperature in the space around the work piece. Temperature swings (HVAC, windows, breezes, etc.) can cause problems with the print warping or collapsing or all manner of problems.
 
I don't know much about it never having even tried it. I've just heard the horror stories from those who went back to PLA because it was so hard to get a decent print in an open environment around the printer......that said, I know some prefer it for some applications. Would like to know more, and was told to start with a printer enclosed and it's way easier.
 
The video shows stringing in some of the small holes that can be reamed in a second with a drill bit. You can see minor stringing....hardly any really....look how smooth the surfaces are with this Zyltec Gunmetal filament and the slicer....they like each other.
Yes, I can see what you're referring to. It is very much what I would have expected to be present. I was surprised how well cleaned up the completed unit I received was. I expected to at least have to smooth the bearing surface of the Trigger Level rod...nope, really slick right out of the envelope. There was no drag between any of the sliding surfaces.

I went with the completed unit because I was too lazy to source the pivot pin (he recommends metal) or the Trigger Release spring (he only gives a metric standard). Plus then I'd know if it wasn't working it would just be poor adjustments on my part
 
Having a little experience printing and using TylerR's feed dies, I was always impressed with the threads and even got some cad instruction from him how to design them....his threads are perfect. All you have to do to clean them up is run a steel die nut up and down a couple of times and its smooth a can be. I expect this Norwegian fellow did the same thing with his before he ships them out. Same with cleanup......he wouldn't send them fresh off the printer without a little TLC first.....I wouldn't.....so not surprised.....in fact I'd be more surprised if he didn't.

But I am impressed so far with his design talents.....smarter than me by a long shot......I sure didn't think of that design solution. Still hoping to find way to combine Tyler's quick change with it....but may be dreaming....we will see. Not that it's a big deal, since I would still want and use the quick change on the APP.
Thanks for your insight.

All that TLC after the printing, plus the included hardware, has me wondering how that Norwegian guy can make any money selling them that cheap.
Adding any hands-on time increases the cost of everything in today's world and is often short-cutted to save costs.
Think of all the guns returned for a malfunction that are remedied with a few strokes of a file.
jmo,
.
 
Last edited:
That has been a reoccurring issue, I think related to the print time.
And sold out because my posting links here and at Cast Boolets sent a lot of 6 pack owners his way to buy these case droppers.
jmo,
.
Yes, I ordered 2 and I think it went out of stock after that.
 
I doubt he's doing it to get rich. He's likely doing it to share with the community, cover his cost, and fund new equipment
Wow, you really think anyone would be that noble? 🤔
It seems someone (GW Staar?) who bought the print files mentioned he has patents for his designs, I'm not sure in what country though.
I know getting a patent costs big bucks in the U.S. and the reason most put "patent pending" on a product to scare off copiers/cloning.
jmo,
.
 
Last edited:
Back
Top