Paco Kelly - Acu'rzr - application jig- (quite long)

Status
Not open for further replies.
Thx for the additional info Rob - most useful and helps make the thread into quite a good reference for folks interested in this.

Your point re the ''sizing'' aspect is one I did not really highlight very much but in fact it is probably the most useful aspect of uniformity - achieved of course quite adequately with just mallet approach. I guess my attempts at uniformity are more re the final profile and thus consistent flight ballistics (consistent drag and axial spin etc).
 
how well would those rounds perform when fired through a suppressed .22
Guesswork Chris but I'd expect them (if modified sub-sonics) to behave just as well or better.

Back in UK bunny hunting days - my Rem semi with suppressor used Win ''HushPower'' sub's ... those were HP's. They were deadly - ''phut'' - zap - ''thwop'' - dead bunny!!!

I really must do some range tests but time is against me right now. I would tho honestly expect - any bonus in accuracy on std velocity rounds, to most probably reflect in modified sub sonic rounds. We will see - eventually.

Any excuse to throw more lead downrange, eh Chris? :D
 
Any excuse to throw more lead downrange
Excuse?? I don't need no *#&^%!% excuse!!! :p Do need to find/make some time tho!

First on list is taking Bonnie to range - she needs practice with CCW snub, amongst other things. .22's may be a ways down the list!

What I need - is some rich doofus - who wants guns (and ammo) tested - on a regular basis - for payment to me in large sums. I would then have found the ideal retirement plan!! :D

Take care dude. :)
 
p95carry: my .02$

I recently purchased paco kelly's tool and the first thing I did was set it up for use with an arbor press and dial indicator. The idea of applying hammer blows of varying force didn't appeal much to me. There would be little consistency from round to round. The DI is mounted using a magnetic base which clamps to the steel base of the arbor press. The DI is positioned over the arbor's ram and very smoothly and accurately measures the amount of force being applied. I am more interested in improving the accuracy potential of various rifles. I've tried the reformed ammo in MkIII's, Biatholon Basic, 10/22, etc, with great results. CCI stingers that couldn't or wouldn't hit a fish in a frying pan (1-3/4") before treatment are now going into the proverbial one hole. I find this rather astonishing. Great Tool.
As an additional note, in terms of accuracy, I believe it is generally accepted by rimfire shooters that a flat nose rimfire bullet is less affected by wind than a round nosed bullet. Which in my experience seems to be the case.
I fired control groups using the same ammo, lot #, rifle, etc, and the best grouping would be in the 1-1/4" to 1-3/4" range. The same ammo after reforming the bullet would shrink down under 1/2", one ragged hole. Not bad for hunting ammo. I found that applying too much force would open the groups up to about 3/4". So, ideally, it seems you should apply minimum force while still expanding the bullet to maximum. For me this worked out to .060 using the dial indicator from zero.
 
Call me dense, but what prevents the downward force from driving the bullet deeper into the case? Neat idea, but I'm missing something here.
 
Legionnaire, the .22 LR uses a "heeled" bullet. The base is smaller than case interior diameter, but the body of the bullet is equal to the case outside diameter; I believe the case would crumple before the bullet could be "driven" past the shoulder at the base of the bullet.

Compare a .22 LR to any modern centerfire round, or to the .22 WMR. You can see and feel that the bullet fits "inside" the case; with the LR, the appearance and "feel" will confirm the bullet is the same diameter as the case.
 
Got it; thanks. As soon as I read your post I was able to visualize this. Very interesting process described here.
 
harley - welcome! :)

Excellent idea - one I had fleetingly considerd but abandoned because I had no suitable press available. I do have a 2 ton ''fly press'' - the deal with the large lever and ball at top of a thread. It works very well for pressing bearings and the like but is a tad lacking in ''fine control''... the down force is hard to control at the levels such as you would used.

I could I guess even try setting up the drill press with a DI - hmmmm - maybe even try that too sometime. <thinks>.

Thus - I went for the ''repeatable energy input'' approach - which tho not perfect does at least allow for some repeatability. Believe it or not - I STILL have not gotten to making up a batch of test rounds - even after all this time. I will tho and am pleased to hear of your apparent success.

I shall use my best .22 rifle, a Mauser Obendorfe and see for myself how they do - when that (eventually) happens I will hopefully report results such as yours. :)
 
P95Carry, et al,
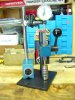
I’ve seen some very large fly presses that work on the principle that you spin (or send flying) a large wheel attached to the screw thread, and the stored energy of the wheel drives the thread to impact, or hammer, a die and form objects that way. I’m not sure how the one you have operates with a lever, but it sounds interesting. I think, with a little ingenuity, you could adapt it to for use with a dial indicator. Couldn’t you turn the ball or lever by hand, slowly and evenly, without letting it fly? Then you would only need limit the downward thrust of the screw so it stops at the same location each time. Some sort of stop block could be used to limit travel. As far as attaching a dial indicator, there are a zillion types of magnetic bases for use with D I s. Grizzly tool catalogue has a good selection, very inexpensive, along with dial indicators.

Or, you have a good thought there using the drill press, since most drill presses have a threaded stop already incorporated into the press. Again, attaching a dial indicator to a drill press should work out very well also.

Whichever method you choose to employ with the accuriz’er tool, (the drill press, fly press, droplanhanger-banger method, arbor press, ball peen hammer, etc) the point is to make up some rounds and get to the range with them, and I think you will be mighty impressed with the improvement over standard factory. I was just reporting some initial results from a small batch of rounds I made up, just to see if further experimentation was going to be worthwhile.

I would really like to hear from other people using the tool and their results with various types of ammunition and the method they employ to form the rounds. I think this is very exciting, being able to dramatically improve rim fire ammo, which heretofore, there was nothing (save prayer) you could do to influence its accuracy. I’ve tried separating rounds by weighing cases, ‘miking’ them, measuring the headspace, checking run out, and so on. None of that stuff made any difference whatsoever. But this tool does and I think it really needs to be rung out with some real life bench test, and find out what gives the best results. Maybe post some pictures of target results, etc. (Personally, I’m new with this posting stuff and email and all that, but if I can figure it out I’ll be happy to post some photos of my results/targets.)

I hope to get to the range tomorrow, weather permitting. I have several hundred rounds processed for testing. Instead of using the Walmart Blue light specials though, I’m going to see what happens with some Wolf (which I’m told is manufactured by RWS), Aquilla blue target (which is Eley primed), and Aquilla SE, which has always shot very well in a number of twenty-twos. None of which are Eley Tenex, but they don’t cost ten bucks a box, either.
I’ll let everyone know how things turn out and what madness I have I have resorted to.

Harley, member OPMC
 
Harley - thx for the further response. In fact my fly press is totally ''conventional'' - my use of the word ''lever'' was probably not best choice! Yes indeed - the long cross bar atop the threaded colum - with the weight - is the deal.

I rarely use mine in max mode - just using a part turn and some effort with pressing stuff.

But sure - I think I may give drill press a try sometime - I use a std type magnetic base for my DI on the lathe and know this would suit fine with press.

As mentioned before - just ain't gotten to making up a load of test rounds, and shooting them! In time I'll get to it.

Meantime - if you have some results to pass on of your own - do post them and if some pics - all the better. If you have any probs posting pics - let me know.

We might even start a new thread on test results - you can take the lead! Thx again. :)
 
P95Carry, et al.
Not really sure how to start a new thread or post pictures, but when the time comes, I'll muddle through somehow. If not, I'll take you up on your offer of assistance. Thanks.
Harley, member OPMC
 
harley - PM if needed later.

But also -go look at my mini site ''Image Matters'' where I give some hints in one section on posting pics. It is not quite up to date actually but - may still give you some inspiration.

I must try to get to update some bits now we have a later version of V Bulletin.
 
Of course the proof is in the targets, for years and years high end 22 shooters
have found that accuracy in 22s is based on

Consistancy of the bullet base.
Consistancy for the primer ignition
Headspace

All of which come before the shape of the bullet.

However that could be because until now the bullet was treated as
given not a variable.

This is a very interseting thread but I wonder just how competition shooters
and record holders have managed to miss this all these years. :scrutiny:
 
bigjim, et al.,
Paco Kelly's tool has two reasons for being:
1. reshape the nose of the bullet and make it a better killer on small game, this it does very well. It turns a round nose bullet into a Keith Style semi-wadcutter.

2. vary the size of the bullet to better fit the bore of a particular rifle, thereby increasing it's accuracy. The standard tool comes with .223 and .224 dia.

I used some very old Rem Hi Speed with the tool and it did wonders for the accuracy end of things. Now, I'm attempting to see if using a little higher grade of ammo will bump up in the accuracy dept. Wolf Match Target, Aquilla SE, and Aquilla target (Golden Eagle) are being tested. These are moderately priced brands and I think it would be interesting to see if their accuracy can be improved by bumping them up a bit.

Gotta run - let you know the results as soon as I can. Probably in a few days.

Harley, member OPMC
 
Here's a photo of the Acu'rzr with the dial indicator attached. Pretty simple stuff. Hope to have some target ready showing results, shortly.
 

Attachments

  • Accur'zr with Dial Indicator AAA.jpg
    Accur'zr with Dial Indicator AAA.jpg
    16.2 KB · Views: 151
Excellent thread!!

This has given me some new ideas.

I tried the hammer option with the Paco devise and eventually figured out "about" what force it took to remodel the bullet but accuracy was perhaps only a tad better.

What I ended up with is an idea I got off rimfirecentral to put a stack of washers over the ram (the part you reform with). The hammer can only go so far as the washers limit its travel.

Accuracy was better and more consistent but I was only working with 1 type ammo and 1 type of ram. Different bullets and selection of a different ram world require a different sized stack of washers.

Other projects pulled me off the study but I think I'll get make into it now.

THX P95.

S-
 
Harley - great!!! Pretty much what your description implied. Got a bigger pic tho? That one's a tad wee! Look fwd to some target pics later - boy, I must get to a test session myself.

Selfd' - glad you are experimenting too - all input is most useful.
 
larger photo?

P95Carry - that photo is 100k and having read (perused, would be a better word) your " image matters " I was hesitant to post at that size. I'm tinkering with a half dozen target photos which are about 60k and therefore pretty small. I noticed your photos of the processed bullets which were really clear and only 43k when I downloaded them. How do you accoplish that clarity at that size? Macro lens? Scanner?

What I have done with the target photos, which are 8.5 x 11 paper with 6 targets on each, is photgraph them (Sony Mavica 10x), then crop and then reduce in size to about 300x200 pixels, which comes out to about 60k each. But they are small. I noticed that if you download them and then view them with a photo viewer (I use Compupic) they show up at a decent size. Should I just go ahead and post them at about 150k or so? What's appropriate?

Sorry to be troubling you on account of my ignorance but this topic is the first time I've ever felt compelled to contribute. I think it has some real value.

Any help would be appreciated.

Harley, member OPMC
 
harley - no probs - pics are so useful.
then crop and then reduce in size to about 300x200 pixels, which comes out to about 60k each.
Here is where I feel you need to make some changes to what you do.

First - do not crop so small - a pic of 500 to 600 piixels is a good average and large enough to see with ease. THEN - you now have to increase the compression.... this is where you are getting the oversize files.

Let's say you crop or reduce to get an image of 640 x 480 - common size. This will be a BMP file size (size in memory) of approx 1 Mb ...... now if that is compressed to a ratio of 15:1 - a compression rate that is not noticeably too ''lossy'' . then you finish up with a file size of 66k!! Quite acceptable.

I don't know what options you have on compression - may be a % - of size or a % re ''quality'' In that case see what sizes you get by trying several values - and aim for something like I have mentioned.

My pics often start as 3Mb originals - big images. I reduce and crop as necessary and then apply my usual approx 15:1 compression. The pic of the tweaked rounds was using these techniques. It was not macro - just close up but large original 2560 x 1920 - so cropping was possible as first step - and then some reduction.

Your example above - of 300x200 equates to a BMP file of 180k - so your compression is a mere 3:1 ... much lower than needed and yet you'll still get a result almost looking same at my 15:1.

Try it out - let me know if probs and also let me know what app you are using. Irfanview is a great free app that will give some options on reduction in size and compression.
 
jpg compression has a lossy effect on quality on a given image size

heres 30K:
attachment.php


here a 4 k version of the file:
attachment.php


its the same 190 x 199 72 dpi file but the jpg compression is much higher in the second file

for web images if people need to see the details,
i like a 400-600 pixel wide 72 dpi file with jpg compression at around 50
 

Attachments

  • pix-1.jpg
    pix-1.jpg
    7 KB · Views: 641
  • pix-2.jpg
    pix-2.jpg
    5.3 KB · Views: 649
Harry - I think your ''50'' must be a quality figure? 50:1 compression as a ratio would be extreme!

Indeed, the lossiness increases proportionately with greater compression - the decompression algorithm cannot ''recover'' what was lost in the excessive compression.

It shows most with text IMO - when outside edges get blurred and there is some ''ghosting''. harley may well have seen on my image matters site - an example of a small circuit board with moderate and extreme compression.
 
"Save for Web" from Photoshop has a sliding jpg scale from 1 to 100
with a 100 jpg having the highest quality

anything much below 50 gets really banged up
 
Ahh - the ''percentage'' deal - forgot that Harry - hardly use Photshop.

My main workhorse is Micrografx ''Picture Publisher'' - used it for years and found it more user friendly. It gives me options for a ratio save - guess I have gotten used to that!

Harley - an easy way tho to tell ratio's is - take the image size in memory (the full uncompresses BMP size) . and divide that figure by the size you have compressed to. As I mentioned before, the nom 1Mb BMP compressed to 15:1 gives 66k.
 
Status
Not open for further replies.
Back
Top