Reloading Bench Build Question

Status
Not open for further replies.
If I were to build another one, I’d just use industrial rack shelving combined with 2 inch BB wood top. You’d have a bench that would support 10,000 lbs. and be adjustable for different heights.
I went with rack shelving from Costco, added rigidity with plywood on each level and bolt it to a 2x4 beam which was bolted to the studs in my garage.

Mounted a progressive at each end of the bench top and a single stage in the middle using Inline Fabrication mounts. The whole thing is stabilized by thousand of RMRbullets on the lower two shelves
 
I want storage space for larger items so cabinets are the way to go for me. If I don't go this route I'll go a store bought workbench with some cabinets under that. It needs to look "nice" as it will be in the house. The reason I fell on these cabinets is they are large with plenty of space, sit at counter top height with the the butcher block on top, and are made of steel. With how they are constructed and their weight rating made me wonder if it'd work for my idea.
I use what it was a desk, just the metal frame, and glued together some 1/2 inch plywood to cover most of it. My press is bolted to a Lyman tower to gain height. It is not optimal, but I do case prep and reload using it. I use a 55 lbs weight for counterbalance. Your setup will be strong and you will not have issues. In fact, I just finished reloading some 50 .243 rounds for this weekend at the range using my "reloading bench".
 
If you bolt the butcher block to the cabinets and also use some screws to attach the top to some studs in the wall you should have a VERY sturdy solid platform.
 
6355D92F-F0B2-4311-B35A-1FAEDA71ACF4.jpeg D26CF272-8FB4-4365-AD84-C06C22AA5B8B.jpeg 85CC4302-1566-4774-864B-E95506C6CD9E.jpeg 23485DE3-ED87-4F17-AEF1-178247E09588.jpeg 57313C95-3DF2-4841-B972-74254F6FC63F.jpeg 51070BE7-5344-437E-B526-99791DBC75B7.jpeg B1EE32B4-B087-4F1B-9C01-8D20E6643A47.jpeg My bench build the last 2 days.

I screwed it into the concrete floor.

I left an 8” overhang on the front end, 4” overhang on the back, 5” overhang on the far side.

Butcher block counter top on top of 3/4” OSB. Allowed me to screw the OSB down into the frame, then, using 1 3/4” screws, through the OSB back into the counter top so no screws are visible.

The color theme in my reloading room is grey so I went with a “weathered grey” stain I’m not too happy about.

But I keep telling myself, “It’s a damn work bench, you aren’t gonna waste hours sanding it!”

So, as soon as I get done posting this, I’m putting a second coat of stain on the darken it.
 
Hey all,

I'm looking to make a new reloading bench and thought about putting an 8' long 1.5" thick butcher block top across two of these, one at each end. The butcher block top would be replacing the top that comes with the cabinets. They are equivalent to the Montezuma cabinets just renamed for Menards. I was wondering if you think they'd be able to hold up to the presses being on them or if anyone else is using them? I've attached a picture and a link to the cabinets. The cabinets are the type that fold out and then are secured into place by the bottom and the top. One of the specs that is missing from the website that was on the box at the store was they are rated to hold 400 lbs.

Masterforce® 30-1/2"W x 34-3/4"H x 24"D Base Garage Storage Cabinet at Menards®

View attachment 1062846

I don't have that kind of cabinet underneath my smaller bench but I do have the butcher block top and I do have, and use, all of the inline mounts in my reloading room ... all four, including the recessed mount which I didn't reccess but instead I invested in the adapater in order to not have to route-out the butcher block top.

You don't need to be able to get your legs and chair underneath the table top if your inline ultra mount is overhanging ... which is how mine is set up. It works great.

(I cannot recommend the inline mounts enough.)

So back to the butcher block top. Before I installed the Inline Fabrication mounts the butcher block was starting to separate some .... I had to inject glue inbetween the slats and clamp it with furniture clamps to get them back together. That's when I decided to go with the Inline Fabrication flush mount attached to the butcher block bench. (When I built my big bench, like a piece of fine furniture, I learned my lesson and made the top strong enough to drive on it.) All of the elevated Inline Fabrication mounts ... I use clamps to attach to my higher bench.

(I'll take pictures and include them when I get out there later this morning.)

The top used on a reloading bench has to be rock solid if you are going to bolt or screw directly into it ... there is so much torque on a reloading press. It may not show-up until you are resizing a bunch of long cases but, it will eventually.

Butcher blocks look good. I'll take a picture of my set-up with the Inline Fabrication mount. I'd screen shot the security camera shot out there but I'm not sure the top will show up .... lemme try.

::::::: long pause :::::::::

Yeah, you really couldn't see the butcher block in the infrared light screenshot of the security camera. When I get back home, later this morning, I'll go out there and take a picture. Solid tops are the way to go if you are mounting a press (my big bench is double-layered 1" thick plywood that has been lamenated together with gorilla glue and had my truck sitting on top of it pressing down on it for two days before I cut it to dimensions ... that was necessary for the amount of overhang I wanted) .... if you are mounting a press and don't want the slats to separate like they are sure to-do on a butcher block, use the Inline Fabrication mounts to prevent that from happening.
 
Last edited:
View attachment 1063675 View attachment 1063676 View attachment 1063677 View attachment 1063678 View attachment 1063679 View attachment 1063680 View attachment 1063681 My bench build the last 2 days.

I screwed it into the concrete floor.

I left an 8” overhang on the front end, 4” overhang on the back, 5” overhang on the far side.

Butcher block counter top on top of 3/4” OSB. Allowed me to screw the OSB down into the frame, then, using 1 3/4” screws, through the OSB back into the counter top so no screws are visible.

The color theme in my reloading room is grey so I went with a “weathered grey” stain I’m not too happy about.

But I keep telling myself, “It’s a damn work bench, you aren’t gonna waste hours sanding it!”

So, as soon as I get done posting this, I’m putting a second coat of stain on the darken it.
That’s really nice. Butcher block is generally hard and dense wood which translates to does not take stain worth a flip. When you give up on stain, consider a tinted polyeurethane. I wish I had room for an island… your setup is a dream for me. I like what’s in the background too. You have a really nice room.
 
I am familiar with those cabinets as there is Menards in Redding where my sister lived and BIL was looking at them for his shop.


Very good point. You need bench top space after mounting the press.

Instead I would rather you consider Husky tool chest from Home Depot that already has wooden top to mount your presses to and is more substantial tool chest for $350 - https://www.homedepot.com/p/Husky-4...-Solid-Wood-Top-in-Red-H42MWC10R-TL/312570922


That tool chest has more storage space than what an average reloader will need.


I have this tool chest in my reloading room and it looks "nice" with all the tools and stuff nicely stored inside drawers - https://www.homedepot.com/p/Husky-4...hest-and-Cabinet-Combo-HOTC4116B13S/312145943

I am actually looking at this 52" adjustable bench for $219 to mount Dillon 550C as I do not need drawer space and want both stand up/sit down reloading option - https://www.homedepot.com/p/Husky-52-in-Adjustable-Height-Work-Table-HOLT52XDB12/301809830

Key is to mount the press at the end with ram lever pointing out to maximize weight leverage. I have used 2'x3' castered bench made out of 2x4s for years and readily sized thick walled military LC .308 brass without issues, even with bench empty on hard floor surfaces.
I have a lot of Home Depot “Husky” tables, tool boxes, and work benches, including the ones in the post. Mine are black. They are all excellent quality.

My reloading press is mounted on a 62” Husky work adjustable height table on casters. Solid but easily moved.
 
Last edited:
I don't have that kind of cabinet underneath my smaller bench but I do have the butcher block top and I do have, and use, all of the inline mounts in my reloading room ... all four, including the recessed mount which I didn't reccess but instead I invested in the adapater in order to not have to route-out the butcher block top.

You don't need to be able to get your legs and chair underneath the table top if your inline ultra mount is overhanging ... which is how mine is set up. It works great.

(I cannot recommend the inline mounts enough.)

So back to the butcher block top. Before I installed the Inline Fabrication mounts the butcher block was starting to separate some .... I had to inject glue inbetween the slats and clamp it with furniture clamps to get them back together. That's when I decided to go with the Inline Fabrication flush mount attached to the butcher block bench. (When I built my big bench, like a piece of fine furniture, I learned my lesson and made the top strong enough to drive on it.) All of the elevated Inline Fabrication mounts ... I use clamps to attach to my higher bench.

(I'll take pictures and include them when I get out there later this morning.)

The top used on a reloading bench has to be rock solid if you are going to bolt or screw directly into it ... there is so much torque on a reloading press. It may not show-up until you are resizing a bunch of long cases but, it will eventually.

Butcher blocks look good. I'll take a picture of my set-up with the Inline Fabrication mount. I'd screen shot the security camera shot out there but I'm not sure the top will show up .... lemme try.

::::::: long pause :::::::::

Yeah, you really couldn't see the butcher block in the infrared light screenshot of the security camera. When I get back home, later this morning, I'll go out there and take a picture. Solid tops are the way to go if you are mounting a press (my big bench is double-layered 1" thick plywood that has been lamenated together with gorilla glue and had my truck sitting on top of it pressing down on it for two days before I cut it to dimensions ... that was necessary for the amount of overhang I wanted) .... if you are mounting a press and don't want the slats to separate like they are sure to-do on a butcher block, use the Inline Fabrication mounts to prevent that from happening.
Looking forward to see your pictures. I’ve had “Inline Fabrication” suggestion several times.

My actual reloading bench is screwed into the concrete block wall. It’s 1 sheet of 3/4” OSB screwed down into the frame. Then 1 sheet of 3/4” CCX plywood screwed down through the OSB into the frame with an adhesive between the sheets. Then a second sheet of 3/4” CCX on top. The top sheet has adhesive between the 2 sheets of plywood and is screwed into place from the bottom.

The butcher block island is for a large vise at one end and a gun vise at the other end. But I didn’t realize butcher block had a tendency to separate.

I was going to look at what Inline Fabrications has to offer to mount gun vises on. I have a vise for ARs they locked into the mag well and another one for bolt guns. It would be nice to use one space for both by removing one and installing the other depending on my needs.
 
Looking forward to see your pictures. I’ve had “Inline Fabrication” suggestion several times.
I’m another one to highly recommend Inline Fabrication gear. You really don’t know what you’re missing until you install one of their Ergo handles

I was going to look at what Inline Fabrications has to offer to mount gun vises on. I have a vise for ARs they locked into the mag well and another one for bolt guns. It would be nice to use one space for both by removing one and installing the other depending on my needs.
The flush mounted Quick Change plate would be idea for this. As stated earlier, you don’t need to route out the top to mount it. Just get the riser plate for clearance.

They make quick change plate with multiple standard hole patterns or will drill one to fit whatever you want mounted
 
Looking forward to see your pictures. I’ve had “Inline Fabrication” suggestion several times.

My actual reloading bench is screwed into the concrete block wall. It’s 1 sheet of 3/4” OSB screwed down into the frame. Then 1 sheet of 3/4” CCX plywood screwed down through the OSB into the frame with an adhesive between the sheets. Then a second sheet of 3/4” CCX on top. The top sheet has adhesive between the 2 sheets of plywood and is screwed into place from the bottom.

The butcher block island is for a large vise at one end and a gun vise at the other end. But I didn’t realize butcher block had a tendency to separate.

I was going to look at what Inline Fabrications has to offer to mount gun vises on. I have a vise for ARs they locked into the mag well and another one for bolt guns. It would be nice to use one space for both by removing one and installing the other depending on my needs.

Yep, pictures just above your post.

You're doing it the right way @kalielkslayer ... over-engineer the heck out of it and save yourself headache down the road. Nothing worse that table tops separation or wobbly legs.

The one thing I would do differently on every bench I have in this new smaller room ... I would figure-out a way to absolutely minimize the gap between the bottom of the bench and the floor. Seems like everything I drop, brass, primers, projectiles, whatever ... they always bounce or roll underneath the bench and to the wall. Then I find myself on my stomach in the prone trying to sweep them out with a small broom (I keep it handy, see pics above).

This was the big bench under construction ... it too is buikt like a tank but it was so heavy I decided to put it on coasters instead of flat on the floor so ....

bench1.jpg

... I did it all in Gunstock stain. It's been an onging project since the move. Moved from a 25x40 mancave to a 5x12 mancave. Downsizing with all the kids gone and I'm getting older in my 60s ... but this downsizing has been an exercise in minimizing for me. And I wish I had made one or two of my old benches portable so that I could have brought them with me.

ETA: I cannot say enough good things about Inline Fabrication. Husband and wife outfit ... really good people.

@kalielkslayer your work looks really good. Man that island is going-to-be sturdy! Don't stump your toe on that bad boy you'll crush it! ;)
 
Last edited:
My bench is 7foot 3 inches long and 2 foot deep. That way I could rip a 4X8 foot 3/4 inch sheet of plywood to have 2 thicknesses thick and then 1/4 inch finished plywood top. The odd length was due to when I made it in the early 80's, it fit into where I removed a closet that was in my daughter's bedroom. That way it was flush with the room wall She got my 3rd floor gun room because she helped me carry drywall. Anyway the bench, and later a desk were both made to be taken apart and moved. There are 3 sets of 4X4 legs held together with 2X4's going front to back on each side of the legs high enough for a bottom shelf. The top 2X4 frame is about the same as the butcher block base above, and the 4X4 legs are screwed to the top in the same pockets. When you move ( my bench has been in 6 of my "forever" homes ) just unscrew the legs, take off the top, and move. Also the table can be leveled front to back and right to left due to being NOT permanent. It has some dents from the moving trucks--- but it is a reloading bench. It is only new once.
 
I have a lot of Home Depot “Husky” tables, tool boxes, and work benches, including the ones in the post. Mine are black. They are all excellent quality.

My reloading press is mounted on a 62” Husky work adjustable height table on casters. Solid but easily moved.
Pics of some of my Husky workbench and tool boxes.

No laughing please…I am a work in progress…LOL!

ED86312C-5FEB-426E-A5EA-FFC895BD46BC.jpeg

CB1566F2-C6DB-4F41-A5D7-AE206F720C08.jpeg

D1510E2A-4C0C-4346-B9B9-F302E41BCEA1.jpeg

Eventually planning to add a corner sink…
 
Last edited:
20220305_205116.jpg 20220305_210103.jpg 20220305_210144.jpg 20220305_210329.jpg I've thought about an adjustable work top also. Not 1 thing to laugh about on your setup! Labeling drawers is a + in my book. Have you just started reloading or just a different location? With Dillon high dollar toolhead stands I went a different direction and color coded for pistol (blue) and rifle (red). Engraved cartridge on the toolhead then colored in red or blue. I drilled holes for locator buttons. 13 different rifle cartridges and 8 pistol so far. Photocopied reloading data for easier more compact storage of info. Later I'll add it in the comp for larger display.
 
View attachment 1064044 View attachment 1064043 View attachment 1064042 View attachment 1064041 I've thought about an adjustable work top also. Not 1 thing to laugh about on your setup! Labeling drawers is a + in my book. Have you just started reloading or just a different location? With Dillon high dollar toolhead stands I went a different direction and color coded for pistol (blue) and rifle (red). Engraved cartridge on the toolhead then colored in red or blue. I drilled holes for locator buttons. 13 different rifle cartridges and 8 pistol so far. Photocopied reloading data for easier more compact storage of info. Later I'll add it in the comp for larger display.

I just started back after a 30+ year hiatus.

30 year military career had me moving a lot and when we finally settled and built our current home, the third bay of the garage is my spot. I bought the Husky gear and have been very happy with it.

Drawers are labeled per my better half’s request…she wants to find what she needs without digging in each drawer. It helps me too.

I don’t really have a great set up…but I’m still trying to figure out what that will be, so I rearrange every 4-6 months.

I need a sink and a small refrigerator next…then shelves.
 
Last edited:
Hey all,

I'm looking to make a new reloading bench and thought about putting an 8' long 1.5" thick butcher block top across two of these, one at each end. The butcher block top would be replacing the top that comes with the cabinets. They are equivalent to the Montezuma cabinets just renamed for Menards. I was wondering if you think they'd be able to hold up to the presses being on them or if anyone else is using them? I've attached a picture and a link to the cabinets. The cabinets are the type that fold out and then are secured into place by the bottom and the top. One of the specs that is missing from the website that was on the box at the store was they are rated to hold 400 lbs.

Masterforce® 30-1/2"W x 34-3/4"H x 24"D Base Garage Storage Cabinet at Menards®

View attachment 1062846
In my opinion that maple butcher block top will do very well. It's the support frame some overlook. I used 4x4 lumber for support frame and anchored to concrete floor.
 
I built up my reloading bench on a steel rack frame, but have a question for folks who have built theirs from scratch.

I remember reading about the inherent/superior strength of a bench built on a torsion beam, has anyone done this?
Pro and Cons?
 
Pics of some of my Husky workbench and tool boxes. This was early just finished conduit and lighting and setting presses. I did double layer of 3/4" ply for the top and stained then epoxied the top. Still have the other side of reloading cave to do. I built that bench out of scrap and it works but not torsionally as rigid. Digital scales like things anchored and very still.

No laughing please…I am a work in progress…LOL!

View attachment 1064012

View attachment 1064013

View attachment 1064014

Eventually planning to add a corner sink…
Pics of some of my Husky workbench and tool boxes.

No laughing please…I am a work in progress…LOL!

View attachment 1064012

View attachment 1064013

View attachment 1064014

Eventually planning to add a corner sink…
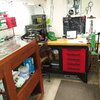
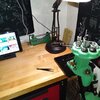
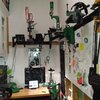
20200426_144640.jpg 20200426_144440.jpg
 
The whole thing is stabilized by thousand of RMRbullets on the lower two shelves

Must be 1000s (I'm a big fan of RMR bullets as well) ... I use bags of shot to weigh down my big bench. Eight 20# bags plus a few square peanut jugs full pf birdshot, they all hold 20 pounds each and stack like bricks.

Good gosh how many RMR bullets do you have down there? 115ers? ;) RMR must love you.
 
Good gosh how many RMR bullets do you have down there? 115ers? ;) RMR must love you.
For 9mm, I try to keep a few thousand matchwinners in each weight (115, 125,135,147) then a few thousand 125gr RN for PCC. Not as many of his new .357 Matchwinners, but I do keep a few thousand 160gr and 170gr Hi-Tec coated on hand. I’m pretty sure I have fewer than 5k .45 slugs…mixture of coated and jacketed.

So rough estimate, right around 50k
 
Status
Not open for further replies.
Back
Top