The Ruger SP 101 .357 Mag

Status
Not open for further replies.
Joined
Jul 18, 2006
Messages
59
Location
Utah
Hey all,

I see these 642 and 686 clubs...what about us Ruger owners!?! I like my Smith, but I love my Rugers! I guess this club could post on any SP (since there are old .22, .32 and 9mm...and of course the current production .38) but I thought we could do a .357 club since it is my favorite and also the most common. Feel free to answer these questions.

1) What do you own? I currently own two SP101's in .357 mag. I have a 3 inch stainless and a 2 in in Target Grey. I have owned up to four. I used to own a regular stainless 2 inch and I also had a hammerless 2 inch. Sold both.

2) What grips do you use? I have a 3 inch stainless with Hogue grips and a 2 inch Target Grey with Pachmeyer Compact grips. I will post a pic once I can get my computer to do so.

3) Ammo in use: I usually carry the two inch for CCW with Winchester 145 STHP or Gold Dot 135 .357 or 38. If I am not carrying my GP100 in the woods, the 3 inch will often times be stoked with Federal 180 grain HC or even Corbon 200 grain HC.

4) Future changes considered for your gun(s)? I have a laser sight on order from CT for the 2 inch. I may think about putting an Ashely big dot on the 2 inch as well.

5) If Ruger was to produce or bring back another caliber in the SP, what would you want? I think Ruger could have a huge market if they did a .40 with moon clips. I think it would be great for the civilian and the police market. I would also love to get my hands on on a 9mm as well.

6) Questions you have for other SP owners: I am wondering if anyone has a Big Dot sight and how much it affects POA and POI? Also, does anyone have any ballistic results for Winchester 110 grain .357 out of a 2 inch?

7) Holster(s): I use an Uncle Mikes for the 3 inch and a nice Galco OWB for the 2 inch. In addition I use an Uncle Mike BB for Deep stuff.

8) Speed Loader(s): HKS and Bianchi and Speed Strips.

9) Reloading: I don't reload, but will be soon. No recipes to offer yet!

God Bless and have fun.

Porter
 
Last edited:
My SP101 3" .357 mag with Speer SB Gold Dots.
Carry it nearly every day, and it sleeps next to my bed at night. I have other guns, but this is my one true "do-it-all" gun.

It will be the last gun to ever leave my side.

edit to add:
BTW, it wears Hogue Monogrips, gets worn in either an AKJ Concealco IWB, or a Bianchi speed scabbard holster.
And yes, despite what it looks like in the picture, the gun has been shot many times. I am just good about cleaning (Brasso on a felt wheel on rotary tool is key).
 

Attachments

  • n9800647_30683730_7891.jpg
    n9800647_30683730_7891.jpg
    28.8 KB · Views: 1,148
Last edited:
Porter,

That's an excellent idea to have a SP101 .357 Magnum Club.

Mine is 2 1/4 inch and not yet fired. I've got the Gold Dot 135 Mag ammo all ready to visit the range.

I'm thinking about using it as primary carry since it does not show any with the shirt out. It is virtually pasted to my side with a belt holster. My HK USP Compact .45 is a little noticeable.

I hope it will have sufficient stopping power. Apparently the muzzle energy will be under 300 ft/lbs.

Bill
 
You can get a lot better than 300 foot-pounds from a .357, even a short one. Like, over 500 pounds, if you are in the mood. It might smart your second finger, a bit. Makes a big noise.
 
I have a 2" .357. It wears the factory grips with Lett wood inserts. I bought it with a spurred hammer, and picked up an additional spurless hammer on-line; I switch back and forth depending on current thinking. I've updated the springs with a Wolff spring kit, and carry IWB with a Clipdraw. It's my favorite carry piece at the moment.

I'd look for a 3" SP101 if I didn't have a 4" adjustable sight GP100. I replaced the original factory grips on the GP with the smaller grip from a fixed sight model. Not exactly the same size grip as the SP101, but it uses the same inserts, to give you an idea of size. I like the smaller grips better, even though I have big hands. It was the SP that put me on the search for the smaller grip for the GP. Both are great guns. GP in the picture is wearing its original grips; need to shoot another pic with the current, smaller grips.

attachment.php
 
2" DAO here.

Great little gun, still needs deburred (and cleaned :uhoh: ) but she's a good shooter.


gp911
 
here's mine. I purchased it as a birthday present to myself last summer, and it has quickly become one of my favorites. they smooth up nicely with use.

DSCF0572.jpg

(note how my ruger money clip is full of ones :D )
 
Those full house .357 loads in a two inch are a handful (and a earful).

I only shoot a few cylinders at a time, then I go home and take a couple of aspirin.
 
I have only been shooting for about 4-5 months. 357 3" SP101 was my first and only handgun purchase so far. Added Trijicon front night sight. I have small hands and found this a very comfortable fit. I initially loved the factory grips but eventually found them a little slippery. I bought Hogue grips but they felt a little big so I switched to Pachmayr Compact grips and I love them. They add a little weight but they are grippier(is that actually a word?) and fill my hand perfectly.

I just finished a home trigger job last week and replaced factory springs with Wolff. I just got back from the range about an hour a go since the above mentioned changes. Fired about 120 rounds, 100 .38 & +P, 20 .357. NO MISFIRES OR MALFUNCTIONS and the difference in control, trigger pull, and accuracy was significant. I'm a noobie to handguns period so I'm sure experience and practice contributed somewhat to my improved accuracy but I would attribute at lease 50% of my improvement tonight to the new springs and trigger polish. Without exact measurements I would estimate previous spreads at 8"-10" from 7 yards shooting double taps, quicky with no sighting (trying to simulate quick self-defense scenario). Again, without exact measurements I would estimates tonight's spreads at 3"-4" from same distance and technique. Tonight was also my first time shooting .357. I have previously been to the range about 5 times and only shot about 400-500 rounds of .38 and .38 +P. I must admit that as a noobie I was apprehensive about shooting .357 but I decidied to try it tonight and found it to be a "puddy tat" in this weapon. Admittedly it was L&B 158gr FMJ & I assume this is a friendlier load than many self-defense rounds. Anyway, this is my first and only gun so far and I love it. I plan on getting compact 9 or .40 for CCW, probably S&W M&P but this gun will always be in nightstand. It's currently loaded with Federal Hydrashok 129 gr .38 +P JHP. I haven't shot Speer but sounds like I should. I really like Fiocchi 129 gr .38 but it's SP instead of HP but it feels like a stronger load as a .38 than the Federal feels as a +P. I live in a condo and I am worried about overpenetration.

I highly recommend the Wolff springs for anyone who finds the factory DA pull a little too heavy for consistent accuracy. I also found the trigger edges a little too sharp for comfort. I used 400 grit sandpaper to soften the edges. It left some visible scratches but made the trigger much more comfortable. I used Mother's Billet Metal Polish from auto part store and a dremmel to remove sandpaper scratches from trigger and to polish the trigger innards. Sorry for rambling a bit but I just came back from the range so excited and then came to the revolver forum and found a thread on my only and favorite gun!!
 
Last edited:
My Ruger SP-101, 2.25" carries SB Gold Dot .38s.

I do like to shoot .357s with it, though, but only with Pachmayr Compac grips. The stock grips do not soak the recoil as well.

110-grain shoot way low, 158-grain shoot well and are fun but "blastey," 125-grain actually hurt.

The SP-101 is brilliant as a .38, but I can also load the 125-gr Mags if I feel threatened. Not that it's fun to shoot with those.
 
I have the SP101 in a couple of configurations, 2.25 w/hammer, bobbed-hammer DAO, and 3 inch w/hammer. (I didn't buy them all at once. :) ) If I had to do without every gun I own but one, it would be an SP101, probably the 3 inch in that situation. The very best small .357 IMO.
 
Whenever I'm tempted to buy a J-frame .357, I just shoot a box of .357 through my SP-101.

At best, a J-frame is made of steel and has a comfortable grip, making .357s tolerable. Since I already have an SP, my desire for a J-frame .357 disappears.
 
Mine is the 3" barreled 357 mag. Houge Mono-Grips, speed loaders, strip loaders, field and pancake holster (both leather). I like Rugers but this small frame revolver stands out in my mind.
 
Nice job guys!

Lawson---That is a Target Grey isn't it? Same as what I currently own. Nice dressy grips! Made by who?

Legionnaire---Nice photo as well. Thanks for the link to the photo shoot!

Rogerjames---How does the night sight affect your POA/POI issues? I have heard some say that the trijicon consistently shoots very low on it is installed. What has been your experience?

Thanks all. Lets keep this thing going!

God Bless,

Porter.
 
New To Group

hey group, I currently own two SP101's: a 3" and 2" one. Selling the 2" on the buy/sell board, just don't need. But I love my 3"! That's a keeper! Hope to learn more about this gun from this site!
 
Retired a Butter-Smooth 2" S&W .38 K frame Airweight

...and now my carry revolver is a 3" SP101. I spent 3-4 hours one rainy Sunday afternoon with; bright lighting, a Jeweler's loupe, diamond hones, 1000 grit emery cloth, a variable speed Ryobi rotary-tool, felt pads, Mother's Metal polish and a GREAT set of action-tuning instructions I printed off from RugerShooters.com (I think). When I finished & re-assembled my SP101 (with Hogue Monogrips) I found I had turned a very practical tackle-box pistol into a highly preferred carry-gun. And I've got a BUNCH of other carry-gun options.

I had previously bought into the foolish Gunshop gossip that you COULD NOT tune a Ruger revolver to within yelling distance of a S&W. Well, that's horse crap. Maybe a Grand Master PPC Shooter could tell the difference...but I'm here to inform you that my SP101 is as slick as Teflon socks on a glass floor (with all stock factory springs)!

We all know it already, the SP101 is truly a pitbull of a pistol (BIG dog on a compact chassis). I still want a tritium front sight & a set of C/T laser grips when the new rubber (shock absorbing) model becomes available. But there is no better choice in a 5 shot .357 mag. revolver, at ANY price, than the Ruger SP101. I'll stake my life on it...and do.
 
Porter - since I'm relatively a noobie I'm not sure how accurate my info would be. I only shot about 100-150 rounds before the night sight was put on and about 350 since. However, I met up with a buddy a couple weeks ago who had never shot my gun. From 25 yards he was all over the bullseye, and normally shoots his XD low and to the left. I've always felt that the gun shot a little low of POA, but I believe the sights were calibrated for .357 loads and I was primarily shooting .38s. With .38 + P and .357 I have found POA to be quite accurate with the night sight, ...in my amateur opinion.
 
Ghost Tracker, we'd all be much obliged if you can post a link to the action-tuning instructions you reference! I pulled the following from RugerForum.com. Same instruction set? I've not tried this yet, but plan to.

------------------------------
Posted by Iowegan:
"Here's the instructions for a SP-101 Action Job. The same procedure will work for a GP-100 or a Super Redhawk however the part numbers will be different.

You can refer to the SP-100 schematic on Brownell's web site, I'll include the schematic numbers for parts as I go. http://www.brownells.com/aspx/NS/schematics/schemmfg.aspx?schemid=31&m=13&mn=Ruger®&model=SP101+ It's easier to print it than try to switch from screen to screen.
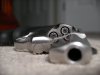
Disassembly:

1. Remove the grips. Note a small pin will fall out (8).

2. Cock the hammer and insert the small pin (8) in the hammer strut hole then slowly lower the hammer and remove the hammer strut assembly (23,28,29). If you don't have the pin, a paper clip will do.

3. Pull the trigger all the way back then push the hammer pivot pin out (22) and lift the hammer (61) out.

4. Locate the trigger guard latch (42). It is a spring-loaded plunger that holds the trigger assembly in and is located about 1/2" down from the top of the grip frame channel, inside the grip frame. Use a screwdriver to push the latch pin forward while pulling down on the trigger guard. The complete trigger assembly will come out as a unit.

5. Set the gun aside and we'll work on the trigger assembly. Pull the trigger about a 1/2" and remove the transfer bar (41).

6. The next step requires attention because a spring-loaded plunger will launch. Put the trigger assembly in a plastic bag then hold the trigger back while pulling the pawl (30) to the right. The spring and plunger (3 & 4) will pop out.

7. Locate the small retaining pin (21) at the upper corner of the frame latch, just above the trigger guard latch pin. Push the trigger guard latch in (42). Use a paper clip to push the retaining pin (21) out. Note: schematic shows two #21, you want the one by the trigger assembly.

8. Pull the trigger guard latch out of the hole. Use your paper clip in the front of the hole to push and remove the trigger guard latch spring (43) and trigger link plunger (46).

10. Pull the trigger back then use your paper clip to push the trigger pin (64) out then lift the trigger out.

11. Remove the trigger plunger (47) from the trigger.

12. Back to the plastic bag for another launching part. Pull the cylinder latch (5) to the right and another spring and plunger (7 & 31) will pop out. Note: this spring and plunger look like the one from the pawl only longer.

Now let the polishing began:

13. The trigger assembly is stripped ready to do some work. Start by using a jeweler's file to "dehorn" any galls or rough spots you can see or feel on the trigger housing (63). The inside walls of the trigger channel and the front latch lip in particular.

14. I lied! you will need one more tool for the next task. Use a 13/64" drill bit and insert it inside the hole for the trigger guard latch. You don't want to drill the hole any deeper, just hand twist the bit to remove any galls. This hole is usually rough and accounts for a gritty trigger feel when the plunger moves over the rough spots. Sometimes the holes are so bad that you can't hand turn the bit. I have an old drill chuck off a dead drill the works really great for jobs like this.

15. Look at the trigger (62) and locate the rounded cam on top and the SA sear at the end of the cam. Buff the cam and sear nice and smooth without removing metal. I use a buffing wheel on my bench grinder or a Dremmel tool with a felt wheel. The smoothness of the cam and SA sear will make a big difference in both DA and SA trigger pull. Make sure you don't change the sear angle or remove much metal, only enough to make it smooth. Dehorn any sharp edges on the sides of the trigger.

16. Locate the trigger plunger (47) and find the 45 degree angle at one end. This surface must be very smooth in order for the trigger to reset. Buff it without removing metal. Dehorn the sides.

17. Locate the cylinder latch (5) and look for the surface on the bottom of the part that looks like a backwards "L". The surface parallel to the hole must be smooth. This part is often very rough with machine marks. It must be smooth to get a trigger reset. Dress the surface and buff it. Buff the rounded area of the latch that locks into the cylinder. Smooth and shiny will reduce cylinder drag lines.

18. Locate the transfer bar (41) and dehorn it.

19. Locate the pawl (30) and dehorn it then buff the tip, especially the left corner. This part contacts the ratchets and will rasp in DA if not smooth.

20. OK, we're ready to reassemble the trigger group. Start by inserting the long spring plunger (7 & 31) into the trigger guard (63). Slide the cylinder stop (5) round end up, on the shaft until it touches the plunger. Back to the plastic bag. Use a tool to push the plunger in while sliding the cylinder stop in place. Out of the bag.

21. Place the trigger plunger (47) back in the trigger. The nose goes in the slot first, between the stud and base. Make sure it is not upside down (see schematic).

22. Set the trigger in the trigger guard making sure the trigger link (44) goes in the latch hole. Align the holes and insert the trigger pin (64). You may have to insert a paper clip in the back of the plunger hole to position the trigger link.

23. The trigger should swing freely in the trigger guard. If not, disassemble, isolate the bind and file it down.

24. Pull the trigger back and insert the spring plunger (3 & 4) in the hole. Back to the plastic bag and slide the pawl shaft part way in the hole. Use a tool to push the plunger down while sliding the pawl (30) into position.

25. Insert the trigger link plunger (46) into the plunger hole, cupped end first. Insert your reduced power Wolff trigger spring. Use the heaviest one in the kit.

26. Insert the trigger guard latch (42), flat side up then push it in while inserting the lock pin (21).

26. Pull the trigger part way back and insert the transfer bar (41) into the trigger.

27. Set the trigger group aside for now and go back to the gun. Press the cylinder release and swing the cylinder out. Pull the cylinder assembly forward to remove it from the frame.

28. Hold the cylinder so the ratchets are up. Inspect each ratchet for galls and rough spots. Use a jeweler's file to dress smooth. You are concerned with the portion of the ratchet where you can see a slight angle. This angle's vertical surface is where the pawl drags and must be smooth. Don't take any more metal off than is absolutely necessary else timing will be affected.

29. Look inside the frame and inspect for galls or nasty spots. Do not dress the outer surface or it will not mate properly with the trigger group. It's not unusual to find splinters of stainless material so clean them out and dehorn.

30. Locate the hammer and use a paper clip to push out the hammer dog pivot pin (21), the one in the schematic by the hammer. There is a spring plunger under the hammer dog but it shouldn't launch.

31. Inspect the hammer dog (no number) and dehorn it. Buff the bottom rear surface (long end). This surface mates with the DA cam and must be smooth.

32. Inspect the sear notch at the end of the hammer extension. This is the SA sear and must be smooth. Dress if necessary but do not remove any more material than you absolutely have to make it smooth.

33. Install the hammer dog, long end down and insert the hammer dog pivot pin (21). Test the hammer dog for free springy movement.

34. Locate the hammer strut assembly. Draw a sketch of how the seat is on the strut. If you reassemble upside down or backwards, it won't work. Place the ball end of the hammer strut (23) vertically in a vise, up to the spring. Use a kitchen fork and force the tines between the mainspring (28) and the mainspring seat (29). Compress the spring by pushing the fork down with one thumb on the ends of the fork tines and the handle in the other hand. Compress until you can pull the pin out of the strut. Be careful! Ease the mainspring and seat off of the strut.

35. Use your file and dress the spring strut. All edges where the spring rides must be smooth or DA pull will feel gritty.

36. Install the heaviest of the new Wolff hammer springs. With the strut in the vise as before, use your fork to compress the spring then slide the seat on as per your sketch. Insert the pin (8) to retain the assembly. Dress the strut's ball tip and make sure there are no rough or sharp areas.

37. You are now ready to reassemble the gun. Start by installing the cylinder assembly in the frame and snap the cylinder shut.

38. Lay the trigger assembly in place and hook the nosepiece into the frame. Hold the muzzle up to get the transfer bar back, then muzzle down and snap the trigger assembly into the frame. If it doesn't go in easily, don't force it. The pawl and/or the transfer bar may not be in the proper position. Pulling the trigger slightly may help.

39. Pull the trigger all the way back and set the hammer (61) in position. Insert the hammer pivot pin (22).

40. With the hammer forward, muzzle down, insert the ball tip end of the strut, flat edge up, into the hammer recess until the seat is positioned over the lugs. Cock the hammer and pull the pin out. Replace the grips and you're done."

I have a tuned .357 SP and with the pound mainspring and 8 pound trigger return spring the double action is about 8.4 pounds. So far, it has worked on what I have fed it (WW, Federal, Remington) but I have not run any CCI thru it except Blazer which works. The headspace is at minimum. Another member here has an article posted at:
http://www.thesixgunjournal.net/repatriatedrugergp.html

on working with firing pin protrusion on a GP which would work on the SP if required. As an aside Teddy Jacobson tuned SP's come out of the shop at around a 9 pound double action with a relatively quick trigger reset (had one). The above article by Iowegan addresses the trigger reset issue.
 
I have the 2.25" . It is the first hangun I got and is my ccw . I got it on sale , new , for $325 when a sporting goods chain store was going out of buisness . I replaced the factory grips with Hogues' wich made it much nicer to shoot .
 
I have a 2.25" SP101 for two years. I found it to be a good shooter.
 
Status
Not open for further replies.
Back
Top