
You are using an out of date browser. It may not display this or other websites correctly.
You should upgrade or use an alternative browser.
You should upgrade or use an alternative browser.
THR Spiller & Burr Club
- Thread starter Bluehawk
- Start date
- Status
-
Not open for further replies.

The price was...well, embarrassing. I was the only bidder and I only had to bid once. This auction is held quarterly and is guns and shooting gear only. It's a real pleasure to attend; the staff knows guns and I see many of the same people each time, so it's actually gotten to be a bit of a social event. They always have a few bp pieces, mostly good to excellent shape but they will sell anything someone brings so you need to know your stuff and look it over carefully. Once you know who the dealers are just watch them - they stop at wholesale.
I was the only bidder and I only had to bid once. This auction is held quarterly and is guns and shooting gear only. It's a real pleasure to attend; the staff knows guns and I see many of the same people each time, so it's actually gotten to be a bit of a social event. They always have a few bp pieces, mostly good to excellent shape but they will sell anything someone brings so you need to know your stuff and look it over carefully. Once you know who the dealers are just watch them - they stop at wholesale.bubba15301
Member
cabela's is selling them now $229.95
My dad recently passed down several of his guns that he doesn't use anymore, and one is a S&B by Palmetto in kit form. The receiver needs the casting/ tooling marks filed, and the grips are fit well but need a little shaping & finishing.
My only gripe is with the barrel. It is already blued, but has awful tooling marks on every flat. I think I'll remove the barrel and front sight, clean up the metalwork, and re-blue. Any idea how that front sight comes off?
My only gripe is with the barrel. It is already blued, but has awful tooling marks on every flat. I think I'll remove the barrel and front sight, clean up the metalwork, and re-blue. Any idea how that front sight comes off?
CAMPBELL49T
Member
I guess I can join. Mine came as a kit and it is not finished. Still working on it.
black_powder_Rob
Member
I am really considering ordering one from cabelas soon. If I do I am reserving this spot in the post.
CAMPBELL49T
Member
Hi, I would like to join the Spiller & Burr club. I bought a used one that was a kit. Tore it down and did a lot of sanding and polishing. When goes back together I will post pictures.
For now here is all apart. I will get them posted tomorrow, having trouble right now.
For now here is all apart. I will get them posted tomorrow, having trouble right now.
Ive moved a ton of scrap metal & still cant find that dam springNothing wrong with pictures of the parts - in fact, that might be helpful to some folks.
CAMPBELL49T
Member
Photos
Here it is been that way for about a year. Hope to get it done this winter. When I finish range time then I will post photos.

Here it is been that way for about a year. Hope to get it done this winter. When I finish range time then I will post photos.
BillHansen
Member
I just got one of these, a Piettta from Cabelas. Looks well made, but unlike the description in the owners manual from Pietta, it does not have safety notches milled in between the cylinder nipples like the Remingtons do. Is this an error or what did the originals have? It also has a 6 and one half inch barrel- is that right, seems short to me?
BHP FAN
Member
sounds like it may have a Whitney cylinder installed.I have a Whitney cylinder for a spare.works fine...
BillHansen
Member
New S&B from Pietta
I have just received a new S&B from Cabelas. It looks well made. Three questions arrise:
1. There are no safety notches milled into the rear of the cylinder as indicated there should be in the users manual provided by Pietta with the gun. Is this an error or did the originals have this feature?
2. It has a six and one half inch barrel- seems short to me; didn't the originals have 7 and one half inch barrels like the Whitneys?
3. In disassembly, how does one release pressure on the hammer from the main spring in order to remove the hammer and hand?
http://s1185.photobucket.com/albums/z356/BillHansen/
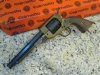
There's a fine picture of an original in post #3 in this thread, thanks to madcratebuilder. No hammer notches in the cylinder. You can scale the barrel length off the cylinder length - I'm sure that's the same as the original.
I can't help with the spring tension on an S&B as I haven't disassembled mine yet. I can say that I typically don't bother to release spring tension when disassembling any other percussion revolvers with the exception of Ruger Old Armies and Walkers. On the Walkers I put the hammer at full cock and tie the spring down to the grip frame with a very stout twine. Then release the hammer.
I can't help with the spring tension on an S&B as I haven't disassembled mine yet. I can say that I typically don't bother to release spring tension when disassembling any other percussion revolvers with the exception of Ruger Old Armies and Walkers. On the Walkers I put the hammer at full cock and tie the spring down to the grip frame with a very stout twine. Then release the hammer.
BillHansen
Member
Spiller & Burr main spring
Thanks to Mykeal. Bluehawk- how do you propose I remove the main spring? On the Colts, there is a screw to release the tension- on the S&B???
Thanks to Mykeal. Bluehawk- how do you propose I remove the main spring? On the Colts, there is a screw to release the tension- on the S&B???
BHP FAN
Member
on the S&B you remove the grips, and as near the bottom of the grip frame as you can, tap the bottom of the spring with a brass or plastic non-marring tack hammer. Getting it back in, requires a pair of pliers and some colorful language.Insert the top of the spring under the hammer first and then grab the bottom end with the pliers. When you have the bottom end over the notch in the frame, tap in back in with the hammer.
On the S&B the mainspring simply slides in and out of the groove in the bottom of the grip frame. Putting the frame in a padded vise you simply tap it out with a hammer and non-marring piece of wood, brass, or aluminum.
Putting it back in, you just compress the top of the spring while sliding the bottom end into it's groove to get it started and tapping it all the way back in.
Putting it back in, you just compress the top of the spring while sliding the bottom end into it's groove to get it started and tapping it all the way back in.
- Status
-
Not open for further replies.