
You are using an out of date browser. It may not display this or other websites correctly.
You should upgrade or use an alternative browser.
You should upgrade or use an alternative browser.
1911 trigger Job Clinic Part 2 SEAR
- Thread starter bigjim
- Start date
- Status
-
Not open for further replies.
romulus
Member
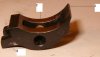
A) Primary sear engagement surface (sear nose)?
B) Sear feet (?)
C) Don't know what this portion is called...
Thanks
B) Sear feet (?)
C) Don't know what this portion is called...
Thanks
okay, what do I do in order to get a clean letoff? I know the sear nose has critical angles, and those critical angles have to be maintained.
Why do the newer Colts have what looks like a sprue mark square in the middle of the working surface of the sear, how much does this affect the pull, and how would you go about rectifying it?
Why do the newer Colts have what looks like a sprue mark square in the middle of the working surface of the sear, how much does this affect the pull, and how would you go about rectifying it?
romulus
Member
I understand that critical angles are a concern, in that you want surfaces to contact fully. But what about a proper angle and a reduced surface? I look at it as a cartesian geometry problem...say you have an incorrect angle on a nice smooth planar contact surface, the contact will still occur on a line on that surface, so most of the surface never contacts properly its mate on the hammer notch. Wouldn't that be similar if the contact surface is reduced even at proper angle? So I guess that both proper angle and enough "meat" are required for a good mating...no pun intended...
Manevitch
Member
1911 trigger pull has very little to do with springs and very much to do with geometry. Here's a summary:
The hammer hooks must be an absolutely square 90 degrees and they must be parallel to the hammer pin. Any variance will result in either trigger creep or a gritty trigger (not square) or worse yet, a partially engaged hammer if the hooks aren't straight. Additionally, the hooks should nominally be .020" high. some prefer to go down to .018; I don't think it's necessary. My hooks are exactly .020 and I have a clean, crisp trigger pull in the neighborhood of 3.5 pounds.
The sear nose should actually have two separate surfaces. The primary angle should match up exactly with the hammer hooks when placed in the gun. This means you can't just purchase a "drop-in" hammer and sear and expect them to fit perfectly. If the geometry is off even a little bit, the trigger pull suffers. Sear-to-hammer engagement must be checked on the gun itself. I have a set of pins (drill rod would work just fine) that mount the hammer and sear to the outside of the frame, and a 10x loupe that allow me to check the work. A swipe of Dykem or even a Sharpie marker across the hammer sear nose will show how the engagement surfaces mate.
The secondary surface of the sear nose should be to the inside of the hammer hook, and should be cut such that the sear engages the hooks fully but that once the nose lets off there's no sharp edge to hang up on. This will facilitate the "break" of the trigger when depressed. It is important to leave about .020", or roughly 2/3, of the sear nose at the primary angle to ensure a safe amount of engagement. For those playing along at home, make sure you stone AWAY from the primary angle so as not to place a "hair" of metal at the junction between the primary and secondary.
As you can tell, this isn't stuff you can just do by fastening the parts to a vise and grinding away with a Dremel. Proper tools and jigs are a necessity. But with the right equipment anyone can do a great trigger job for a 1911. Brownells sells an excellent kit for performing a 1911 trigger job. the kit also contains an instruction sheet that has a very well-done diagram of what proper engagement should look like, as well as some examples of bad engagement and the consequences. The instructions are downloadable here.
1911Tuner
Moderator Emeritus
Breakaway Angle
Also known as the "Escape" angle. Very good post by Manevitch, by the way. Welcome to the fireside, Manevitch.
The breakaway angle does a couple of things. It reduces the area of
engagement a little...fewer square inches means less resistance...and it
provides a cleaner break when the sear trips.
Like barrel crowns, everybody has their own pet method, and I'm no
different on that angle. Some go as heavy as 45 degrees to the primary, but I like less. I use about a 15 degree angle from vertical to the back of the sear nose to get the sear deeper into the hooks, and take care to reduce the primary angle's surface by just enough to get the entire surface IN the hooks...or, stated another way, the width of the primary angle matches the hook's length. This provides maximum engagement without having the trigger pull any heavier than necessary to be safe. The light escape angle gives a slight "rollout" break instead of the glass rod kind.
A light nagle on the top of the half-cock to keep the sear from tipping it
as the hammer falls completes it.
I like .021-.023 hooks, as that seems to offer the best trigger without
compromising the built-in "safe" zone that keeps everything engaged in the
event of a weakened sear or mainspring. As I've stated before, I get nervous when hammer hooks fall below .020 inch. I'm not a trigger man, though, and I know that there are some smiths who can do a perfectly safe
trigger with .018 or even shorter hooks. I'm just not one of them, and if one of my trigger tweaks results in a pull weight of less than 5 pounds,
you'll find me bending sear spring legs forward to get it up to that level.
Carry on, lads...Carry on!
Tuner
manevitch,
Your link goes to a page that shows a Kit and 7 items for sale.
I can not tell if the "kit" for 200 plus dollars ( very reasonable ) includes everything or just some of it.
I think I am intertested in trying this kit and I have maybe learned enough in these clinic threads and some off -line conversation to give this items a try.
If I order them I will start another thread about my adventures with that kit. Complete with pictures and questions!
I have to say I am really enjoying these threads. I hope they expand and we get input from a larger group of people. To that end I went over to the 1911forum and invited folks from the gunsmithing section there.
Manevitch
Member
The kit is all inclusive, consisting of the jig, hammer squaring file with handle, 3 stones, alignment pins, pillar file, shim stock, and stirrup die, plus a box to put it all into.
Quite honsetly I think I could have done without the stirrup die - I use McCormick triggers, which have a slight radius at the rear end. That radius keeps it from forming on the die well, so I just fit it on as best I can, square up the trigger pad, then take it off and check visually that the two sides of the bow are straight. Everything else is entirely worth it.
One tip: if you get the jig, pull the pin out - the one that's (somewhat) glued in to hold the dear in place - and refasten it with some Loctite. Otherwise you'll pull the pin out before it locks the sear in tight enough.
Oops - one more tip: invest in a decent loupe. I have a 10x that's great. Also, a bench vise with plastic jaws is pretty much mandatory. Picked mine up at Harbor Freight for about $6, with a suction base for use on the kitchen table - er, I mean my gunsmithing room...
Manevitch
Member
I learned all this by reading a ton, and tearing down my 1911. It's not really that difficult; there's just a lot of critical steps in working on the trigger group.
The deeper you dig into your 1911, and the more work you do on it, the more you'll respect and admire the simplicity and effectiveness of the design.
The deeper you dig into your 1911, and the more work you do on it, the more you'll respect and admire the simplicity and effectiveness of the design.
JeffC
Member
So if your Gun comes with a sear that has no secondary angle from the factory would it be wrong to add a secondary?
Wouldn't a secondary angle be benifical to limiting damage if by chance your sear tip bumps the half cock notch?
Wouldn't a secondary angle be benifical to limiting damage if by chance your sear tip bumps the half cock notch?
1911Tuner
Moderator Emeritus
Secondary Angle
So if your Gun comes with a sear that has no secondary angle from the factory would it be wrong to add a secondary?
-------------------------------
If you mean a breakaway or escape angle...Probably not on a stock
Colt with .028 inch hammer hooks.
Wouldn't a secondary angle be benifical to limiting damage if by chance your sear tip bumps the half cock notch?
---------------------------------
Probably not, unless the half-cock passed by the sear close enough to
barely tip it. The breakaway might be just enough to cause it to miss,
or cam it farther open as it made contact. If the half-cock gets that close, there's something else wrong. I normally file a light angle on the end of the half-cock as a matter of course. Not enough to actually do anything, but just to break the corner 'cause, well...I like broke corners.
Chris Rhines
Member
I just recently bought the Brownells trigger kit that Manevitch mentions. I also bought some expendable hammers and sears to practice with (strongly recommended.) It's very good, although the large spur hammers that I prefer will not fit in the stoning fixture properly - I may have to take my mill to it.
The real trick to working on the sear seems to be matching the sear primary angle to the hammer. The dissasembly pins that come in the kit are very handy for testing the angle without having to put the entire trigger group back together.
Also, just like on the hammer, it's important to make sure that the pin holes are parallel to the sear engagement surfaces. I don't know how much of a problem this is on modern parts, though.
- Chris
Well, thanks to these fine threads, I have my Government, Combat Commander, Officers Model and my Gold Cup Trophy all torn apart on the dining room table and I'm looking at at the sears! Hey-it keeps me off the street!!
As all the pistols are Series 80, all the sears look the same. Except for the Trophy sear. It has a square notch right in the middle of the sear engagement surface, and the hammer has a knob, roughly triangular in profile and looks as if this knob passes through the notch on the sear.
The trigger press on the Trophy is much lighter and feels cleaner-maybe due to the design of the sear (?) and probably because the National Match series uses a wider trigger which tends to make it feel lighter.
What is this protrusion on the hammer for and why do I have a cutout on the sear?
1911Tuner
Moderator Emeritus
Delmar's Sear and Hammer
Delmar, as near as I can figure by your description, the square area on
yout sear engagement angle is the unworn portion. The center isn't
touched by anything at full cock/sear trip, while the hammer hooks
bear on the ends. Simply put, it sounds like a wear pattern. All my
hard-use pistols show the same pattern. No way to tell if it's excessive
without looking at it.
The triangular thingie on your hammer...from your description...is a modified
half-cock. Only the center portion is left so that in the event of a followdown to half-cock, the only part of the sear that gets hit is the part that doesn't engage the hammer hooks, thus protecting the trigger
job. Simply put....it sounds like your trigger has been tuned, and if I'm not mistaken, that's a McCormick hammer, or somebody has copied the modification. It's actually one of the few deviations from original that I like.
Cheers!
Tuner
.
romulus
Member
QUOTE]Also, just like on the hammer, it's important to make sure that the pin holes are parallel to the sear engagement surfaces. I don't know how much of a problem this is on modern parts, though.[/QUOTE]
Can anybody tell me if this applies to Norincos? I had it apart, and the wear pattern is disturbingly skewed, almost oblique...also the hooks look like they were cut crabwise, and polished with a garden rake...
Can anybody tell me if this applies to Norincos? I had it apart, and the wear pattern is disturbingly skewed, almost oblique...also the hooks look like they were cut crabwise, and polished with a garden rake...
1911Tuner
Moderator Emeritus
Norinco Skewered Sear
Yep romulus. It applies to all of'em. There's a possibility that the holes were catty wampus and some sharp factory tweaker just cut the sear at an angle to get the gun out the door.
Check it by coloring the primary angle with a chisel point felt-tip marker...
preferably blue, and dry firing the pistol a few times. If both hammer hooks
hit the sear, and the sear is cut at an angle, it's been "smithed". It'll
work. It just ain't right, and swapping sears will require that the new one is likewise modified.
Luck to ya!
Tuner
Hi Tuner,
I really botched up the description on the GCT. You are of course correct in the sear bearing on the hammer hooks which are on the ends
Upon looking further at this, that lump is indeed the half cock shelf, and the notch in the sear nose apparently provides clearance for it in normal operation. BTW-this particular pistol is bone stock. I bought it NIB from a good friend who had it sitting on his shelf for a couple of years unfired, and I asked him today if he had made any mods to it at all. Not a thing was touched according to him. So it looks as if Colt either farmed out the hammer and sear or they have copied it.
It really does make a lot of sense to me having this half cock shelf as you describe-if the hammer does follow to half cock, its not going to bear on the ends of the sear nose and possibly damage the working surface.
I would suppose that if someone were to choose a hammer design like this that they would also have to use this type of sear as well?
romulus
Member
Thanks...what I meant to say was can you sort of assume from the beginning that Norincos, being crude and all, would almost certainly exhibit such flaws, and if what I noticed was actually what Chris Rhines described. Satisfied that that is exactly the prob with my Norinco...Yep romulus. It applies to all of'em.
Much obliged, Tuner...and CRhines
1911Tuner
Moderator Emeritus
Odd Half-Cock
Delmar said:
him. So it looks as if Colt either farmed out the hammer and sear or they have copied it.
That, or somebody modified and refinished it.
Sear type? Though I haven't used a hammer with that type of half-cock,
it's my understanding that the conventional sears will work with it. I could
be wrong. I need to get offa these old GI pistols and get cozy with some of
the modern stuff.
Tuner-just to see if it would work, I put one of these new fangled hammers in my old Government model and it does work with the conventional styled sears.
Cylinder and Slide were dumping some "Colt National Match" hammers out of their inventory last spring so I bought 3 of them. What the heck says Delmar, they're only $17.50 a piece. They are different from the GCT hammer in that they use a spur rather than the abomination enlongated commander types you see now. It has the same little triangle thingy for a half cock notch above the hooks.
Cylinder and Slide were dumping some "Colt National Match" hammers out of their inventory last spring so I bought 3 of them. What the heck says Delmar, they're only $17.50 a piece. They are different from the GCT hammer in that they use a spur rather than the abomination enlongated commander types you see now. It has the same little triangle thingy for a half cock notch above the hooks.
- Status
-
Not open for further replies.
Similar threads
- Replies
- 1
- Views
- 105K
- Replies
- 21
- Views
- 870
- Replies
- 11
- Views
- 2K
- Replies
- 6
- Views
- 1K
- Replies
- 12
- Views
- 824