Maybe I got one more knife left in me?

Status
Not open for further replies.
After thought!

Here is a very useful homemade tool for fitting those blind hole hidden tangs in your Bling knife project!! :D

I made it years ago from some 3/16" cold rolled steel rod, and a 3/16" x 3/16" tool steel lathe bit ground sharp, and silver-soldered to the rod handle.

This thing allows you to snake back in those blind holes and cut out Epoxy that squeezes out inside the pre-fit tang hole, drilled antlers, Mud Dauber nests on old forgotten projects, etc.

You can make one for nothing, IF you have a half-way decent Junk box!!

And you will not get along without it sooner or later!!
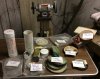
Hole Scraper Tool:
A37 Scraper.jpg

Cutter detail: Photo Looks like I need to sharpen it before I use it next time!! :eek:

A38 Scraper.jpg

rc
 
Last edited:
Assembling the handle this afternoon.

Ready, Set, GLUE!:
a39 Gluing scales.jpg

Epoxing scales together:
a40 Gluing scales.jpg

rc
 
Last edited:
Have you used other exoxy's besides Great Planes?
Yes.
I used to use the twin-tube Devcon 2-Ton stuff.

But it got too expensive in the mass amounts I was using when I was making a lot of knives.
And I got too impatient waiting on it to kick and set up the next day!! :banghead:

I had been using Great Planes for r/c aircraft.
And the only parts that ever survived a crash were the epoxy joints!

So, I figured it was good enough for knife handles too!!

Besides, it used to be cheap!
I see it's got up to $8.99 now!!

http://www3.towerhobbies.com/cgi-bin/WTI0001P?I=LXK302&P=8

rc
 
Last edited:
O.K. Here WeGo!

Little further along tonight.

Out of the clamps at 6:00 tonight:

a43 Out of clamps.jpg

(3rd. Mistake.
I cut the pins a little short with the V-bit in the lathe. So not enough pin sticking through on some of them as I would have liked to have.)

Sanding pins flush with 4" x 36" belt sander:
(Note home-made dust collection system on belt sander.)


a44 Sanding pins flush.jpg

rc
 
Last edited:
First fit off of belt sander:

a45 initial fit.jpg

After Minor rounding with orbital sander:
Still more shaping and polishing to do.

(Note Scrimshaw idea I'm playing around with.)


a46 Progress so far.jpg


Next Step:
I guess will be milling the guard for the nickle-Silver inlays, and soldering them and the N/S wire on the balls.


Friends, the pucker factor is getting very high at this point!
One slip-up with the milling or torch, and I will be starting all over and making another ball-end guard!! :eek: :what:

rc
 
Question RC

Just point me to the post number if I missed it.

What actually hold the handle onto the shank?

Does epoxy form a cross-plug in each of the two shank holes?


Todd.
 
I asked about that in post #35, he is not using pins in the holes in the tang and yep epoxy will fill those holes. RC told us it is a pretty strong bond and I believe him!
 
I asked about that in post #35, he is not using pins in the holes in the tang and yep epoxy will fill those holes. RC told us it is a pretty strong bond and I believe him!
Sure enough - and I read that too... Go figure.

Thanks, Todd.
 
What actually hold the handle onto the shank?
Nothing but Epoxy bond.

Same way they glue composite wing skins on super-sonic fighters!!

The tang, plus front surface of guard give me almost 15 sq/in of surface area to bond too.

Plus the holes in the tang full of epoxy 'pins'.

Plus, I will do some cross-hatching with a cut-off wheel on the rear 1/3 of the tang.
Plus 'Key-Ways' for want of a better word, in the back of the guard and front of the handle to lock them in.
Plus rough it up to clean steel with a course belt sander belt.


I can assure you, it will never come off in our, or our off-springs lifetime.


As an aside:
My late daddy brought home a Barong, and a Parang from WWII in the Philippines in 1945.

Both taper tang like a file tang.
Both glued on with some kind of native tree sap!!

One got a little loose about 10 years ago, after 60 years, and I re-glued it with CA Adhesive.

The other one ain't come loose yet in 70 years!!!

PS: Yes, it's gonna be fancy looking to some eyes, and tastes.

But I'd take it into battle when I get it done.
I have that much confidence in the strength of it.

rc
 
Last edited:
If you have a sand blaster I'd blast the tang, if not your idea is good to roughen it up. I tape the blade and sandblast every tang before putting the handles on.
 
Don't have a sand-blaster.

Cross-hatching it lightly with a Dremel cut-off wheel, and roughing it up with an 40 grit belt sander is all I got!!

I think that will have to do.

rc
 
home-made dust collection system on belt sander

Good for you! Ya'll pay close attention to that statement. You don't get to be a senior mentor ignoring shop safety.

***

If the tang and handle are cleaned well to get good adhesion with the epoxy there's nothing that will make an epoxied handle more secure than what RC has. I also agree that there's little chance that the thing will come loose and it if does it will be long after RC don't care no more.
 
Last edited:
Finished shaping the handle this afternoon using Fordom flex-shaft grinder:

Marked out what needs to be gone!:

a44 Handle layout .jpg


Foredom grinder hand pieces with various attachments::

a45Foredom tools .jpg

rc
 
Handle after first buff.
Now I can see all the tiny sanding scratches because the buffing compound leaves black in them..
Then I can wet sand them out with Wet or Dry 320, 400, and 600 grit & re-buff again:


a46 After buffing.jpg


Assembled again:

a47 after buffing .jpg

rc
 
Last edited:
Might as well talk about buffing & polishing now.

I'm using a cheap bench grinder for a buffing motor.

Various types of polishing compound & wheels that go with them are kept separate in zip-lock bags to prevent cross-contamination of the finer polishing wheels with courser grits.

Water based compounds are kept in air-tight containers to prevent drying out.

Below are what I use, or have used.
Left to right, front row:
* 240 Polish-O-Ray - Water glue base - Fast scratch removal.
* 400 Polish-O-Ray - Water glue base - Semi good dull satin finish.
* Green Rouge - Grease base - Super high gloss on stainless or carbon Steel.
* Brown Tripoli - Grease based - Course scratch removal on hard steel.

Back row:
* Yellow Rouge - Grease based - For super high polish on plastics & micarta.
* Bee's wax for finishing edges on leather.
* Blue rouge on buffer - Grease based - High polish on anything.
* Red 240 - Water & glue based - Cuts fast & leaves a rough finish!

http://www.texasknife.com/vcom/index.php?cPath=225_177

http://www.brownells.com/gunsmith-t...olishing-compounds/polish-o-ray--prod543.aspx

* Buffing wheels can be loose flannel for super finish, Loose Muslin for a good general purpose polish, or Sewn Muslin for a harder wheel for putting more pressure on.

http://www.texasknife.com/vcom/index.php?cPath=225_176

View attachment 214115

rc
 

Attachments

  • a48 Buffing wheels .jpg
    a48 Buffing wheels .jpg
    88.1 KB · Views: 34
Got Brave tonight!!

Milled the guard for inlays:

a50 Milling for inlay.jpg


Stuff laid out to sliver solder inlays in guard:

a51 Tools for wire inlay.jpg

rc
 
Last edited:
Status
Not open for further replies.
Back
Top