Disassembly of ROA

I was going to the range today. But last night as I was getting my stuff all lined up... I started fooling around with one of the ROAs. I was using the ROA Owners Manual and Chicoine's "Antique Firearms Assembly/Disassembly" to guide me along. I have done the remove the cylinder thing and the loading lever to check it out after I bought it. But that is as far as i went.
I figure if I'm going to own and shoot one of these things, I might as well go ahead and get into the disassembly and reassembly part of it.
I own a Ruger Super Redhawk Alaskan that has the same type of main spring assembly, so I'm on familiar ground after I get the grips off. Everything was moving along until it came to removing the 5 Screws that hold the grip frame to the cylinder frame. I sprayed them with Ballistol and later on CLP and finally they all came out. I'd wager they have not been removed since this thing was made in 1979. It took a couple of hours but I did not want to damage the screws by trying to muscle them out.
I notice in the ROA Owners Manual that after one gets the mainspring out that they say proceed to remove the 5 screws. Chicoine says to pull the trigger and allow the hammer to ease forward gently. Then remove the screws.[COLOR="Red"]Has anyone done this before and does it matter whether the hammer is forward or not?[/COLOR]

The hammer on this one is going to get some polishing done.


I have to give the folks at Ruger some credit for the factory work they did on this one. There were no arc marks on the hammer, burrs or excess metal. Very smooth and well honed. The screws may have been tight but there were no butter soft ones.
Any way after I get her polished up, do a little cleaning, I'm going to reassemble her and try to get to the range next weekend.
Any helpful comments on reassembly would of course be appreciated.")
It's bed time. Night.

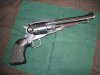
 Heres mine along with my 1880 springfield army knife from the indian campains


 Most of us anyways.....