The tungsten weight is now glued into place. The tungsten weight actually prevents severe misalignment of the magazine while you are inserting it into the magazine well. The tungsten surface is very smooth and nearly friction free.
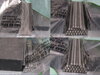
Top View
View attachment 1055605
Bottom View
View attachment 1055607
The only downside appears to be the cost of the tungsten rods and the time and effort to glue the tungsten rods together and grind them to shape.
If you want to get really nitpicky you could complain that the tan color of the JB Weld Plastic Bonder contrasts too much against the black grip module. Of course now that I have just finished gluing the tungsten weight into the grip module I discovered that JB Weld also makes their Plastic Bonder in black! I'll use the black Plastic Bonder next time.
The balance feels good. No side to side floppy feeling when the magazine is near empty. Whenever I pick up the pistol the beavertail drives down into the web between my thumb and forefinger and I get a nice high grip every time I pick up the pistol no matter how many rounds are in the magazine.
I used $15.40 in tungsten rods, about $1.00 worth of glue, and about $3.00 worth of sandpaper. So just under $20 in materials for the project.
I would do this modification again, minus the mistakes.