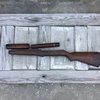
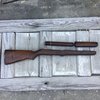
A little road trip to the CMP South store.

Status
Not open for further replies.
I started on the stock. Here is the crack at the wrist. I wet the crack with denatured alcohol so that it would be easy to see
F33430B5-4F6B-4CBF-9441-CAB3DBC4B006.jpeg DFFB0AB2-1181-419C-A7F7-C2D58BF87675.jpeg

Drilling into the crack will give the Acraglas more surface to hold. A dowel wrapped in fiberglass thread will be inserted in the hole to add strength. But before drilling the area needs to be clamped so that wood chips don’t get into the crack.
D172B40B-32B9-483F-841D-6BBD89094401.jpeg

Yes. That’s a 3/8” wood bit. Now let’s make a hole.
FCDAC7FB-C235-44BD-A29D-E92F83DEC497.jpeg AAAD4FD1-151B-40A5-ACF3-E3E9BCCBB98C.jpeg

Now that’s a nice hole. I drilled about an inch and a half into the stock. I’ll
Get more done tomorrow. AAA25056-119B-49D9-AA72-FF8E660F7EFF.jpeg
 
Experience- drill here, fill this, clamp that. Me- (Home Depot aisle) what fine grit sandpaper to smooth stock a bit, do I just kiss the stock with it...aww crap Im gonna screw this up so bad:rofl:
 
Got to work on the stock as soon as I got home. I put some wax on the outside of the stock just I case some Acraglas got on it.
Here’s the stock with the resin in the hole.
08C4FFC8-AEAA-48BE-852D-AF8AA3A21095.jpeg

I flexed the crack until resin worked its way into the crack.
951B9640-7470-4B4F-9D06-30B751ED804B.jpeg A8C2113B-2D45-4111-BA00-DCC0F296A6FF.jpeg


I then put a fiberglass wrapped dowel into the hole ant clamped it up tight, now to let the resin cure.
858A6A62-9A46-4AF0-A7FA-93E8B73A610F.jpeg
 
Well, here it is all dressed up.
BEDBCC8B-414E-47D9-A64E-07170F2DA7B6.jpeg 8E8552FD-1E6F-4B10-B4E4-FB730E5CB615.jpeg E1E4CC2E-7CC9-45A6-975A-DB0C2AA92144.jpeg

I still have one small repair to address. There is an old repair on the left side of the stock. The repair was done very good but the front leading edge of the crack needs to be secured.
I’ll just drill and peg the area like the old repair. I’ll try and do that tomorrow.
B5DC1D4E-5605-4F67-BE1B-5110B528531F.jpeg

Here is a pic of the inside of the handguard. I applied some aged BLO to match it. Just need to finish it. And yes that is a very old can of BLO. I just have a little left in it. I use it on special projects.
C7405120-590B-4537-AF28-CD96594E73B5.jpeg
 
I finely got a chance to get back to the stock.
I drilled the hole for the repair on the side of the stock. The wood in that area is still pretty oily so, I will have to clean it so that the resin will hold.
791B6316-8441-46B6-9CB7-DD212484E4B2.jpeg

I did work on the handguards. Here is the rear handguard next to the front handguard the rear handguard has been boned.
7CDE9FF6-FB8F-4238-80D6-E9F0ABE8439B.jpeg

Here they are after both were boned. I may start the oil finish tomorrow.
DBD30A62-51E0-4EF5-A16F-361DAD7AB409.jpeg
 
While cleaning the oil from the area for the last repair, I decided to bone the butt of the stock.
Here’s the left side before boning.
2B34E280-045F-459E-A034-49476DB63CFD.jpeg

And here it is after.
7218C9B0-A461-4A1B-A850-78B24964B3CD.jpeg


Now the right side. The area where the numbers are is a little flat due to sanding to remove an old number to be re-stamped with a new number. How ever did the job must not have cared about his job, drunk, or hungover from the night before.
But this is just another part in the stocks history and I’ll not try to clean it up.
6E3D028C-14A5-4392-B79D-7CE5CFF7F97C.jpeg


I don’t think everyone still reading this post has done boning before so, I will go over a few tips that will help.
Boning is used to smooth wood without sanding. It also compress the surface, making it harder, and resist dings.
When restoring an old stock and wanting to keep that Been There, Done That look, or what I call a BTDT finish, you do not want to sand the stock. This is because patina is the aging of the exposed surface of the wood. If you sand the surface away you loose the patina.
Now if you wish the stock to be a little smoother, you can steam the dents before boning.
I don’t have an old, smooth, bone laying around the shop, I think my dog took it a while back. So I use an Ash dowel. Ash is very hard and works great. I just find an old pool cue and cut a section from the front.
Boning is simple, you just rub the stock down with the dowel. First rud with the grain.
B5E24015-EC65-4601-BF6F-CD51AFC92A5A.jpeg


As you rub the stock will take on a shine.
3C51FCE1-687F-4A14-A4C8-D0748814C209.jpeg

It should take 30 to 45 minuets to finish a stock.
D1B7BE82-2A6F-40F4-A36B-B39D1E0BF71D.jpeg AD51F8B8-88D6-41CC-A8B2-52DA9D63F475.jpeg
 

Attachments

  • C2C742D9-20E8-42A7-AC22-2D3464EF90AA.jpeg
    C2C742D9-20E8-42A7-AC22-2D3464EF90AA.jpeg
    103.9 KB · Views: 2
Here’s what the stock looked like after boning. After you have boned with the grain, you can go cross grain.
On a rough stock like this one you will end up with light spots where the dowel did not get to.
56356FE2-F330-4313-B196-4F1F720BDE7F.jpeg

This is where the end of the dowel is used. But make sure that your edges have been rounded a little. 69E38337-598D-4ADE-852F-653CEC803420.jpeg

Using the end of the dowel rub all the low spots then rub the area with the side of the dowel again.
0A27BAD5-7B6B-4045-9112-58CADD45787F.jpeg 76B9FF19-E698-4772-BBA7-227AD9AF0B3F.jpeg

Looking better righ?
07A37102-6EBB-4BD8-BB34-AF28F0BEF346.jpeg
 

Attachments

  • 480F2C6C-C998-4ADE-8ECB-B6F178DED229.jpeg
    480F2C6C-C998-4ADE-8ECB-B6F178DED229.jpeg
    76 KB · Views: 2
I got the last area to repair cleaned up. This is the dowel that I use. It’s wrapped with fiberglass . Now to let it cure.
View attachment 788431 View attachment 788432
Gunny, is there a reason you choose to wrap fiberglass on a dowel and fill the hole, isn't shoveling glass fiber, or a fabric, down the hole easier and stronger? End plug the hole with dowel if like, finish to match color.
 
Gunny, is there a reason you choose to wrap fiberglass on a dowel and fill the hole, isn't shoveling glass fiber, or a fabric, down the hole easier and stronger? End plug the hole with dowel if like, finish to match color.
The reason is that resins like Acraglas and other fiberglass resins hold to a surface much stronger then they hold to their self. Fiberglass Floc can be added to help, but by using a dowel the repair has two 360 degrees surfaces to hold to. Wrapping the dowel with fiberglass cages it stronger. The end of the dowels can be dyed to match.
Now if I have to do a repair where the end of the dowel will show. I counter sink and make a cross grain plus to match the surface. But I try to do all my repairs from the inside of the stock so, that they are never seen when the gun is assembled.
 
I rubbed in a coat of BLO this morning, I think it’s going to turn out nice.
D49C90A5-8F17-4861-9B51-FF536141A2B9.jpeg BFB49A78-0A3A-4F86-8B3F-90A6FD14FDAF.jpeg

I will end up applying to more coats, but they will just be polish coats.

If you ask 10 people, what is the correct way to apply aBLO finish, you might get 5 to 7 difference answers. But here’s the problem, two or three of the answers may be right.
The first time I did a BLO finish was in 1988. I had an old Gunsmith as a mentor. He never cut my slack because and made sure I did things right. If I had to count how many BOL finishes I’ve done over the years, it would be in the hundreds.
For those of you that would like to know how to apply BLO, this part is for y’all. I’ll cover the why and how of the finish.
A few notes first.
#1 You are applying oil into the surface of the wood, not oil soak the wood. Each time you apply a coat, it’s really not a coat, but that is just what it’s called.
#2 Do not let BLO dry on the surface, it will get gummy. If this happens you will need to wipe the stock down with mineral spirits.
#3 A wax top coat is needed to protect the finish.
#4 Never be in a rush to finish.
Let’s get started. Your first coat (the wet coat) needs to be very wet and rubbed in. You want your hand to get warm from rubbing. Once this coat is rubbed in, you want to leave the surface wet. This first coat will let you know how Dey your stock is. Once done with the coat let the stock sit for 30 min. The stock may or may not soak up the oil from the surface. After the 30 min. Use a rag or paper towel to wipe it dry. I prefer paper towels.
Now don’t worry these rags or paper towels will not burst into flames. Just set them out where they can air dry before you put them in the trash.
You will now have to let the stock set for 24 hours. This will allow the oil in the surface of the wood cure.
For the second coat. If the first coat was soaked up leaving very little on the surface. Your stock is dry and you need to apply another wet coat. If the stock didn’t soak up that much you can start your polish coats or a rub coat. Let’s say coat two will be a rub coat. What you want is to apply just enough to keep the area you are rubbing a little wet. You will find that as you rub, your hand may get warmer then on the wet coat.
Rub the stock down very good then let it sit for 30 min. Then wipe it dry and let it sit 24 hours.
For the third coat you can do another rub coat if you feel the stock needs more oil, or start the polish coats.
A polish coat is applied sparingly and you want to rub it until your hand becomes hot. At this point you should start to see the wood grain really start to show. Once you’re done rubbing in the polish, the surface should look almost dry with no oil standing on the surface. Let the stock sit for 30 min. Then wipe it down with clean paper towels. You should get very little oil on the paper towel. Let the stock sit for 24 hours.
I like to apply two polish coats. Once you have finished your last polish coat and wiped down, let the stock sit for 48 hours. After 48 hours use a clean dry paper towel and rub the stock a little. If some oil comes off, let the stock sit another 24 hours. You want the oil in the stock to cure. If it is not, your wax top coat will turn cloudy and have to be removed.
Now it’s time to protect all that hard work. There are different types of furniture wax out there, but you want paste wax. Min Wax works great but I prefer a 3 in one wax. Tom’s 3 in 1 military stock wax is good stuff. Using your fingers rub the wax to soften it an apply to the stock. Then rub it into the stock by hand. Allow time for the wax to dry then buff it with a soft clean cloth. Two coats of wax should be enough.
Now put your rifle back together and go have some fun.
I hope that this helps.
 
Last edited:
Gunny, thank you so much for the tutorial!
Question, I picked up the BLO but have read that it may help to mix the BLO with odorless mineral spirits to help the BLO with drying and soaking into the wood on a 1:1 ratio, for the first coat or two. Or am I just better off shutting up and follow said directions?:)
Questions are always good.
Cutting BLO with mineral spirits can be done, but 1:1 ratio is pretty thin, I like a 2:1 ratio. It is used on new stock, but shouldn’t be used on an old one that has seen a lot of oil like mine. Now the new Walnut stocks from CMP , it can be used on, but the cheap finish on them needs to be removed first. That is done with paint stripper. If the stock needs to be reshaped it should be done after stripping. The stock should be boned after the first coat of cut BLOis applied.
Ok, thats what I have, is a new CMP stock. Time to get some paint stripper for the finish
 
Last edited:
MVC-006F.JPG M107.jpg M108.jpg MVC-001F.JPG MVC-003F.JPG MVC-004F.JPG MVC-005F.JPG It finally arrived. Shipping label printed on the 4th. I turned on the automatic Fedex Tracker to send me updated shipping info. Absolutely no updated info until 3:39 pm yesterday saying it was in the hot little hands of Fedex. Here it comes in the driveway at 11:00 am.
Gunny, what am I gonna do now? They put a new stock on it! My only complaint is the gas tube in the white (or tumbled to the white.)
Lets see, how do ya send pictures?
MVC-006F.JPG M107.jpg M108.jpg MVC-001F.JPG MVC-002F.JPG MVC-003F.JPG MVC-004F.JPG MVC-005F.JPG
 
Your handguards look to be Walnut, but the stock is not. It may be one of the Hackberry stocks with a Walnut stain. I have never worked with Hackberry, so I can't tell you how it would react to alcohol base stain.
 
Status
Not open for further replies.
Back
Top